


Try putting a smash ("/") at the end of that "mv" command?Originally Posted by eloxole
+ Reply to Thread
Results 751 to 763 of 763
-
-
[Attachment 84784 - Click to enlarge]
Still the same issue -
Hi Guys.
I'm running frida-server on, Pixel 7 Pro with API Level 28 and Target Android 9. But when I try to open udemxx in the browser, I get the following message:
Application error: a client-side exception has occurred (see the browser console for more information).
What is the problem?
Thanks! -
hi all, newbie to the forum here. I have followed all steps and get to the point of playing the video on the device, but i receive no info in the dump screen
Last edited by copyrightr; 30th Jan 2025 at 04:57.
-
hello
thnx for this tutorialLast edited by muiacir; 1st Feb 2025 at 15:44.
-
Hello folks,
This post will revisite the famous Dumping Your own L3 CDM with Android Studio, but updated for 2025.
This will be written from the perspective of a Linux user, but you can translate it easily for Windows.
Prerequisites
This assumes you have a PC with a x86_64 processor (AMD or Intel), either with Linux or Windows. It is possible to do it under ARM64 but I don't have such machine available.
Step 1: softwares needed
- Install adb-studio from https://developer.android.com/studio
On Linux, you can use Flatpak:
or SnapCode:flatpak install com.google.AndroidStudio
It is in the AUR for Arch users:Code:sudo snap install android-tools
Code:sudo pacman -S android-studio
- Install Android platform-tools
Code:sudo dnf install android-tools
Code:sudo apt install android-tools-adb
On Windows, grab it from https://developer.android.com/tools/releases/platform-tools and extract the zip to an easily accessible directory.Code:sudo pacman -S android-sdk-platform-tools
- Install python3
- Install frida
Please note the version number of frida (currently it is 16.6.6).Code:pip install frida frida-tools
On Windows, after installing Python, I think you can go to the Start menu, then Python, and launch a command line there to type that command.- Download the frida-server corrresponding to your Frida version at https://github.com/frida/frida/releases
- Click either "Show all assets" or "Assets" under the release corresponding to the version of Frida you have (usually the last one if you just installed Frida)
- Search for frida-server-XX.X.X-android-x86_64.xz and download it. Please make sur to use the Android, x86_64 version.
- Extract the file with your favorite archive extractor. On Windows, you can use 7zip.
- Rename the extracted file to frida-server
- Download the utility to dump the keys
On Windows or Linux, you can also just download the archive from https://github.com/wvdumper/dumper/archive/refs/heads/main.zip. In that case, just extract the zip afterward.- Install Protobuf 3.20.0
We use this specific version to use the dump keys utility.Code:pip install --force-reinstall -v "protobuf==3.20.0"
On Windows, after installing Python, I think you can go to the Start menu, then Python, and launch a command line there to type that command.
Step 2: creating a virtual Android device
- Launch Android Studio
On Linux, go to the extracted android-studio/bin/ and launch ./studio.sh
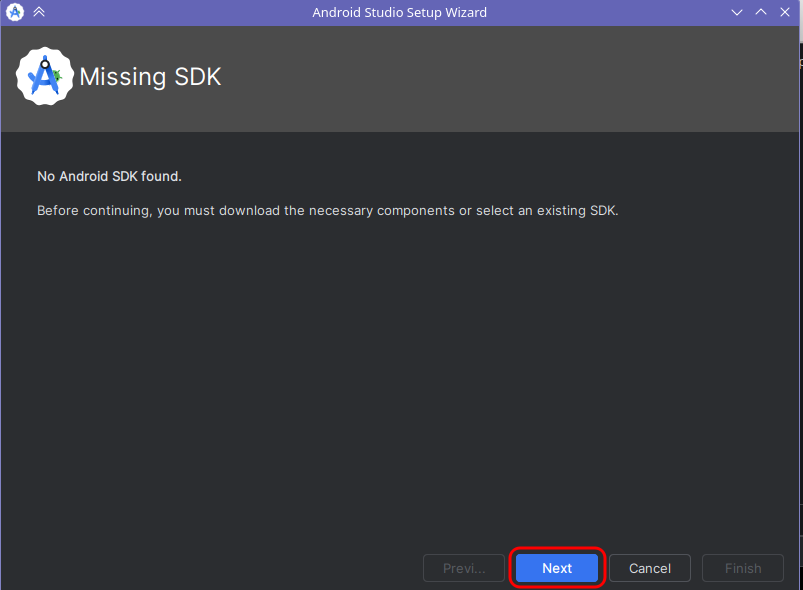
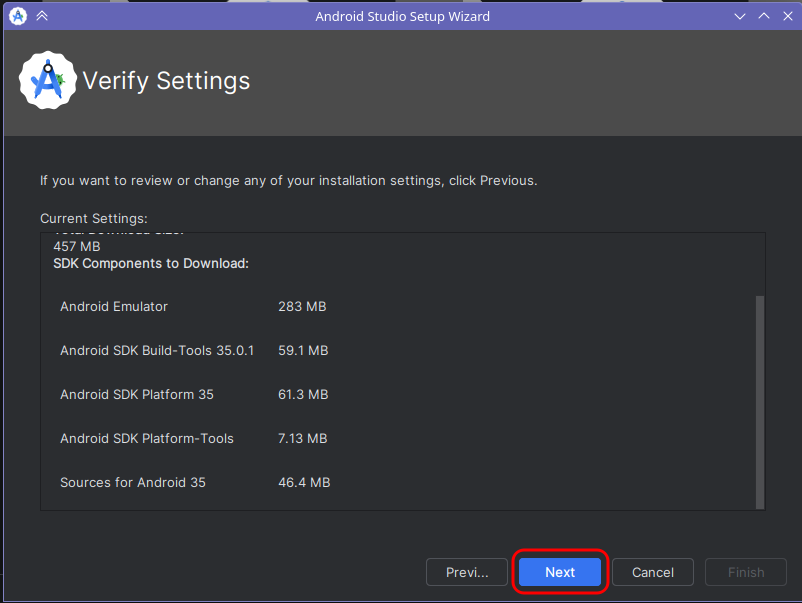
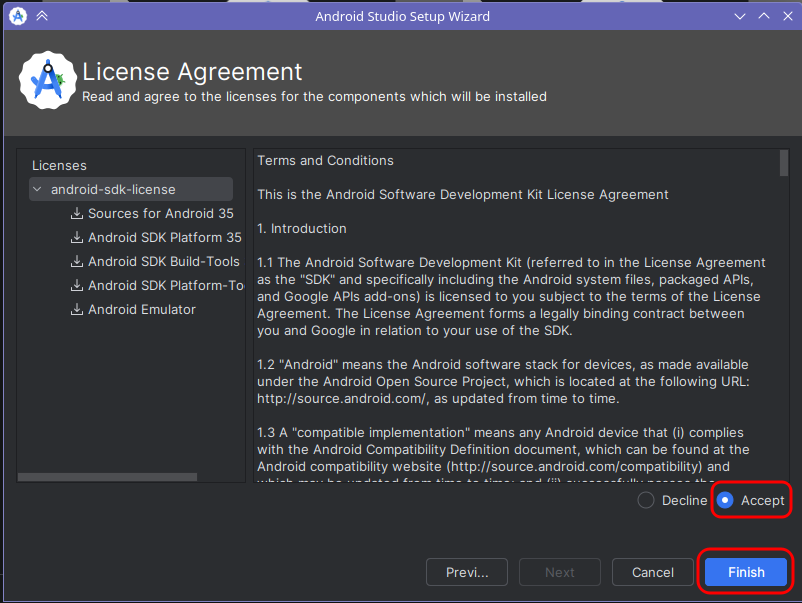
If you have installed any other way, there is probably a shorcut somewhere to start it. - We will then create the virtual device. First follow the first startup wizard:

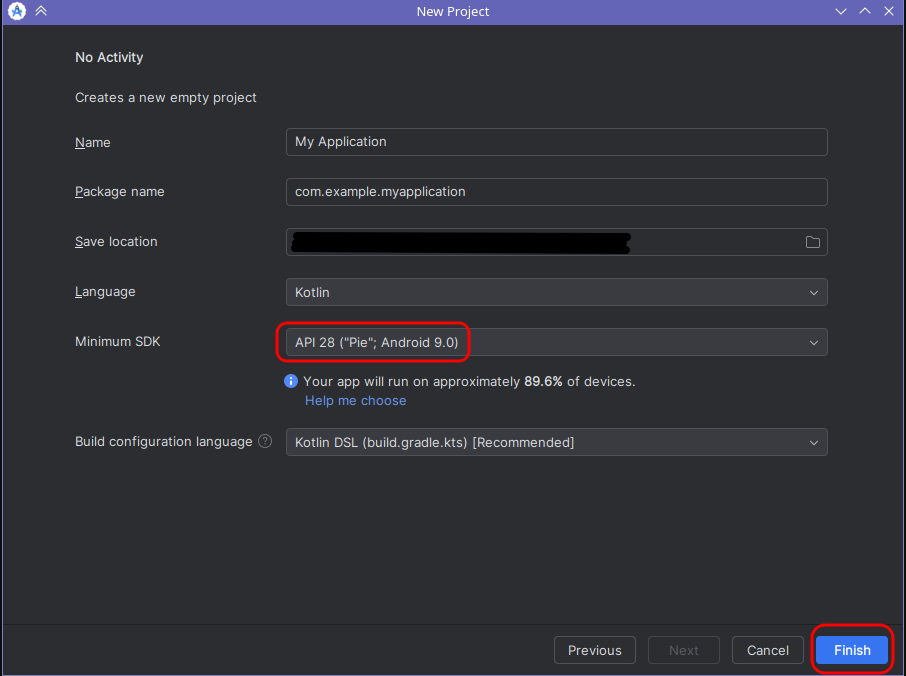
- After everything is downloaded, just create a new project and select No activity:

- Select API28 ("Pie"; Android 9.0):
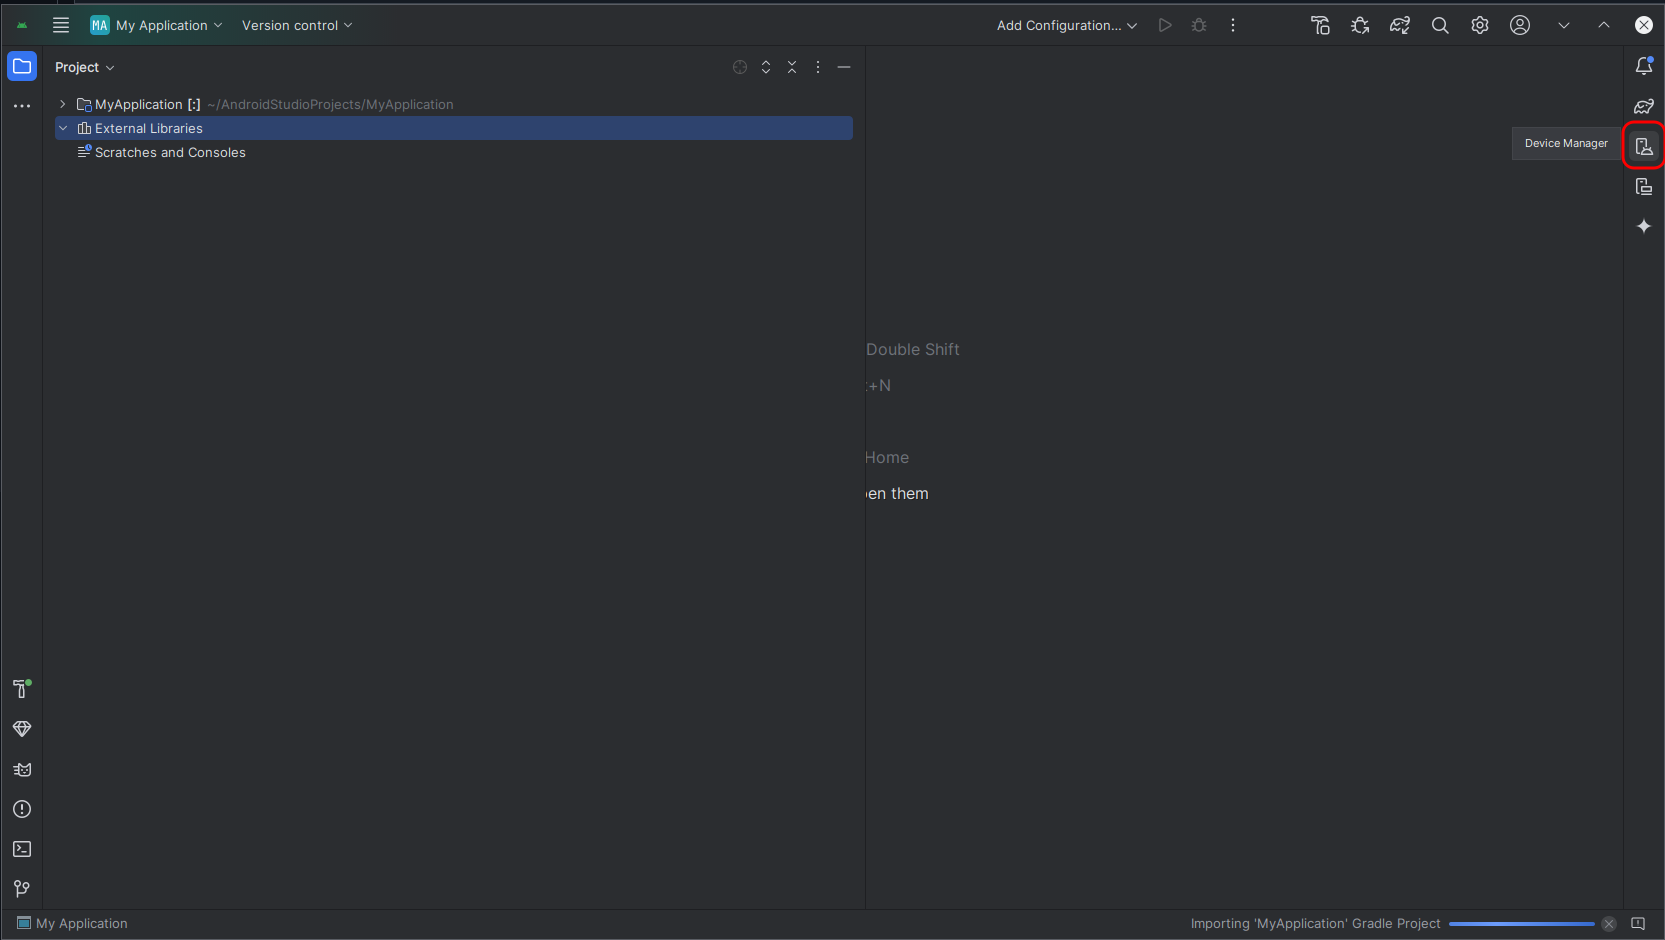
- After the project is created, click on the Device Manager icon on the right toolbar:
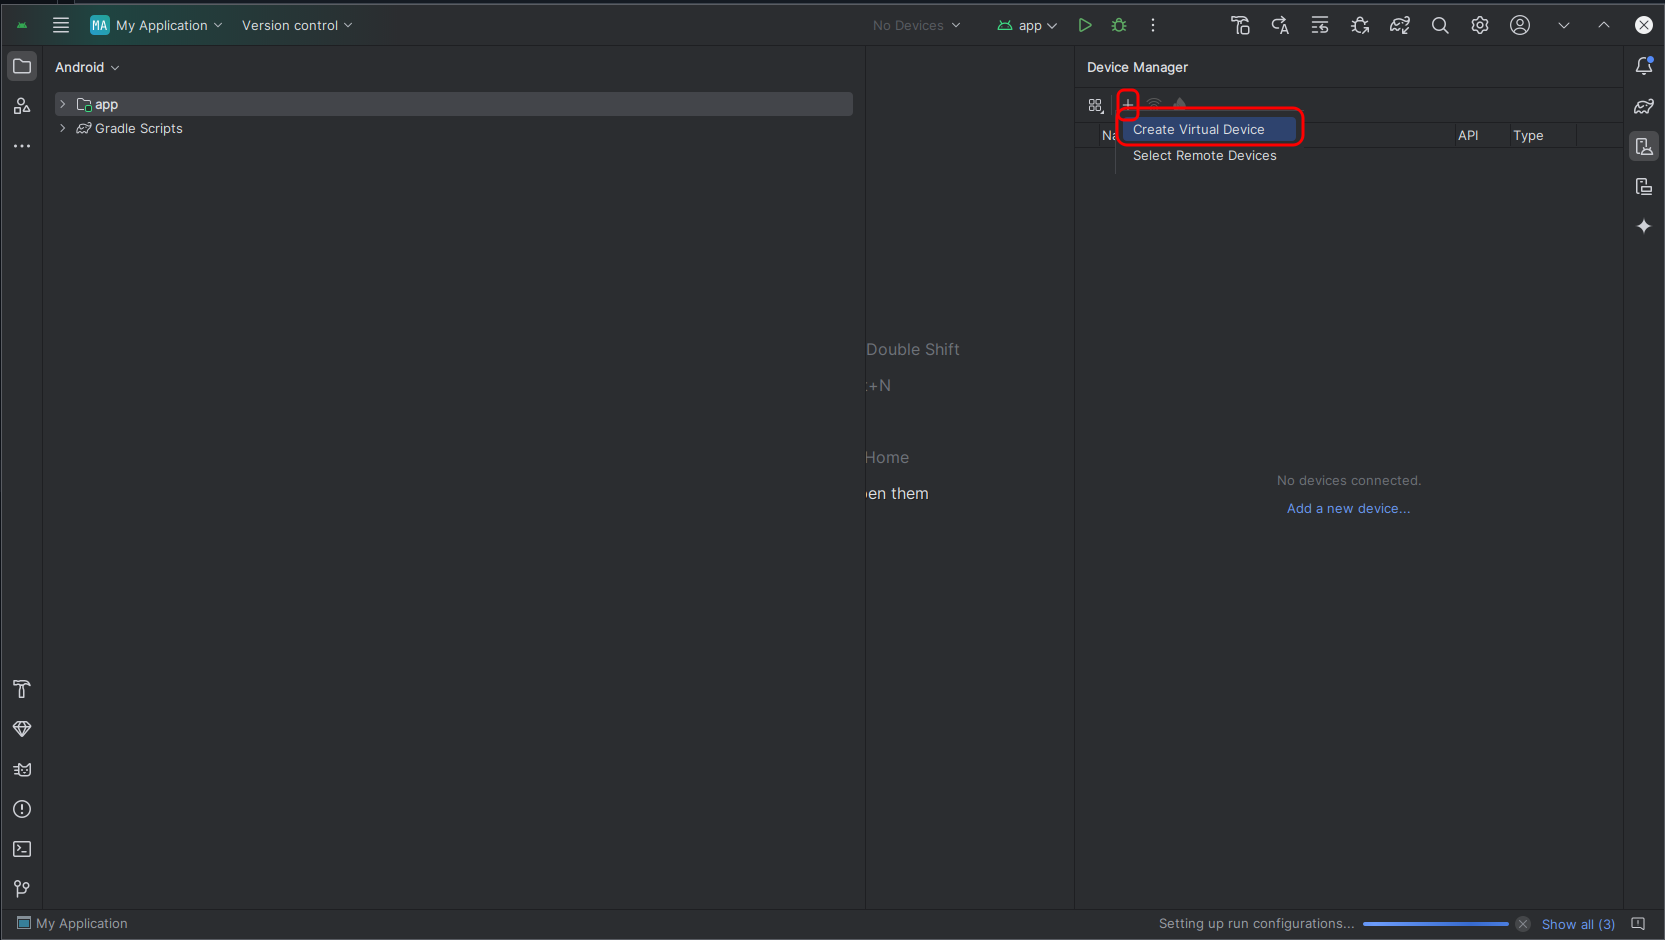
- Then click on the "+" button and Create Virtual Device:
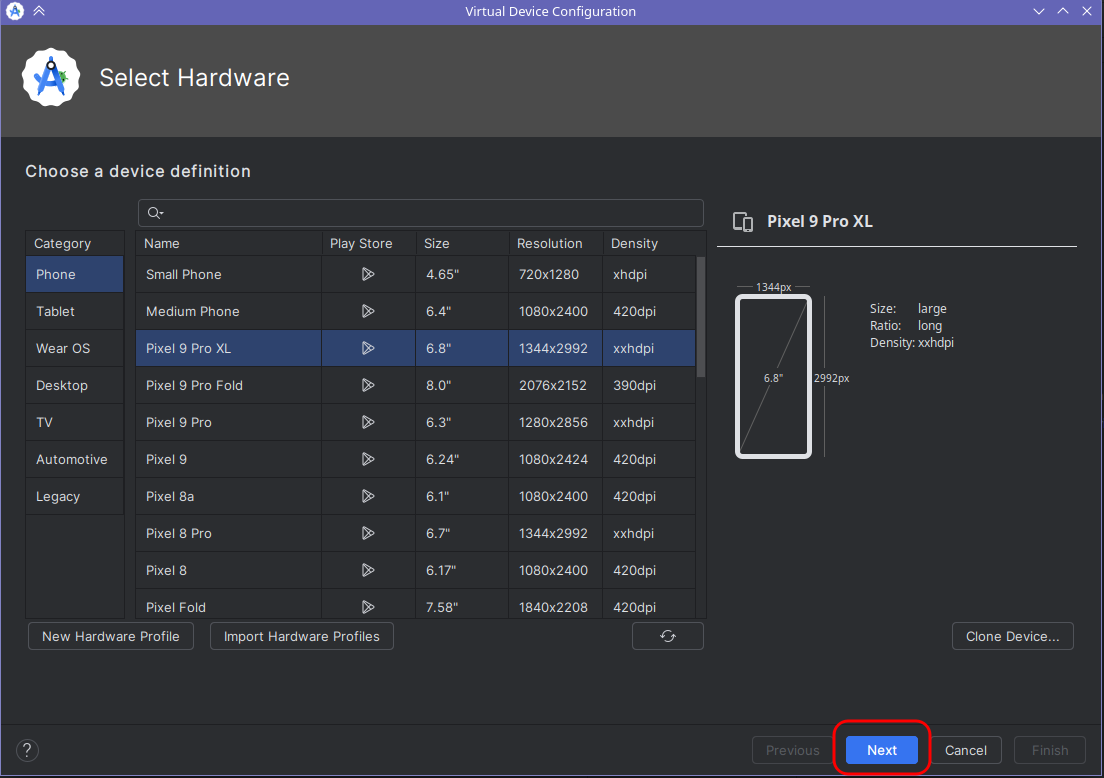
- Select an Android device like Pixel 9 Pro XL for example:
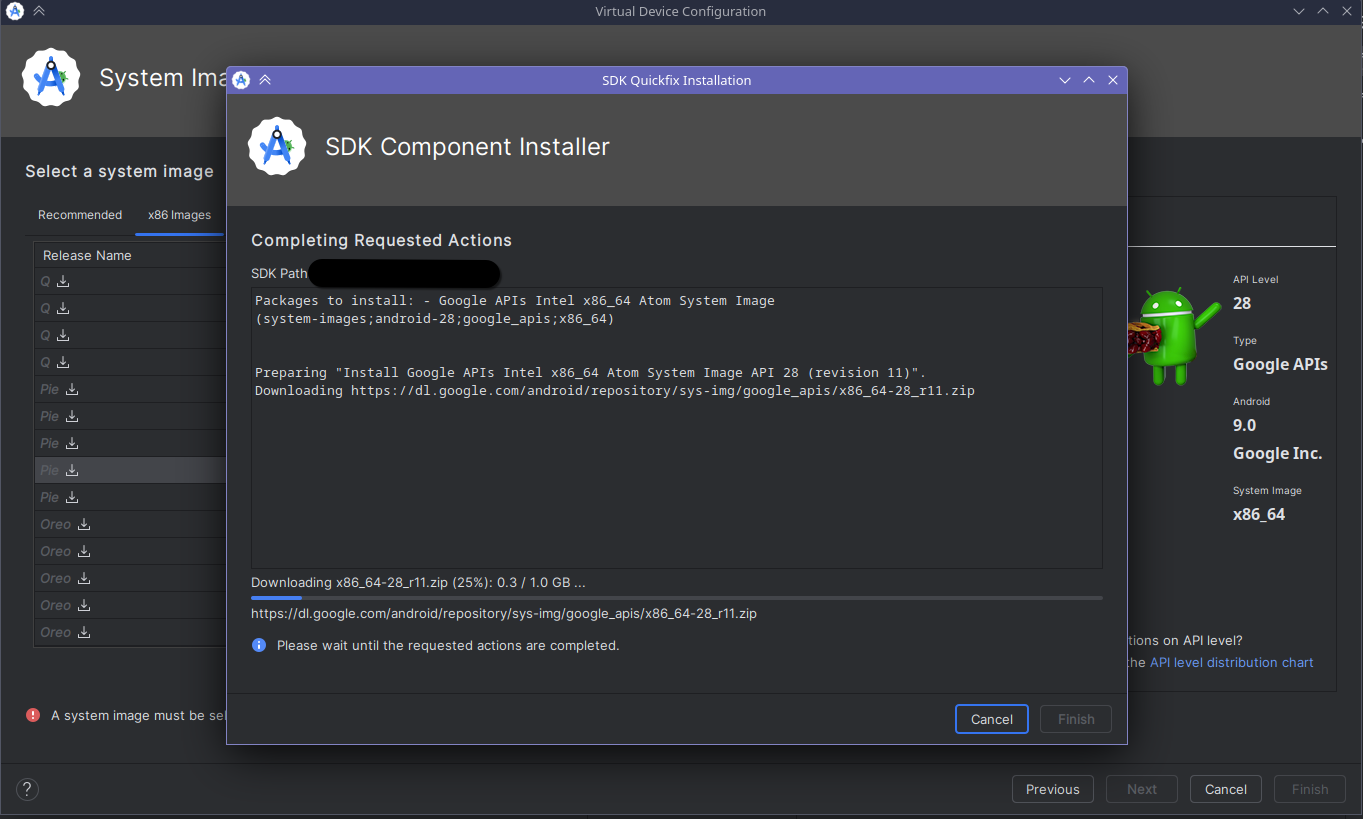
- On the next window popping up, go to the second tab called x86 Images, then scroll down until you find Android Pie, API28, x86_64, Android Pie (Google APIs), and click the down arrow to download it:
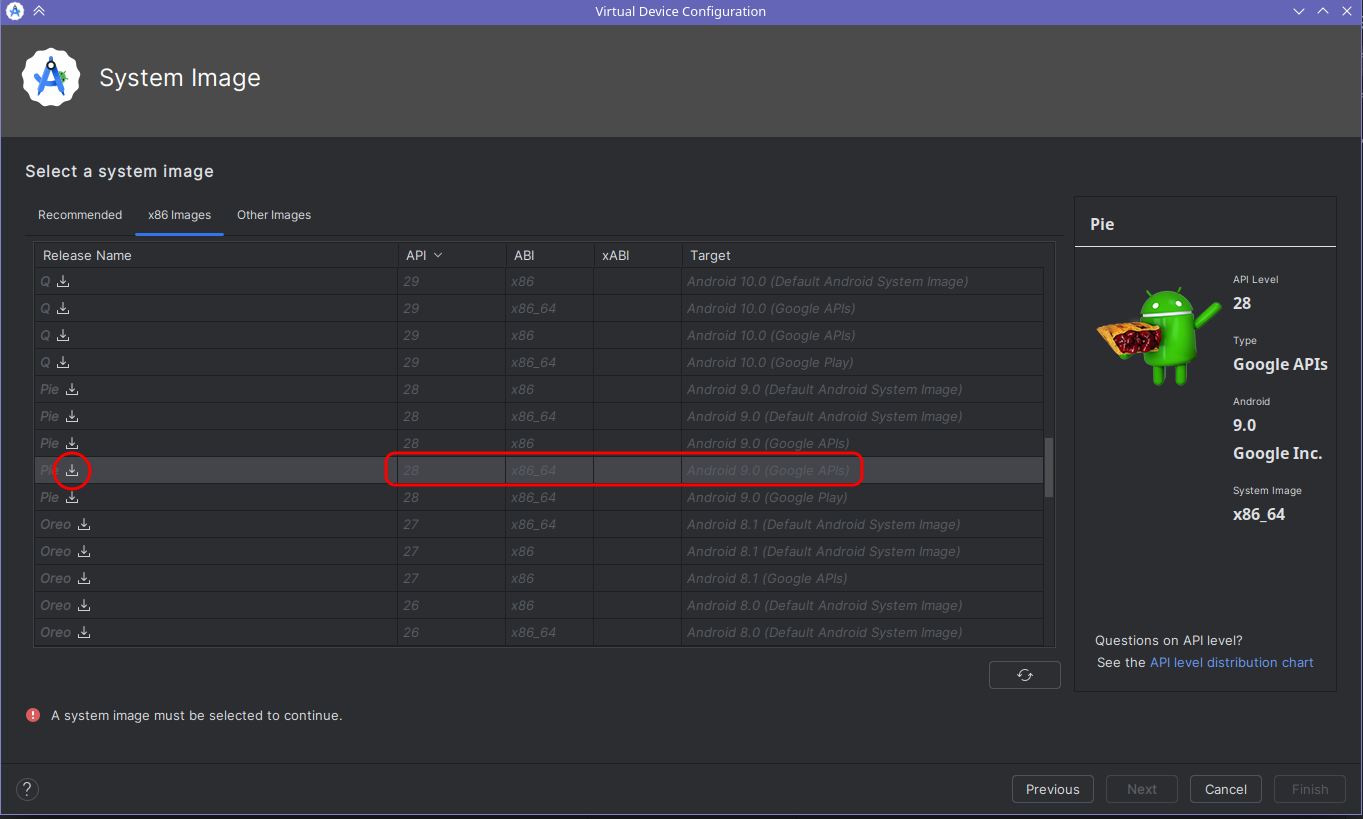
In any case, do not select any images more recent than Android Pie/API28 or we won't be able to root it.
Select x86_64 if you have an AMD or Intel processor. If you are on ARM64, go to the 3rd tab to download the same image for ARM64.
Do not download images where it says Google Play in the Target column. - Wait for the image to download:
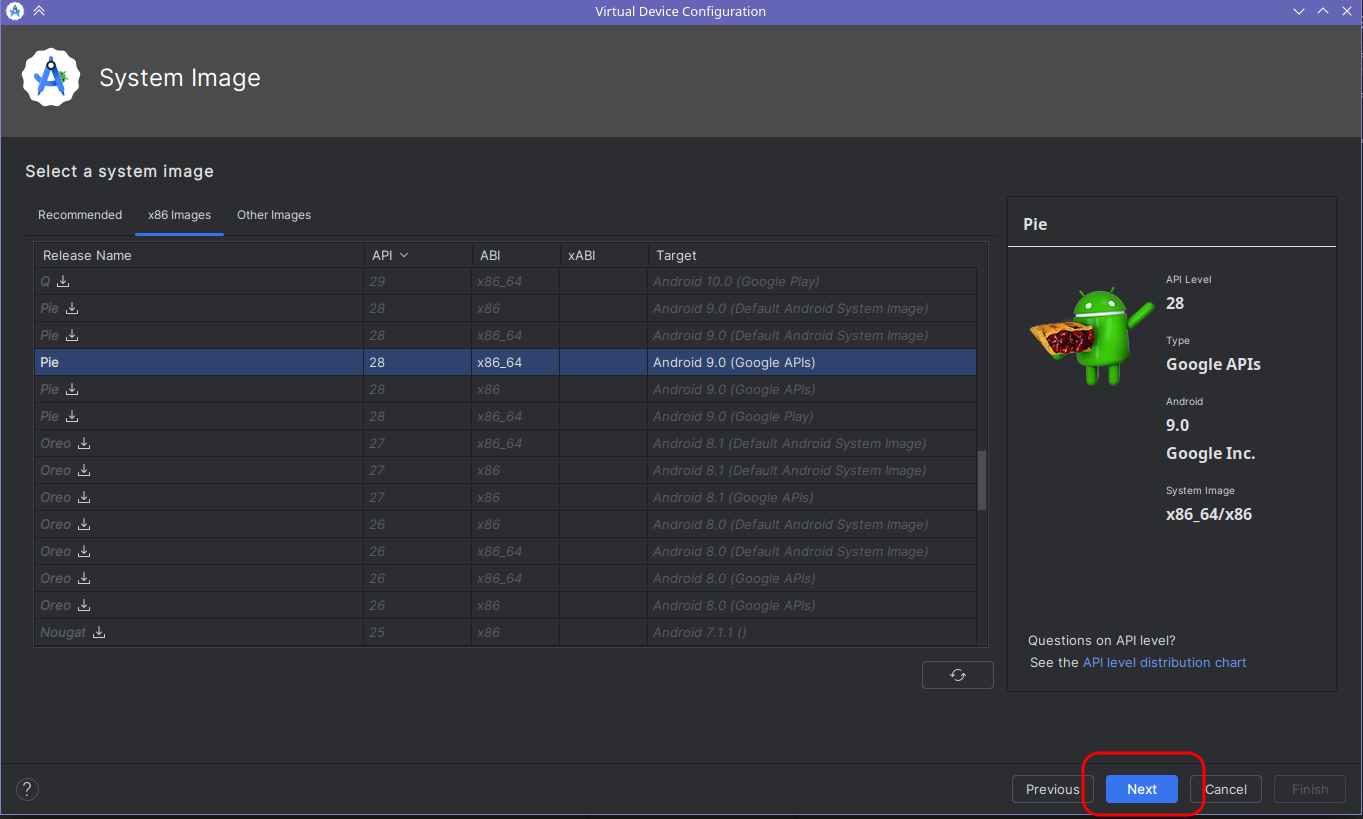
- After the download is finished, scroll down again to select Android Pie, API28, x86_64, Android Pie (Google APIs) that you've just downloaded and click Next:
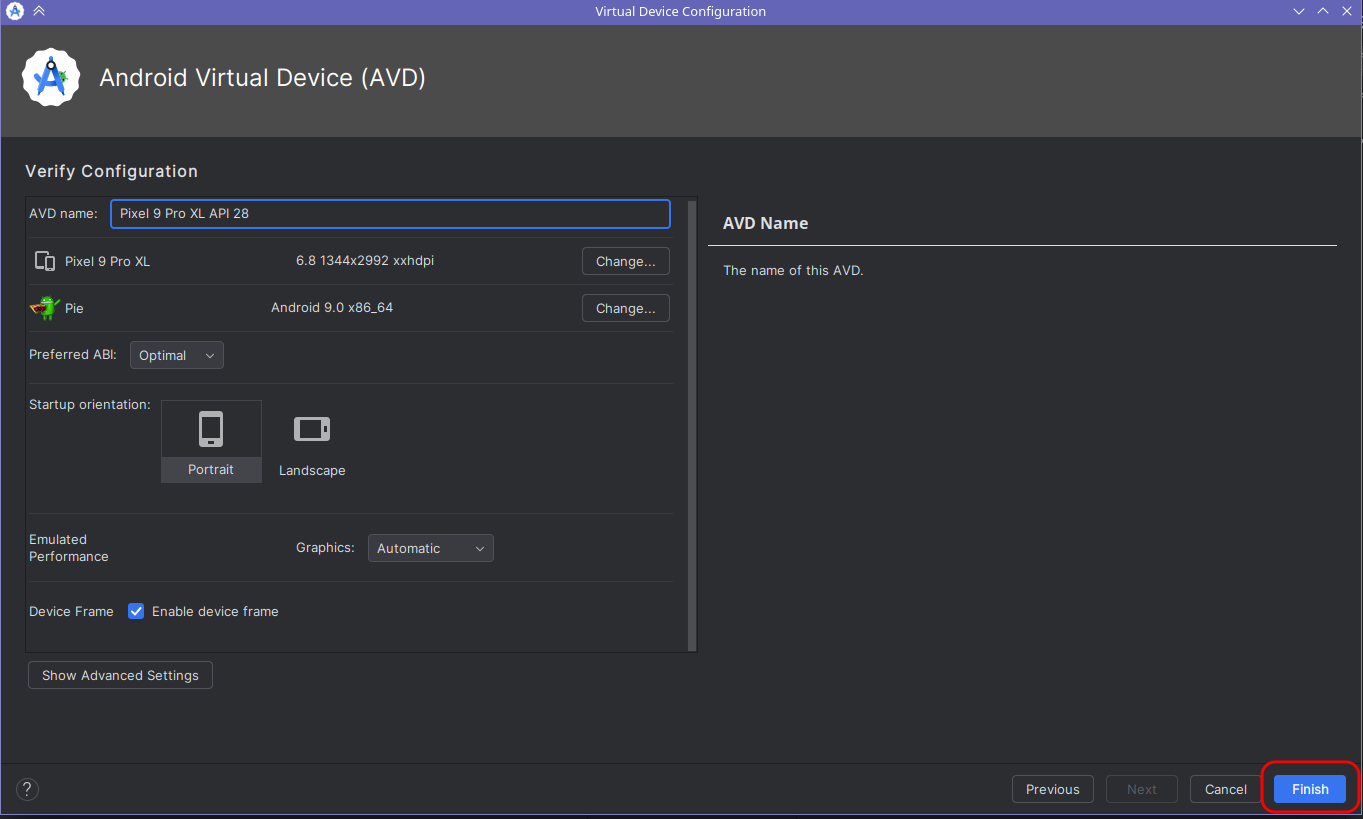
- Click Finish on the following window:
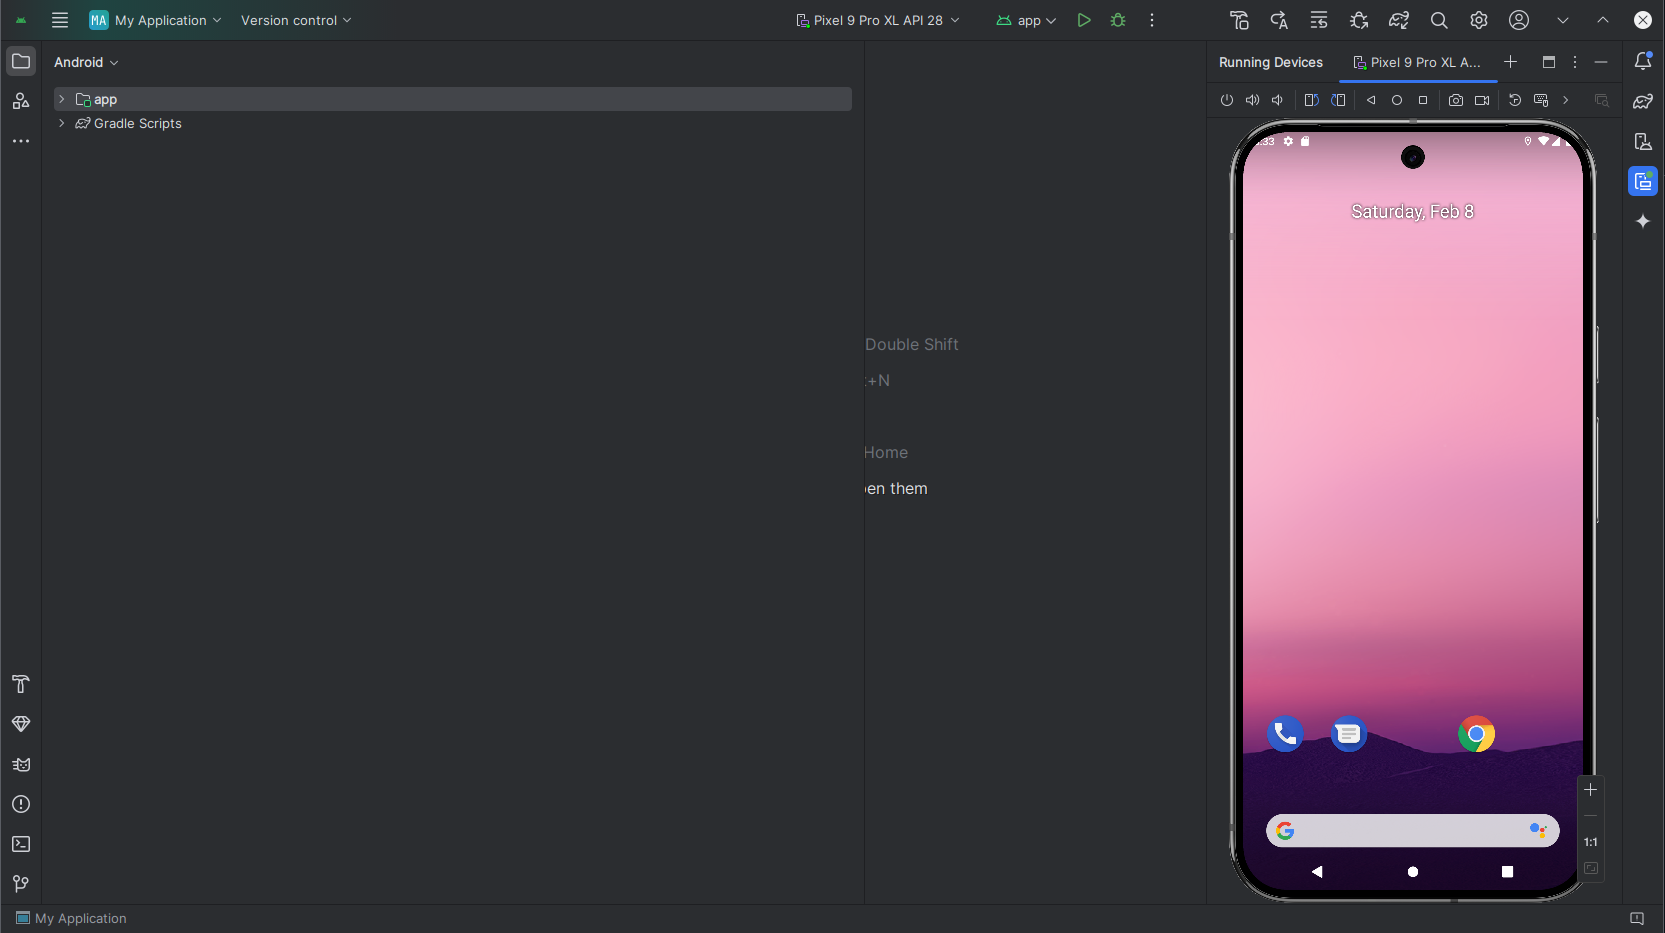
- Then click the Start arrow to load the virtual Android device we've just created:
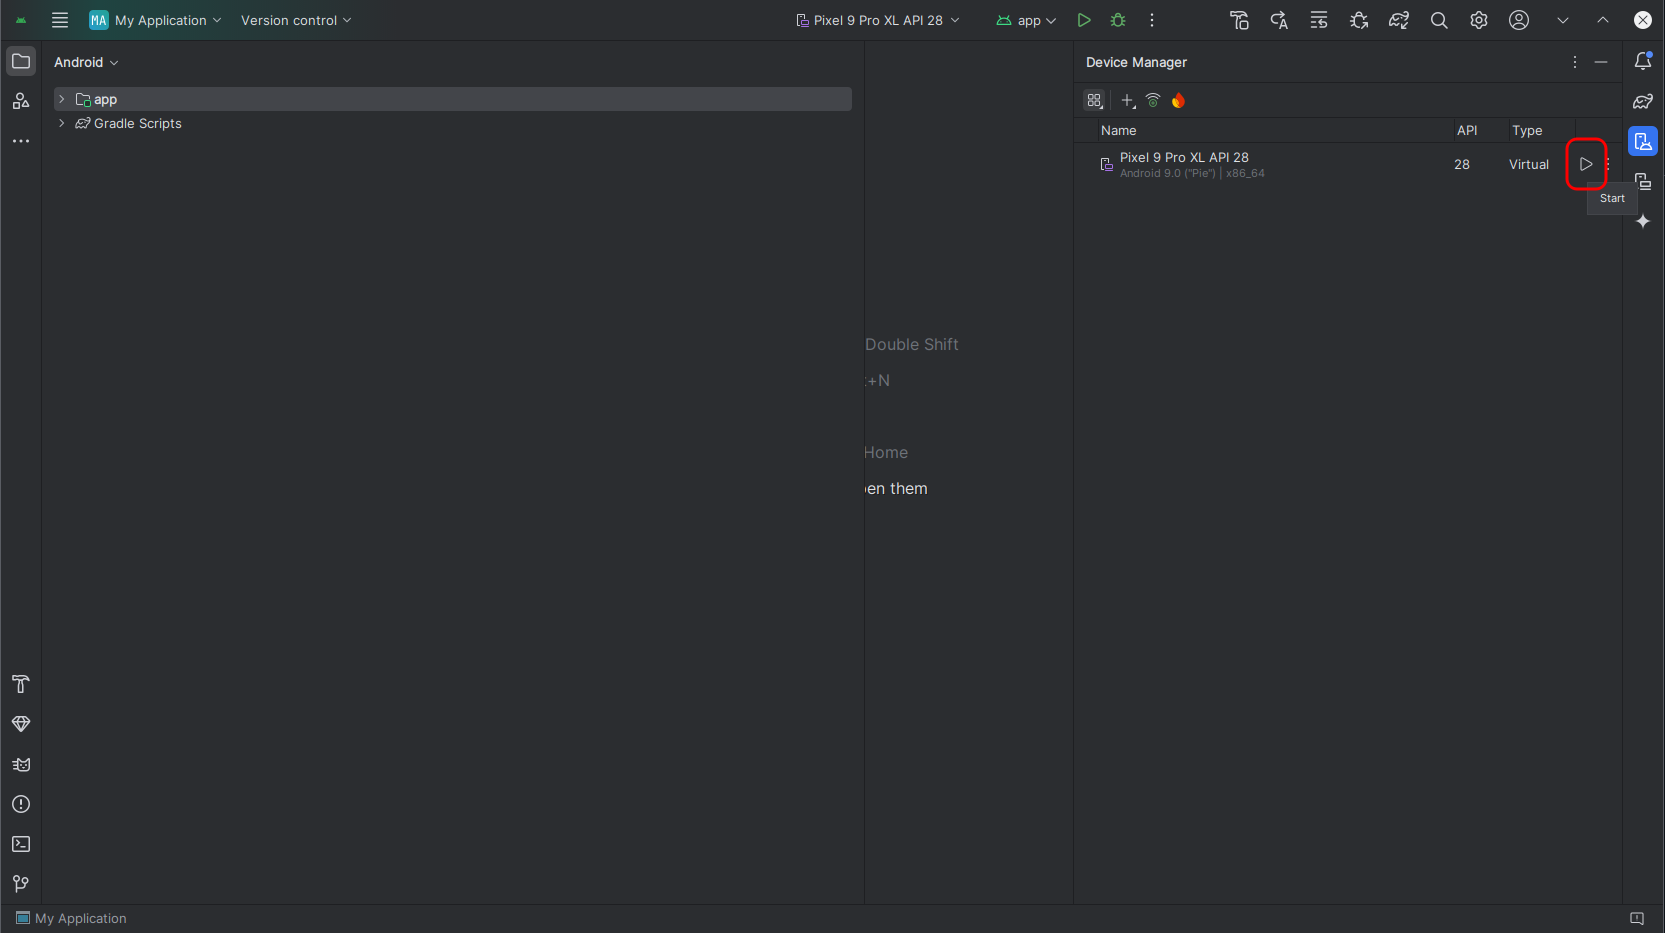
- Wait a bit, you should have soon a Android device ready like this:
Step 3: copy frida-server and start it
On Linux, type the following command in a terminal, in the directory where you have extracted frida-server:
On Windows, open a command line (cmd) then go to the directory where you extracted adb.exe from the platform-tools, and do the same:Code:adb root adb push frida-server /data/local/tmp/ adb shell chmod 755 /data/local/tmp/frida-server /data/local/tmp/frida-server &
Note, on both Windows and Linux, you can change directory with cd path/to/the/directory and go to the parent directory with cd ..Code:adb.exe root adb.exe push /path/to/extracted/frida-server /data/local/tmp/ adb.exe shell chmod 755 /data/local/tmp/frida-server /data/local/tmp/frida-server &
In any case, do not close that terminal window.
Step 4: start dump_keys.py
On Linux, open a new terminal, go to the directory where you extracted or cloned dumper, and launchOn Windows, after installing Python, I think you can go to the Start menu, then Python, and launch a command line there. Then use the command cd path/to/the/dumper/directory to go to the correct directory, than launchCode:python dump_keys.py
The program is starting, when it is ready, you should see something likeCode:python dump_keys.py
Step 5: load a webpage with DRM on the virtual deviceCode:2025-02-09 06:09:31 AM - root - 25 - INFO - Hooks completed
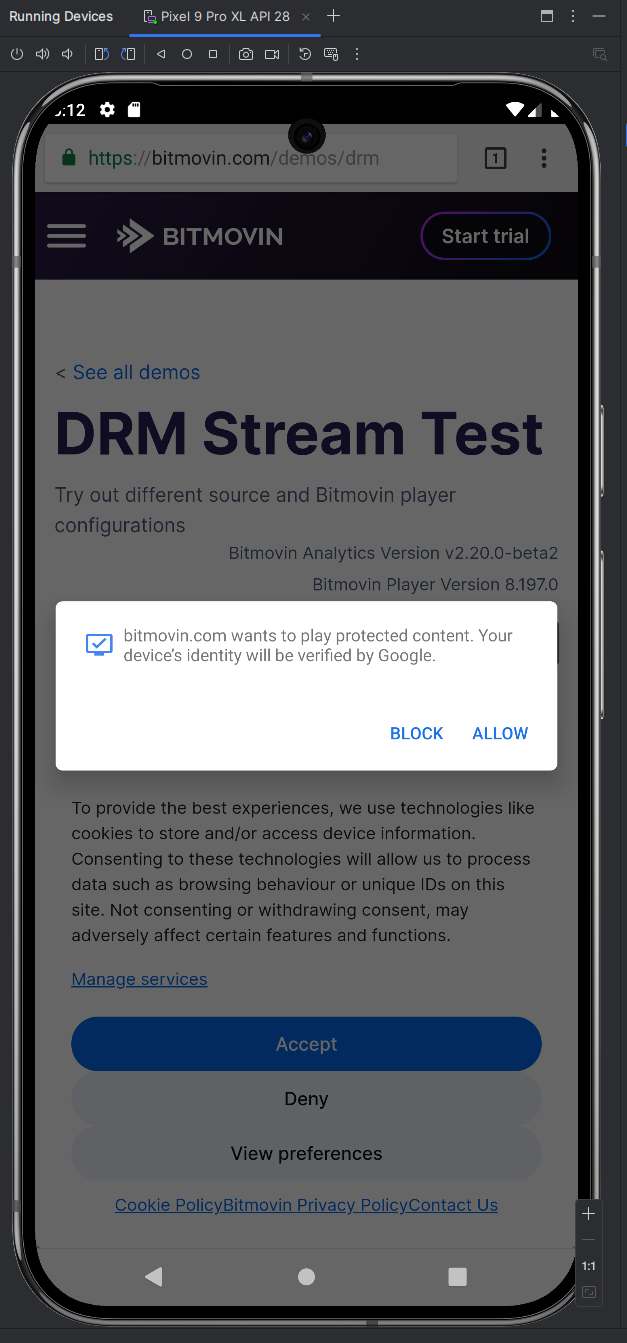
Launch Chrome on the virtual phone (do not sign in). Then go to the following URL: https://bitmovin.com/demos/drm
Click Allow when prompted to play protected content:
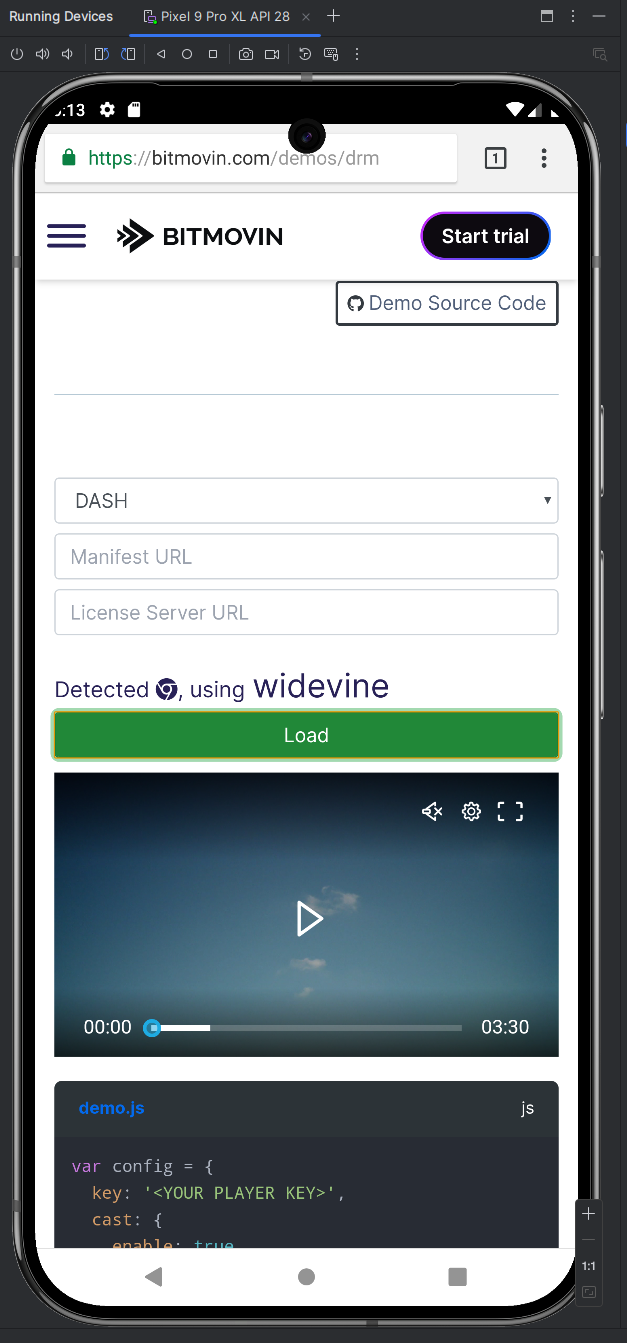
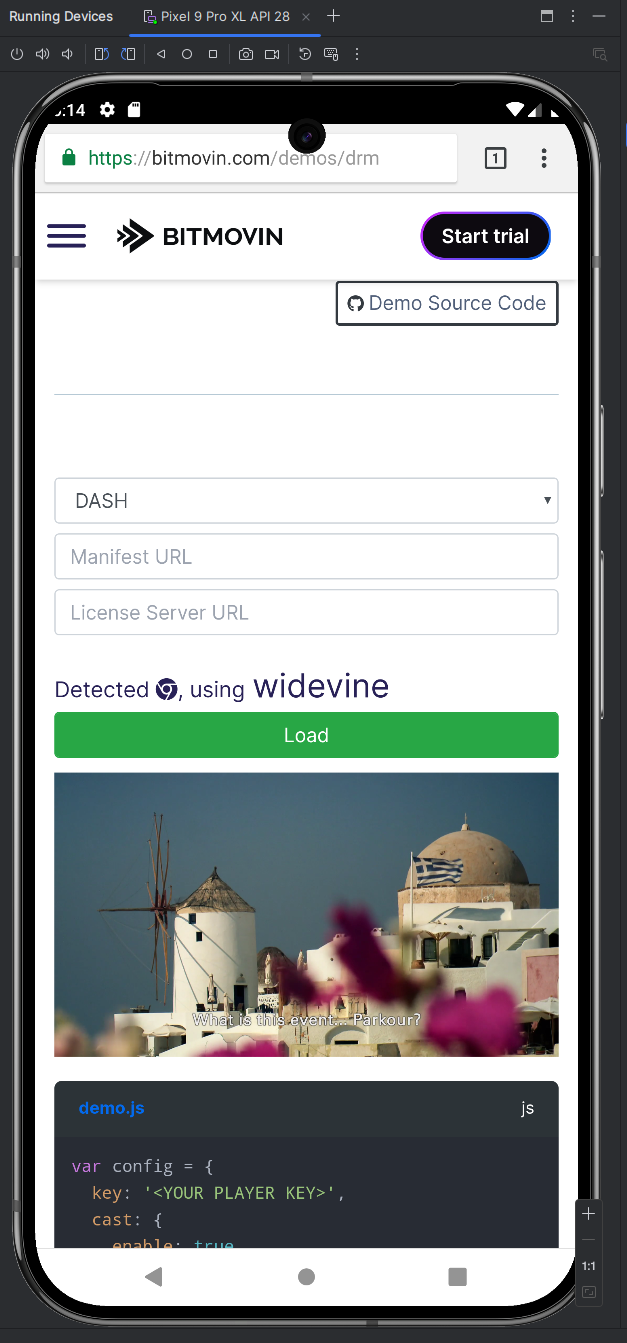
Then click Load and play the video:
Step 6: copy the keys
In the background, dump_keys should have been doing its work:
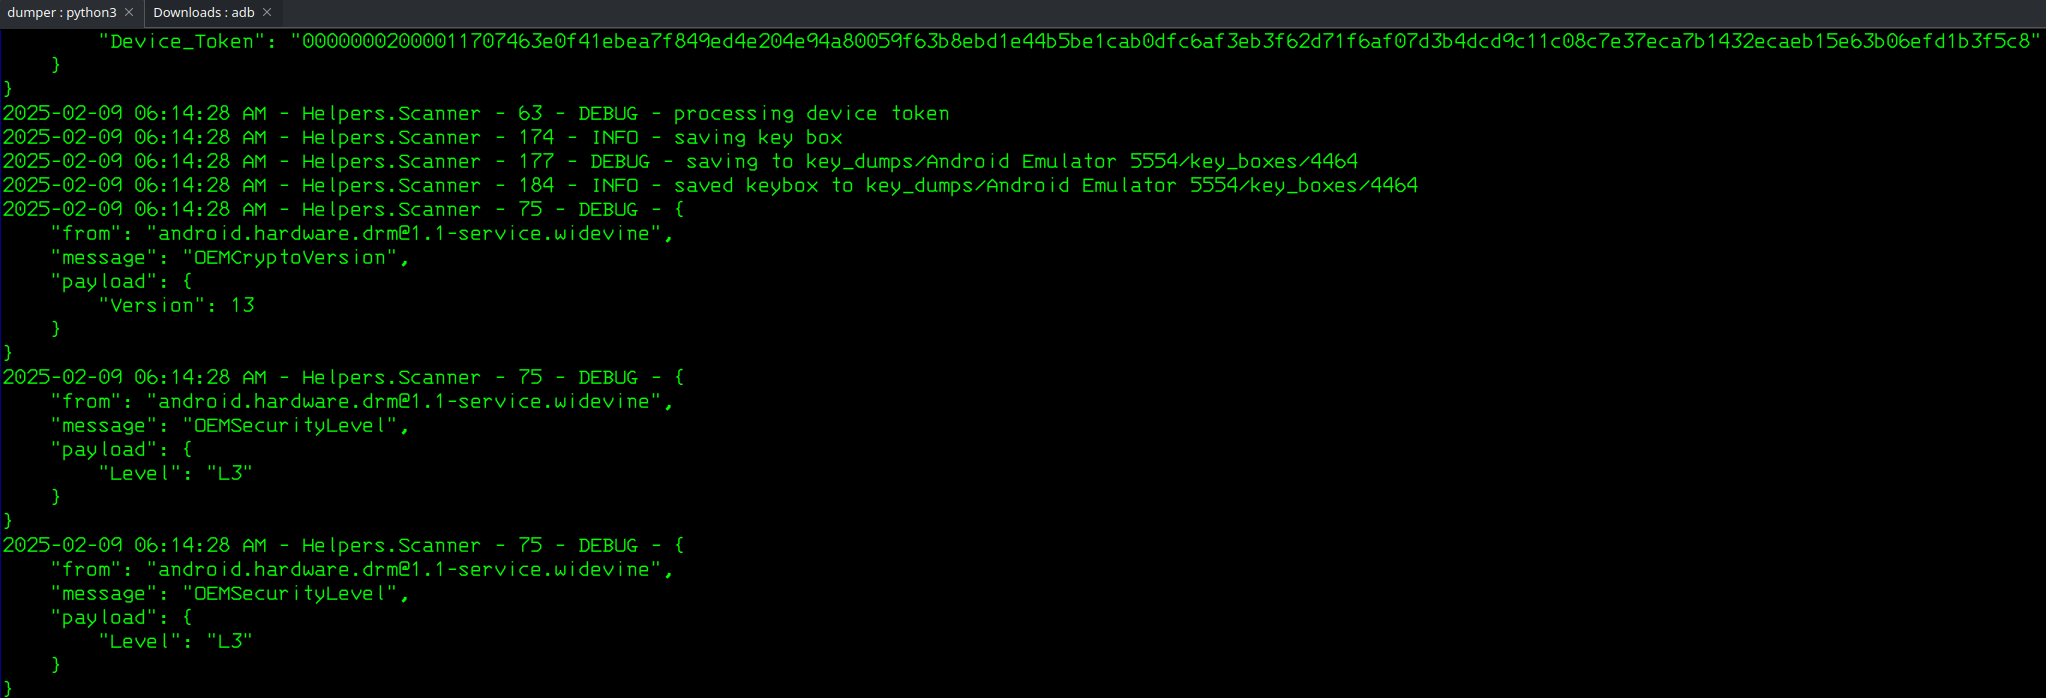
In the directory where you have cloned or extracted dumper, you should have the following directories: key_dumps/Android Emulator XXXX/private_keys/XXXX/
In this directory, you can have one or more folder with a number, and inside them you will find two files:
- client_id.bin
- private_key.pem
(do not share them)
Copy or backup them to a safe place.
You can now stop the virtual device, quit Android studio, stop dump_keys.py (Ctrl+C) and close adb too.
Step 7: Profit! -
Thanks a lot for that, much appreciated.
-
@rvlnnb
thanks a lot for your work!
unfortunately i get this error whenever i try to start dump_keys.py:
[Attachment 85501 - Click to enlarge]
can someone help me? thanks
Edit: i figured it out. it downloaded the wrong android system image (i should have downloaded the x86_64 version instead of the x86 version)Last edited by Pepnek; 16th Feb 2025 at 11:29.
-
I'm currently stuck on @rvlnnb's instructions on step 4 - running the dumper returns: frida.TransportError: failed to open USB device: Input/Output Error
Does anyone have any ideas to fix this?
[Attachment 85518 - Click to enlarge] -
Change your version of frida.
pip install frida==16.5.2 -
This is still working!! Thanks a lot

-
This worked perfectly! Thank you!Originally Posted by cedric8528
-
Hi everyone! I think I got a problem. When dumping it said unable to save keybox. I scrolled the entire page and didn't find the same situation. Can someone help me? Thanks!
[Attachment 85744 - Click to enlarge]
And the Chinese 拒绝访问 means access denied, I believe. I live in China so the system here is Chinese.
 Quote
Quote
Similar Threads
-
Dumping L3 from Android 10, 11 and 12
By Diazole in forum Video Streaming DownloadingReplies: 45Last Post: 9th Jan 2023, 08:13 -
Can you set up a working CDM from an Android device running a custom ROM?
By scryclwn in forum Video Streaming DownloadingReplies: 2Last Post: 27th Nov 2022, 13:46 -
Error getting the keys with dumper, cdm L3 android 9
By Brift_Bv in forum Video Streaming DownloadingReplies: 15Last Post: 23rd Sep 2022, 03:33 -
How To Dump L3 CDM From Android Device's (ONLY Talk About Dumping L3 CDMS)
By Dannyboi in forum Video Streaming DownloadingReplies: 226Last Post: 1st Mar 2022, 04:34 -
How To Dump L1 CDM From Android Device's (ONLY Talk About Dumping L1 CDMS)
By mintolik in forum Video Streaming DownloadingReplies: 13Last Post: 20th Feb 2022, 15:33