


Hello!
I'm in the process of recapturing and converting my analog home video collection. I started this a while ago on a mac using passthrough method with camcorder or DV capture device and converting/deinterlacing in Handbrake. I've since then revamped my entire setup and now am using Windows 7, ATI 600 USB (purchased from Lordsmurf), VirtualDub, AviSynth, QTGMC etc. I'm less than 2 weeks into all of this.
For a while, the DV approach was "passable" to me because it was easy and mostly problem free, and I was getting it done.
Then I came across a few tapes that were dark and noisy, and I wasn't happy with the results anymore, which led me to where I am now.
So, bear with me as I'm totally new to the new setup and I'm just barely stumbling through it all.
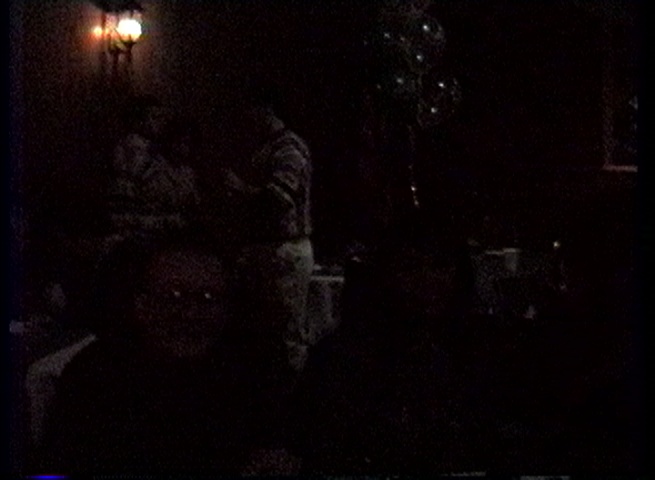
It wasn't intentional, but for my first test capture in the new setup, I chose an 8mm tape of a party in a catering hall (so, "dark and noisy" as stated above, and basically the worst possible scenario!)
What I noticed off the bat was the capture from the ATI 600 USB was a lot darker (cleaner too, but darker) compared with the DV "capture" from the mac of the same video.
When I started to experiment with VirtualDub filters (levels, etc) to bring up some of the darks, it started looking a lot like the DV version...noisy, and "blah".. I've tried some denoising but don't know the best one to use or the settings to use for it.
I know that this is a tough scenario to improve on and I'm not expecting miracles, but I would at least like my new windows capture setup and workflow to yield a video that is better than what I was doing before! And not just "technically" better either, but ultimately more "watchable". What I mean by that is even if the new workflow yields a video that is cleaner with correct black levels and less noise, but it's so dark you can't see anyone's faces to even know who is in the video, then that is less "watchable" to me (and worse for posterity) because you can't even make out who is who.
I attached a sample file to illustrate what I mean. This is BY NO MEANS a perfect test, as it took a little bit of me fumbling through everything to even get something to upload here to show side by side, but it should at least illustrate my point above. I did convert and deinterlace the two captures (as I would before on the mac using Handbrake with decomb for the DV file, and now using AviSynth with QTGMC and ffmpeg in Windows for the new capture). The only "processing" that was done was EZDenoise within my QTGMC command on the windows version. Then, I am sure I screwed this up, but I wasn't sure how else to do this - after I combined the side by side x264 mp4s using AviSynth, I didn't want to upload a huge file here so I opened the AVS script in Avidemux and recompressed again to x264.. so I think I might have double-compressed these. Either way, I hope it at least shows what I mean.
I also trimmed out a section in the middle of the original windows huffyuv avi test capture using VirtualDub Direct Stream Copy and attached here to get under the 500MB attachment limit.
My ultimate goal would be to understand how I can improve upon the new windows capture, either in VirtualDub or AviSynth filters, to - at the very least - make it look better and more watchable than my original DV method.
I have some other general questions about when to use VirtualDub filters vs when to use AviSynth, but I will save that for later or another post.
I also have a question about the ATI 600 USB "registry hack" for audio. I was able to find the key and edit it but it doesn't appear to do anything. My audio isn't clipping, and it didn't seem too high on the meter during capture from what I can tell, but it seems very loud in my final file compared with how loud other things sound at that same volume. (What I mean is, I put the file on an external hard drive, plugged into my TV, and watched it there. Had to lower the TV volume significantly from what was a comfortable volume watching regular TV.) I don't know if the registry edit didn't work, or if I didn't put it to the right value. I tried changing it to extreme values to see how it affected the audio and then recapturing, but it didn't do anything. Do you have to restart computer or do something else for it to take effect? Can you tell by my sample upload capture if the levels are too high or correct?
Thanks in advance for your help!
+ Reply to Thread
Results 1 to 30 of 49
-
-
If the original video is dark, you can try to brighten that by changing to a capture chain which includes a "proc amp" that can have its gain adjusted, but I don't think that has any advantage -- and in fact has many disadvantages -- compared to adjusting the brightness using the tools in your NLE (a.k.a. your video editing program).
I've been waiting fifteen minutes for your massive video file to upload (10 seconds is all you need to upload next time).
OK, it finally downloaded. It is very standard wedding video, shot without a video light. I've seen this dozens of times, both in the church and at the reception.
What you do is put it in your NLE and that apply a gamma brightening (do NOT use the brightness and contrast controls!!!). Better yet, if your NLE supports histogram brightening, use that. You need to leave the black point and white point alone, but gain the bottom 30% quite a bit, but reducing the brightening gain for the brighter sections.
If your NLE supports color correction based on the brightness, you could eliminate the pink tones in the pure whites, while leaving the rest untouched.
Finally, when those corrections are made, you should run the result through a good AVISynth denoiser. There are lots of posts about that, so I won't attempt to describe that here.
P.S. I just realized that the "firstcap_trimmed.avi" file is not the original DV file (which is what you should have uploaded), but instead has been re-encoded to HuffYUV. This accomplished nothing other than increasing the size by 5x or more. Next time, just cut a section of DV and upload that.
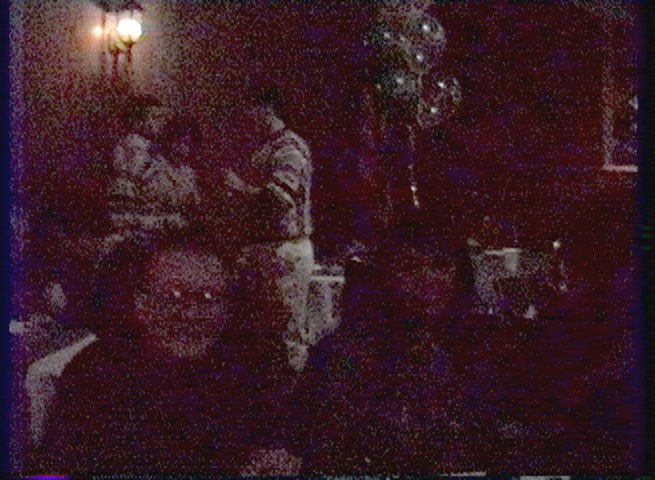
[edit]This is the simplest of all brightening, done by increasing the gamma (NOT the brightness and NOT the contrast). As you can see, the original video is so dark, that there is very little real detail available, resulting in quite a big of really large-sized noise after you apply any sort of brightening. There are NR plugins that can reduce the noise quite a bit, but don't expect to get very much detail in the faces. The type and amount of brightening will affect the brightness differently, but the noise will be identical regardless of how you make the video brighter.
Again, you won't get any better results by using a different capture chain, and any artifacts caused by DV compression are roundoff error compared to what you are dealing with.
DV capture is NOT the problem here.
Original:
Brightened using Vegas Pro "Levels" fX, using only the gamma control:
Last edited by johnmeyer; 2nd Sep 2020 at 19:36. Reason: added pics
-
Looks to me like the black levels are crushed, dark shadows disappeared.
Assuming this is an analog capture directly from ATI 600 to HuffyUV, the proc amp settings adjustment may help -
You can make the left half of the image match the right half with ColorYUV(off_y=10). Unfortunately, blacks in the AVI file are crushed at Y=16 so you can't get back those deep black shades. You get something close to the other right half's blacks with a contrast stretch in the darkest areas:
Note, I was only adjusting the levels for the first few frames. Other parts of the video need slightly different settings.Code:LWLibavVideoSource("compare.mkv") v1 = Crop(0,0,640,480) # left half v2 = Crop(640,0,640,480) # right half bmask = v1.ColorYUV(off_y=-6).ColorYUV(gain_y=4000) v1 = Overlay(v1, v1.ColorYUV(off_y=10), mask=bmask) Interleave(v1, v2) HistogramOnBottom()
Of course, the best fix is to re-capture after adjusting the capture device's proc amp settings so the blacks don't get crushed. -
I saw the crushed (below 0) blacks in the Vegas histogram display, but I really don't think that contributes more than about 1% to the total problem because the video is obviously so dreadfully underexposed.
-
Thank you. Let me clarify something here.Originally Posted by johnmeyer

The "firstcap_trimmed.avi" file I uploaded IS the original captured file that I used by capturing in the "new setup", which is using the ATI 600 USB via VirtualDub in Windows 7 using HuffYUV compression. I didn't recompress that - it was a direct stream copy from the capture. And the reason I uploaded such a long segment was because I figured I messed up the converted version in the side by side comparison and someone may want to see what the true original looked like before I did that.
"firstcap_trimmed.avi" is the file I am now working with and the one I am interested in improving - it started out as HuffYUV, is HuffYUV still, and there's no DV anywhere in my new setup for analog videos.
The DV capture in the side by side comparison was the "old setup" that I am trying to improve upon with my new setup.
The point I was trying to make is that after I spent all the time and effort in obtaining a Windows computer, a good capture device, installing all the software including AviSynth, getting that up and running with all the plugins and dependencies, learning how to write AVS scripts and how to execute them and encode with ffmpeg via a command line, editing the registry, and so on... at the VERY LEAST I am hoping to get a better result than what I was getting with my sub-par DV captures from years past. And I am looking for some guidance on how to best do that with a challenging video source, one that I understand is hard to "improve". But I don't think "better than my DV capture" is unreasonable.
Also, I am not using an NLE in my current setup. I am looking to do everything either with VirtualDub or AviSynth filters if possible. So if anyone can point me to specific filters or plugins as a starting out point, I would appreciate it. (I do have Final Cut Pro 7 on my mac but I am trying to eliminate having to go back and forth between computers if possible.)Last edited by Christina; 2nd Sep 2020 at 20:05. Reason: edited to add quote
-
Originally Posted by davexnet
Yes, it is an analog capture from ATI 600 USB to HuffYUV. Sorry if I didn't make that clear.Originally Posted by jagabo
And yes this was just a short capture test, my first time using all of my new equipment, so I haven't even captured the whole tape yet and can definitely re-do with different settings.
So let me make sure I understand. You both mean to use the proc amp settings in VirtualDub when setting up the capture, correct? I do not have an external proc amp, and I read somewhere else that ATI 600 USB crushes blacks before it even gets to the proc amp settings I can manipulate in VirtualDub. Also, are these settings you generally just eye-ball or trial and error or is there a science (histogram?) to it? Never used capture device's proc amp settings before. -
Adjusting proc amp settings for capture device was good advice for me because it wasn't really on my radar doing this for the first time - so while it seems obvious to you, it wasn't even something I thought of until you mentioned it. So thanks.
I went back and recaptured the same segment dialing the brightness way up and the contrast up a little. I assume if the lights get turned on later and the video source gets brighter, these settings will not work. How do you handle situations like this - just pick a happy medium?
I uploaded my new capture - I guess this will need some tweaking as well but I think it's a much better baseline to start from.
Can you guys explain to me the difference between using VirtualDub filters vs AviSynth plugins? Are there pros/cons? Do you do a combination of both? I read something about colorspace conversions and VirtualDub only working in RGB, and that not being ideal.. is that right? If I am ONLY doing a crop/mask in VirtualDub to hide tape noise and center video, does the video need to be re-encoded? (And which mode do I need to be in.. full processing, normal, fast, direct.. etc)?
Also, the volume meter in VirtualDub during my capture was hovering between -10dB and -6dB. Is that where I want it? -
You can capture a short clip then access the file in Virtualdub using the levels filter. You can sample theOriginally Posted by Christina
file to get an idea of how close you are. This file went a little to far the other way, but this is much more correctable in Avisynth -
Personally, I'd start with the cleanest, clearest, most "normal" looking source material you've got - if you can't get decent results from a fairly decent source then you've got no chance with more challenging source material. Don't forget, at the capture stage, initially, you're trying to get results that are as close to your source as possible. Once you've managed that THEN you can start trying to restore or 'improve' your video. And have realistic expectations. You're not going to get results like you see on CSI etc. If the original video is too dark or too bright that detail just isn't there then don't expect to get it "back", Don't get me wrong, there are some truly amazing avisynth filters out there, as well as some very knowledgeable and amazingly helpful people here, but if that detail just isn't there in the source . . . ! Good luck.
Last edited by TimA-C; 3rd Sep 2020 at 05:51. Reason: Poor typing!
"Well, my days of not taking you seriously are certainly coming to a middle." - Captain Malcolm Reynolds -
The new cap has gone too far in the opposite direction. The black levels are too high and the brights are blown out (crushed at Y=255).Originally Posted by Christina
Generally, you want to find a happy medium. You want to avoid darks that are too dark or brights that are too bright. You can use VirtualDub's Histogram display (Video -> Histogram, in the capture module; also it's finicky, you may not be able to see a live preview of the video and and a live histogram at the same time) to check the levels. You want to avoid having large amounts of red at either end:Originally Posted by Christina
[Attachment 54731 - Click to enlarge]
(Ignore the diagonal lines in the video preview -- I think that's some artifact of using a file is input to the capture module.) You especially want to avoid peaks at the very ends of the histogram. Those represent parts of the picture that are blown out. Detail cannot be recovered in those areas. It's hard to see in that image but there is a red bar at the far right edge. That's the blown out white areas of the image.
In your particular case I think your capture device crushes blacks at Y=16 before giving the video to VirtualDub so you want to avoid a peak at the left end of the blue part of the histogram.
There may be times when you don't care about blown out brights and darks. For example, in a very dark shot with small blown out lights in the background. If you are capturing just that shot and you want to make out people's dark faces you may not care that the lights in the background are blown out.
AviSynth is the more powerful of the two. But it's (plain text) script based, there's no GUI. You have to edit the script then (re)load it into an editor to view the effects. Some operations that can be done easily in a GUI can be very complex in text. VirtualDub2 does have an AviSynth script editor built in (Tools -> Script Editor) making the process a little easier. But there's nothing like being able to adjust a slider in a GUI and seeing the changes in real time.Originally Posted by Christina
I've been using AviSynth for many years so I'm pretty comfortable with it. I usually do everything in AviSynth now. I use VirtualDub only to view the results of the script. There are rare occasion where I'll use VirtualDub's filtering -- because there's no easy way to do it in AviSynth or because a certain filter isn't available in AviSynth. Note that it's also possible to use VirtualDub filters within AviSynth script via the LoadVirtualDubPlugin() filter.Originally Posted by Christina
In the past VirtualDub always converted incoming YUV video to RGB before filtering. It always used a rec.601 matrix to do so. That could result in blurring of the colors and loss of super-blacks and super-whites. Newer versions of VirtualDub do allow some filters to work in YUV, avoiding those problems. But not all. And even some which may accept YUV as input work internally in RGB and have the same problem. VirtualDub also has a problem with interlaced YV12 video -- it blurs the colors of the two fields together.Originally Posted by Christina
Yes, any time you change the picture you need to reencode. (There are some exceptions with specialized software, but not as far as VirtualDub and AviSynth are concerned.) VirtualDub's filters work only in Full Processing mode.Originally Posted by Christina
That's fine. You have good levels but still have a little headroom for occasional short peaks.Originally Posted by Christina
-
Beware of the levels filter in VirtualDub. It only works after the contrast stretch of a rec.601 YUV to RGB conversion (even when it's working in YUV (luma) mode. So superblacks will be piled up at the left end of the histogram, superbrights at the right end.Originally Posted by davexnet
-
Please don't take this the wrong way, but seeing what you did by using controls that you don't understand is almost certainly going to give you worse results than the DV capture. The one reason I continue to advocate for using DV, despite the chorus of boos I always get from those who correctly point out its color deficiencies (and sometimes the DCT compression artifacts, although the severity of those depends a LOT on the quality of the DV chip you are using) is that DV gets the levels right. I'll bet that if you posted one of your original DV captures of the same material, that it will not have the problems that everyone is complaining about with your ATI 600 captures.
If you are going to continue using your ATI 600, you need to use software that gives you access to a histogram and you need to learn how to use it.
The first picture shows the histogram of the first capture you posted, with the crushed blacks. Look at all the content that is below the zero line. What you did by setting the proc amp incorrectly was to map all of those dark pixels to completely black. This cannot be reversed because once a pixel is pure black, it can no longer hold any valid picture information.
The second picture shows your latest capture. The good news is that there are no more crushed blacks, but the bad news is that you'll now see all sorts of bright spots above the "100" line, indicating blown-out highlights. When you transfer normally-lit scenes using these same proc amp settings, those scenes will be completely destroyed.
As others have said, your goal in doing the transfer is to faithfully reproduce exactly what was on the tape, and then do whatever restoration is possible by using software in post production. AVISynth has a wider range of tools for improving video. This is because it makes it much easier to use video from multiple frames in order to improve the current frame.
So, start reading up on what brightness levels 16-235 and 0-255 mean; what 7.5 IRE setup is all about; and what Studio RGB means.
I would love to see you post the exact same video clip captured using DV. I'll bet its levels will be more accurate, and pretty darn close to the original. -
Thank you for such a clear and detailed response and for addressing each of my individual questions. Appreciate it.Originally Posted by jagabo
I have been using AvsPmod to play around with my scripts which allows you to see the results in a preview within the same window, rather than opening the script in VirtualDub and going back and forth between programs. Any reason you don't use something like that?
I'm extremely new to AviSynth but I've got it working and anyone can do a google search and copy/paste code with a general understanding of what they're doing, so I feel like if AviSynth is the preferred method to tweak video because it keeps it in the original or preferred colorspace (assuming that is true), I could probably figure out the few filters I need to use regularly and accomplish it without a GUI. Might take a little trial and error at first without having a slider but I think once you have a jumping off point, it's doable. I hope to not be doing any major complicated editing anyway because I think it ends up making it worse with home videos. I just now have to figure out how to get the proc amp settings more correct during capture. I'll try out the histogram.. and yes, when I select preview mode and histogram, the preview window goes blank.
Are there a handful of common/most useful/popular AviSynth filters you can suggest to look into that are generally used in VHS/8mm analog home video cleanup to correct common issues (such as my dark video, levels, gamma, noise, etc.) I've picked up a few already just from reading forums but there are a lot of options and opinions here and I'd like to understand which few I should focus on for basic cleanup. I'm sure this has been discussed already, if there is a link to post or guide I would appreciate it.
I'm getting the impression that RGB = bad, but is there a "right way" or "wrong way" to do it if you do want to use VirtualDub for some filters? And should it be before or after deinterlacing? (You mentioned VirtualDub has a problem with interlaced YV12 video). I'm using the suggested version of 1.9.
Sort of off topic, but which filters/corrections should be applied to an intermediate version of the video, and which should be saved for the final delivery format (which will be deinterlaced h264/mp4 resized to 640x480)? I assume I should do all corrections and cleanup for the intermediate file except for QTGMC deinterlacing and resizing to 640x480, but can someone confirm? Should intermediate version be identical to delivery version except not as compressed? Or save some steps for final output only?
THANK YOU! I'm sure you all are sick of talking about this over and over Sometimes it's just hard to find what you need on the forums because there is SO MUCH information. So I really do appreciate the one-on-one guidance even if it's repeating stuff that's already been said before.
Last edited by Christina; 3rd Sep 2020 at 12:37.
-
I welcome the constructive criticism. I'm learning how to do something and I'm certainly not expecting to be a pro at it the first attempt. I really just wanted to see what extreme changes to the proc amp would do and I did not do it with any type of precision or science, so I'm not surprised I went too far. I am using VirtualDub to capture and I'll play around with the histogram to see if I can get it closer to accurate. The first time around I left the device proc amp settings on default - I assumed incorrectly that leaving it on default would be "as close to the original as possible" and that changing it would be "enhancing" or trying to improve the original. So, now I know I can't leave ATI 600 USB device proc amp settings on default, and I have to use histogram to figure out what the settings should be, to the best of my ability.Originally Posted by johnmeyer
I have a general understanding of brightness levels and IRE but zero experience/understanding of the capture process and how you can tweak settings before capturing to get them right. But, I will learn, and then I will know. I don't know what Studio RGB means but I'll look it up.
If I can later I will post the original DV capture for you. Thanks for your help.Last edited by Christina; 3rd Sep 2020 at 12:10. Reason: typo
-
Note the images that johnmeyer posted are not histograms, they are waveform monitors, from Sony Vegas, I believe. The AviSynth filter called Histogram() gives a similar waveform monitor by default. It can display histograms for all three channels using Histogram(mode="levels"). It can also display a UV plot and several other things.
http://avisynth.nl/index.php/Histogram
Personally, I find a waveform monitor to be much more useful than a histogram. The former includes a lot of spacial information in addition to brightness information. -
Thank you for the correction.Originally Posted by jagabo
-
Originally Posted by johnmeyer
Here you go. -
OK, I attempted recapturing and setting brightness and contrast based on viewing the histogram alone (since I can't see the video while I am looking at the histogram in VirtualDub preview mode). I also temporarily cropped the black edges off while viewing the histogram, and then put them back for capture, and then subsequently cropped them off temporarily in my AVS script not to throw off the blacks when viewing histogram("levels"). Am I doin' this right?
I attached screenshots of where the histogram was during capture process, as well as the histogram in levels mode in AviSynth.
I had to bring up the proc amp brightness from default 110 to 124, and the contrast down from default 32 to 29, in order to not get any reds at the bottom or at the top. Everything is still pushed heavily towards the left, but I don't think I've lost the deep blacks this time, have I? We expect it to be pushed to the left since it's a dark video, right?
It still seems pretty dark to me. Can I push the limits with the proc amp settings and make brightness a little higher, and then dial contrast down a little to compensate for any crushed whites? Or is that going just make the video way too flat, dull, and gray and require more post processing?
Attached a part of the re-capture as well. How's this one? -
I pumped up the gamma and applied a very strong denoise filter to the second video. This is probably further than you want to go but it gives you some idea what's possible.
Code:LWLibavVideoSource("firstcaptake2-trimmed.avi") AssumeTFF() QTGMC() ConvertToYV12(interlaced=true) MCTemporalDenoise(settings="very high") ColorYUV(gain_y=70, off_y=-72, gamma_y=300) # full range and gamma ColorYUV(cont_y=-40, cont_u=600, cont_v=600, off_u=0, off_v=-17) # back to limited range, color adjustments -
Oops, I didn't see your latest sample. I took a quick look at it and the levels are pretty good. The black level could stand to go down a little lower because the black borders at the left and right are the darkest part of the frame -- and you don't really care about those. That's where a waveform monitor is helpful:
[Attachment 54754 - Click to enlarge]
In case you don't understand a waveform monitor:
https://forum.videohelp.com/threads/340804-colorspace-conversation-elaboration#post2121568 -
I agree with Jagabo. As I expected, and as I constantly say, DV is how people should transfer their VHS tapes. This thread provides all the reasons for why I recommend this.
In particular, your DV capture looks exactly as it should, with levels that are normal. The video is still dreadfully underexposed, but I was able to make the result brighter in Vegas using just the levels control. For the really dark portions of the scene I also used color curves. The next step would be to then denoise the result.
Since Jagabo already posted the results of his efforts, I chose to make mine brighter. It isn't necessarily any better this way, but I thought you should see something different. -
I wanted to see what you did here but I can't seem to get the MCTemporalDenoise fully working. I get a script error (there is no function named TTempSmoothF) even after installing the TTempSmooth dll into my plugins filter. Any idea why? nevermind, I got it. Yeah.. I want to go nowhere NEAR this level of denoising. It looks like a cartoon. Also- Why did you QTGMC and then interlaced=true on next line? Should that have been flip flopped? Can I just not QTGMC and add interlaced=true in MCTemporalDenoise?Originally Posted by jagabo
PS. Can I substitute LWLibavVideoSource with AviSource?Last edited by Christina; 3rd Sep 2020 at 21:34. Reason: Got it working
-
32 bit vs. 64 bit problem? If you're using a 32 bit editor you need 32 bit AviSynth and 32 bit filters. If you're using a 64 bit editor you need 64 bit AviSynth and 64 bit filters. With AviSynth+ 32 bit plugins must be in the Plugins or Plugins+ folder. 64 bit plugins should be in the Plugins64 or Plugins64+ folder.Originally Posted by Christina
If that's not the problem try explicitly importing the filter at the start of your script:
Code:LoadPlugin("x:\path\to\TTempSmooth.dll")Yes. I don't have a VFW huffyuv decoder installed so I used LWlibavVideoSource instead.Originally Posted by Christina
-
Ahhhhhhh, ok, making more sense now. Thanks!Originally Posted by jagabo
-
The DV war rages on...Originally Posted by johnmeyer
I am still determined to do better than my previous DV captures. Just need to get through the learning curve. Right now it's like drinking from a fire hose but once I get the hang of it, I think I'll be ok.
Thanks for posting an alternate version. Personally, I don't prefer either one But yes it does show something different and helps me see what is possible. Appreciate it!
-
Can anyone answer the above questions from earlier in the thread?Originally Posted by Christina
Also, besides these AviSynth filters used above, what other filters should I look into for the most basic common vhs/8mm cleanup?
ColorYUV()
MCTemporalDenoise()
QTGMC()
I should add, I know it's simply not possible to list every filter that could be helpful here, and there's plenty of info in the forums on dozens of available filters, but I am looking for the "ones you can't live without" for basic gamma/brightness corrections, maybe some slight denoising, for tapes that are starting off pretty decent. Just the basics - if that's even possible!! My tapes are in pretty good shape, and when I was doing them in DV, I wasn't applying any corrections at all (other than masking edges), and they were passable... no major issues so far to correct.Last edited by Christina; 3rd Sep 2020 at 22:19. Reason: I need to start proofreading
-
You can use as much or little denoising as you want. Changing the gamma to bring out dark details greatly increases the noise in those dark areas. So I was reducing the noise before the gamma change.Originally Posted by Christina
Oops, good catch. I was playing around with the order of the filters and forgot to remove the interlaced=true. QTGMC can work with both YUY2 and YV12 video, MCTD only works with YV12. So I had to convert to YV12 somewhere. I originally had the conversion before QTGMC but decided that having more chroma to work with might get better color from QTGMC. So I moved QTGMC up, but forgot to change the ConvertToYV12().Originally Posted by Christina
Yes, you can do that. Generally, progressive filtering works better than interlaced filtering (and some filters don't have an interlaced option). So if I don't need interlaced video I'll deinterlace early on.Originally Posted by Christina
-
Unfortuantely, the answer is "it depends". Some filters work only in some color formats. So you may need to convert formats before using some filters. Generally, you should avoid more conversions than is necessary as each conversion can lead to loss of precision, loss of super-blacks and super-whites, and blurring of the colors.Originally Posted by Christina
The problem with VirtualDub and interlaced YV12 is longstanding. The original author's point of view was that interlaced YV12 should not use the same fourcc as progressive YV12. So he refused to address the problem, expecting the rest of the world to start using a different fourcc for interlaced YV12. VirtualDub treats YV12 as progressive and will screw up the chroma. The result ranges from barely noticeable to obvious color artifacts (ghosting, horizontal stripes).
As mentioned above, progressive filtering generally works better than interlaced filtering. So if the output is going to be progressive video I deinterlace early in the filter sequence.Originally Posted by Christina
Some other basic AviSynth filters you'll often use:Originally Posted by Christina
Tweak()
Levels()
RGBAdjust()
ChromaShift()
aWarpSharp2()
MergeChroma()
SeparateFields()/Weave()
http://avisynth.nl/index.php/External_filters#Denoisers
http://avisynth.nl/index.php/External_filters#Rainbow_.26_Dot_Crawl_Removal
One of the best things you can do for your VHS sources can't be done in software: use a line time base corrector. That can take the form of an S-VHS deck with LTBC or a passthrough device with LTBC (like a Panasonic ES10 or ES15 DVD recorder). That will straighten up all those wobbly vertical lines/edges. -
Interesting. I am still trying to wrap my head around this as I was under the impression I should keep interlaced video interlaced as long as possible, including in any intermediate/archival copies, in case I want (for some reason) to output as interlaced at some point in the future. And then as the last step, deinterlace for final output file only. I also would need to do a bit of research to understand which filters work "better" on progressive (should be fairly easy to figure out which don't work on interlaced at all). So deinterlacing early on would solve that problem...Originally Posted by jagabo
Awesome, thank you. It's very helpful to have some type of "starter pack" to get going when first beginning with AviSynth. This is perfect. Thanks.Originally Posted by jagabo
I have an S-VHS deck and I believe it has some type of LTBC built in.Originally Posted by jagabo
I have an ES10. I haven't tried using it yet because I was working on some 8mm and not VHS. I've heard not to use it unless you see problems first. Is that true or should I just automatically use it if I'm capturing VHS? Can it do anything bad if it's not needed or can it only help?Last edited by Christina; 4th Sep 2020 at 09:47.
 Quote
QuoteSimilar Threads
-
How to capture analog video in Prores format?
By digicube in forum Capturing and VCRReplies: 31Last Post: 24th Sep 2023, 12:07 -
Video off phone to watchable format?
By Isaacthegamer in forum Video ConversionReplies: 2Last Post: 17th Aug 2020, 20:11 -
Capture Analog Video Losslessly Via FireWire !!
By dellsam34 in forum Capturing and VCRReplies: 43Last Post: 20th Apr 2020, 00:22 -
The Best Easy Way to Capture Analog Video
By digicube in forum Capturing and VCRReplies: 22Last Post: 16th Jul 2019, 05:48 -
How do I set the analog video capture resolution in Virtualdub?
By spotty in forum Capturing and VCRReplies: 5Last Post: 10th Dec 2018, 03:51