


With lots of research and lots of info ive collecti on the net and from many great people here at vcdhelp.com. Ive compiled a process to get Nero Digital movies to work on Phillips DVP642. Before i goto the trouble of putting the info together in a guide i wanted to see if theres enough intested in me doing this. So please put your comments ya or nah if theres enough people wanting it all make the guide and put it up. I havnt seen any other guides telling how to do this. Any comments are appreciated...
+ Reply to Thread
Results 1 to 19 of 19
-
-
I do it now. Demux the Recode file with MP4UI and remux with AVI_MUX. They usually play on the DVP642. I normally use the AC3 audio stream.
-
Ive complted the guide but it wont let me put it on with the screen and i want to show it step buy stop anyone know how to add pics into info on forums or do i just submit it to vcdhelp.com as a guide and set a link. I havnt done one before so any help on how to submit would be help I took the day and have comleted the guide just need to get it up here now.
Forget this one i figured it out -
How Too Run Nero Digital Movies on your Phillips DVP642
Programs Needed:
DVD Decrypter - V3.5.30
Nero Recode 2 – V2.2.6.17
MP4UI - V1.0 RC2
Nero Wave Editor - V2.0.0.57
VirtualDubMod – V1.5.10.1
AnyDVD 4.3.0.1 Optional But good idea
STEP-1: Ripping The Movie
Nero Digital well only work with unprotected files so our first task is to rip the movie to the hard drive. So insert movie into your dvd drive and then run DVD Decrypter you should see something like this:
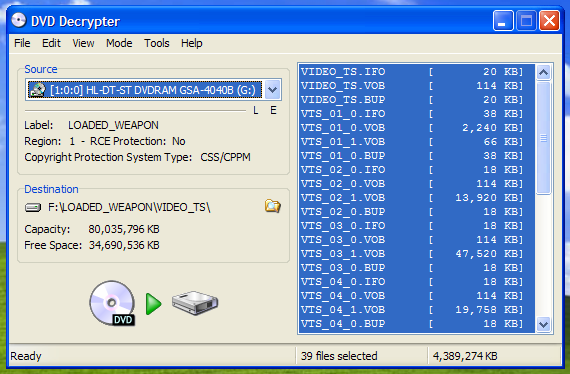
Click on mode and make sure its set to file everything should just be default settings.
Check your hard drive and make sure you have enough space available. I like to be on the safe side and have at least 10 gigs free. Unless you need to change your destination, you should now be ready to rip your movie. Just click on the DVD symbol below destination. You should now be seeing a screen like this:
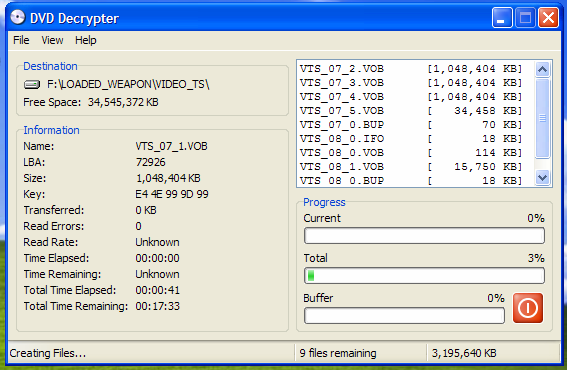
Depending on your system and size of movie etc this well take 10 – 30 minutes so grab a coffee and relax for a few while it does its job.
When it’s all done you should be seeing a screen like this:
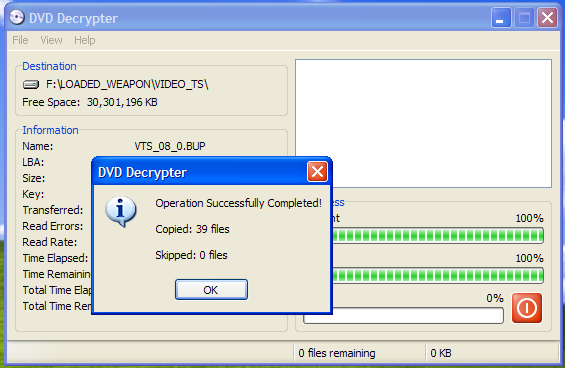
Just click ok and exit DVD Decrypter your ready to go onto the next step.
STEP-2: Converting The Movie to Nero Digital
Next step is to convert movie to Nero Digital so start up Nero Recode 2 you should see a screen like this:
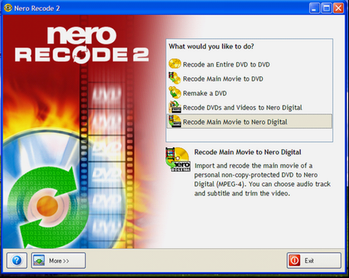
Select Recode Main Movie to Nero Digital just as highlighted above.
Our next task is to import our DVD into Nero Recode for conversion. Click on Import DVD after a short analysis of 1 - 4 minutes you should see a screen like this:
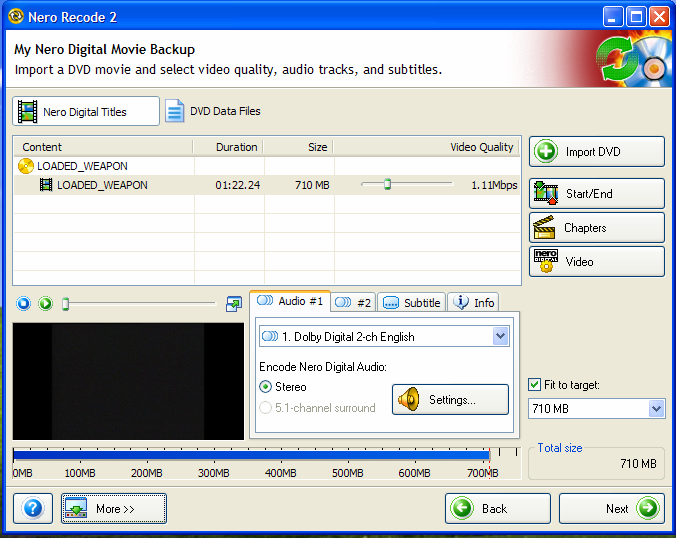
Click on the More button on the lower left, you should see a screen like this:
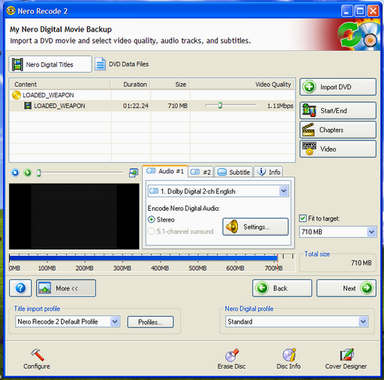
Make sure that the Nero Digital profile is set to Standard.
In your Audio #1 tab select your language, this depends on what audio tracks are available on your DVD. Do not change your audio settings just leave that at default.
Next click on your Subtitle tab and make sure its set to none.
Click on the pulldown menu below the Fit to target box. Instead of selecting CD [80 min] I like to select Custom… and set Target size to 710 MB. I know it doesn’t seem like much but every meg helps to improve your end result. But don’t worry when the file outputs it well still fit onto a standard CD-R without overburning.
Of course if your planning on putting your files onto a DVD-R you can increase Target size to whatever you want depending on how many movies you want to fit onto one DVD-R. Although increasing Target size can increase quality I think you well find that the 710 MB size well give excellent results.
The following step is meant to improve Video Quality Mbps rate, if you don’t want to do it just skip the next process.
Next click on the Start/End button so you can tweak the Video Quality Mbps rate just a little bit more. Using the slider bar on the End frame: (right side of screen) remove as much of the end credits as possible don’t go to far you don’t want to cut off the end of the movie. You should see a screen like this:
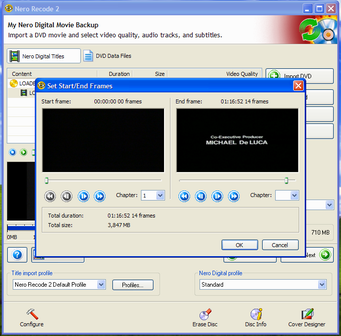
Click the ok button and you should see a small increase in your Video Quality Mbps rate. Like I said every little bit helps, now were ready for the next step click the Next button.
You should now be looking at a screen like this:
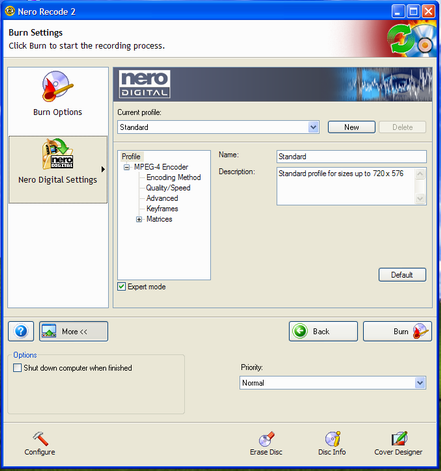
Click on Nero Digital Settings make sure the Expert Mode box is checked. The following settings are the most important part make sure everything is exactly set as I tell you or it wont work correctly on your DVP642.
First click on Encoding Method: I prefer to do a 2 pass quite a bit more time consuming. But, I do find it improves quality this one is up to you one or two wont affect the functionality of the movie only the quality.
Second click on Quality/Speed: here I do Extra quality this well increase your processing time as well, but it well improve your end result. You can however use a lower setting, that well decrease process time, but not effect the functionality of the movie only the quality. Other settings leave at default.
Third click on Advanced: Check the
Simple profile (Quick Time ™ compatibility) box
Spatial prediction box
Predicted VOP box
Unrestricted motion vectors box
4 motion vectors per macroblock box
Rest leave at default.
Fourth set Priority to Normal.
Fifth click on Burn Options and select your destination for the file set it to somewhere on your Hard drive don’t burn it its not ready for playing yet.
Last but not least hit the Burn button depending on your system and how you have done some of the settings this well take 1 - 4 hours. So grab lunch get some beer and chill this well take some time. When complete you should see a screen like this:
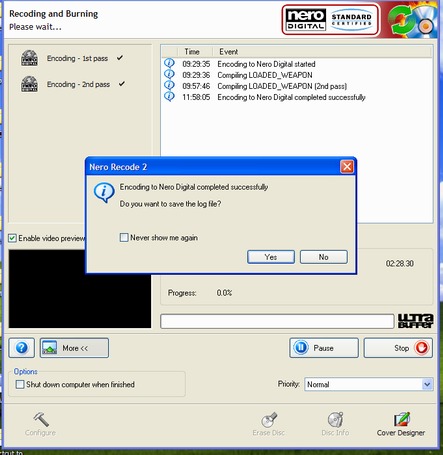
Click No click Next click Exit your now done with Nero Recode.
STEP-3: Splitting Up The Audio and Video Tracks
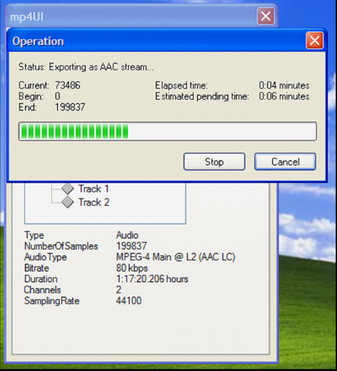
Next step is to split the tracks up this well only take a few minutes, for this part we need to use mp4UI. Load up the program hit open and locate your newly made Nero Digital movie and select the track below Video, your screen should look like this:
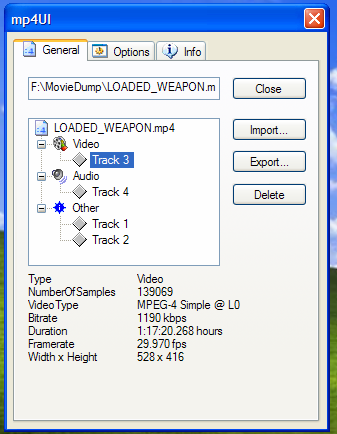
Now hit the Export button and choose your location and save your file. I called mine Loaded-Video so I wouldn’t get it mixed up with the other file since I’m saving it to the same directory as our source file. You should now see a screen like this:
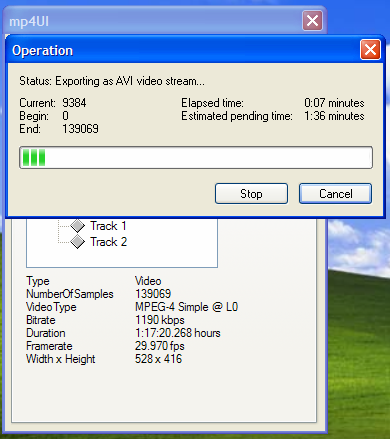
Note: Sometimes I’ve noticed that the status bar doesn’t show that it’s exporting. Think this is a program bug but rest assured it’s working this well just take a 1-3 minutes when it’s done it goes back to the general screen.
Our next task is to export the track just below Audio you should see a screen like this:
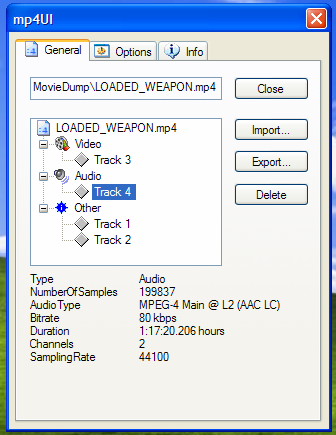
Now hit the Export button and choose your location and save your file. I called mine Loaded-Audio so I wouldn’t get it mixed up with the other file since I’m saving it to the same directory as our source file. You should now see a screen like this:
We are now ready to move on to the next step. You can close down mp4UI.
STEP-4: Fixing the Audio track
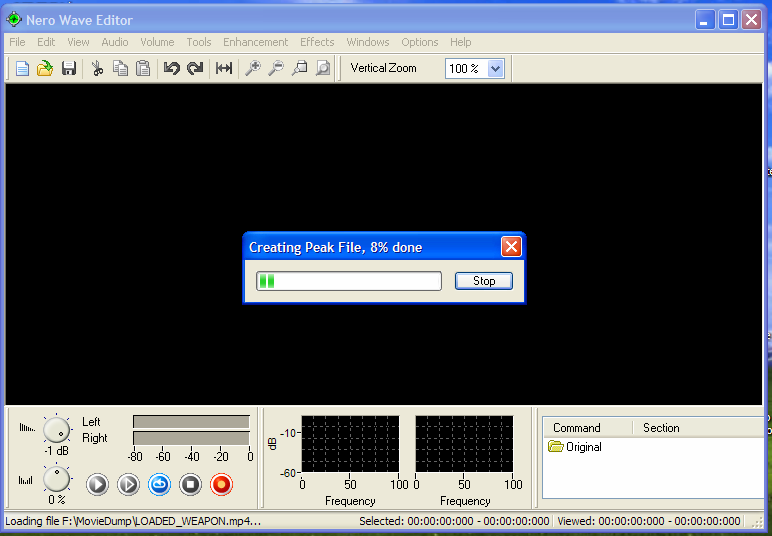
Now we need to use Nero Wave Editor so load up the program. Click on file select open locate your file then click on the Open button. You should see a screen like this:
Click on file select Save As make sure Save as type is set to mp3Pro(*.mp3). Type your file name and click on the Save button. You should now see a screen like this:
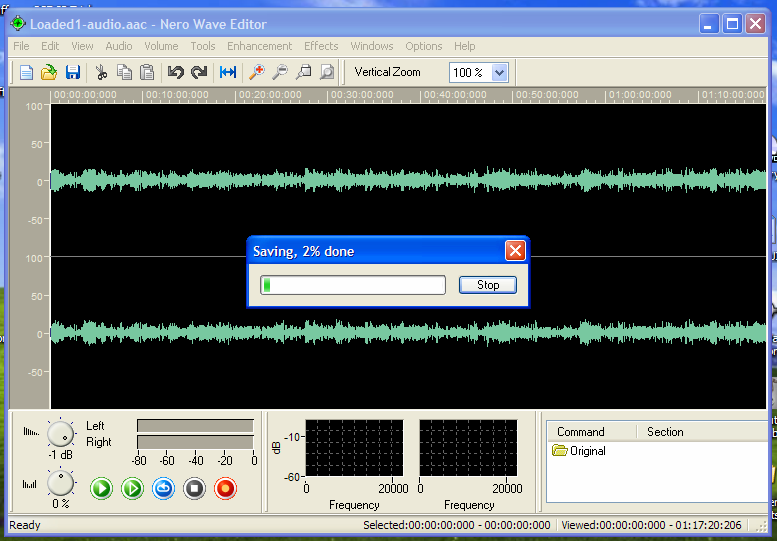
This well take 4-10 minutes so grab another beer and chill for a few minutes.
STEP-5: Putting It All Back Together
For the final step we will be using VirtualDubMod click on File and select Open you should see a screen like this: now click on the Open button.
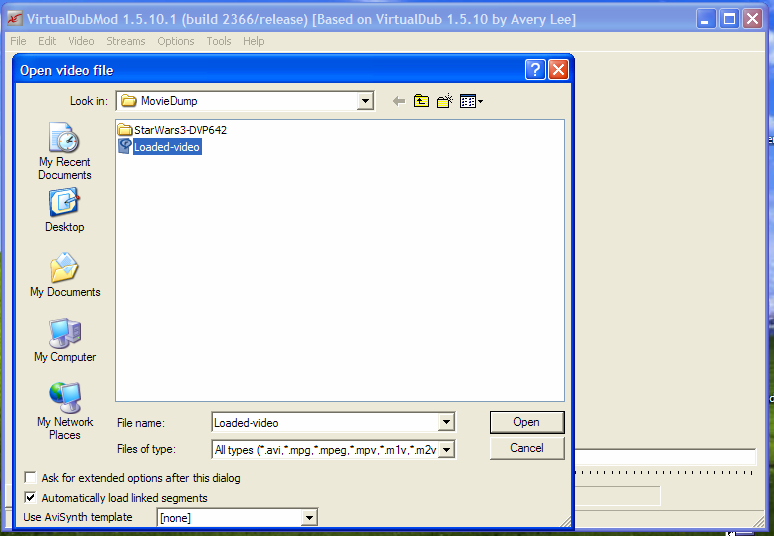
Now click on the Open button.
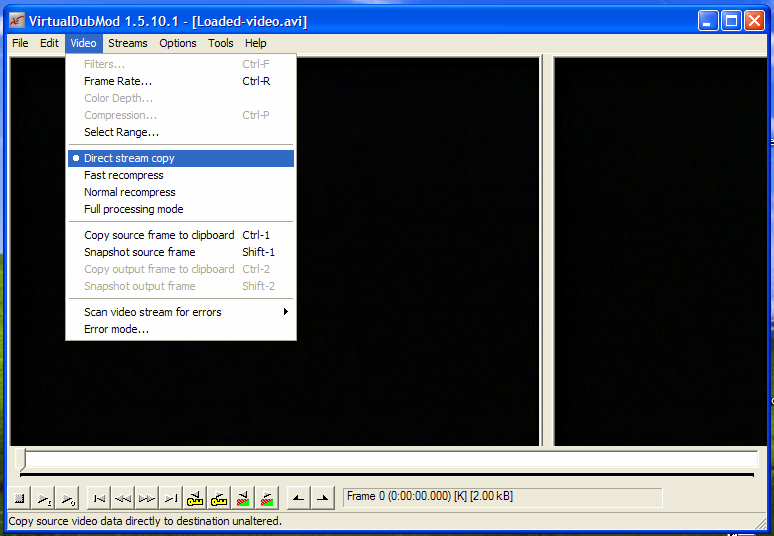
Next click on Video and select Direct stream copy you should see a screen like this:
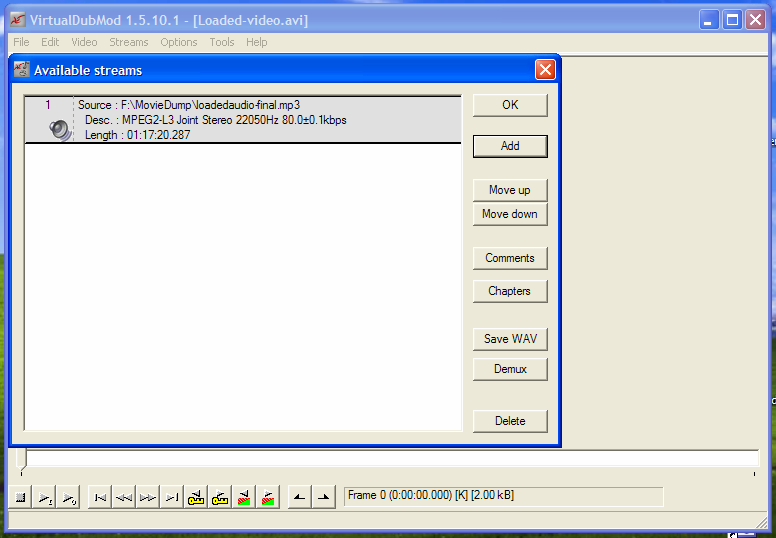
Next click on Streams and select Stream List click the Add button you should see a screen like this:
Now click OK, click on File and select Save As… Type your name and hit the Save button you should now see a screen like this:
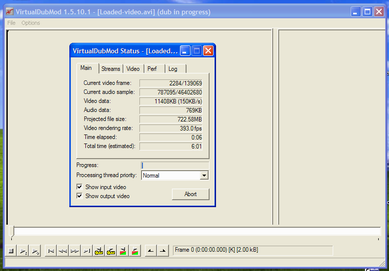
Sit back this well take 4-8 minutes for process to complete.
Everything is now done your movie is now ready to burn onto a cd-r or dvd-r I myself use a CDRW or DVDRW to test just to make sure file turned out ok. You now have a Nero Digitil file inside of an Avi shell it tricks the player into thinking it’s a Divx file and well now run fine. Well good luck in your conversions hope this guide helps.
PS: I would also like to thank everyone at VCDhelp.com for there information and comments that made this guide possible -
The method below is what I used last year after reading and getting help in the associated thread. It's an mp4 with mp3 audio in an avi container.
https://www.videohelp.com/forum/viewtopic.php?p=1046667#1046667 -
No bframes? Settings to avoid would be qpel and GMC, although ND can output 1 warp point GMC.
Also why re-encode the aac audio and not the original AC3? -
-
DvdDecrpt > dvdshrink > AutoGk > Nandub ?
Why not just: DVD Decrypter > AutoGK?
Well if you prefer NeroDigital over XviD or DivX, then the advantage is that you get ND. -
To answer your question Jafa: Nero Digital can do the movie as a 700 meg file with excellent quality so instead of one movie you can have 6 movies on one 4.7 gig dvd.
To my friend, my mate, my love, my queen - the honour is to serve -
Thanks Trident. Great guide. I've read several guides , some of them quite complicated but I've often come away thinking what were they trying to acheive in the first place. I didn't realise you could have different stream "flavours" inside the wrapper .
I've just got my hands on the software and I'll give it a go on my 642. On my PC its going to take me a week to do the encoding
I read up on a codec shootout on doom9 that included nero MD and HD profiles but the codecs were still under development when the article was compiled in 2004. The nero codecs came out very well. Have they changed version since that review ?Any screenshots ? -
This guide is for ND ASP not AVC which I think is what you will find doom9 tested.
-
One other tip incase you run into this problem took me days to get the answer if you do the movie convert etc and it plays good on comp and then on player all the faces are blue you can easily correct this..instead of making one 710 meg file split the movie in half and do 2 355meg files dont ask me why it works it just does took me a few days to come up with the fix. Did lots of others without this problem but last 2 were like that after lots and lots of different things that fixed it and its an easy one...no other changes neeed to be done other than splitting it into 2 files...when you get to picking your output size select custom and do 355megs and in start end do first half then when done do second half..so for example if your movie had a total of 24 sceenes you do 1-12 first for first file then 13-24 for second....hope that clears it up if not let me know and all break it down....
To my friend, my mate, my love, my queen - the honour is to serve -
Nice guide, the only problem though is that standard does not produce the best quality, imho only maximum definition AVC is worth using, and the new pimped version of xbox media centre plays maximum def mp4's
 red red wine you make me feel so fine
 -
Nice guide--now if we could only get ND AVC into the container
-
Digging up old threads (2.5 years in this case) to make comments to is what we call "Gravedigging". We don't like it.Originally Posted by headhunter03
So you dug up a 2.5 year old thread to make your 2nd all time post here and that's all you have to say? Great. Could your post have possibly been more pointless to the original thread? Thanks for nothing. If you're going to do this, at least make it relevant to the original post. -
Since this post is 2.5 years old and is probably referring to Nero 6 or 7....Is there an easier way of doing this now with Nero 8? Or Roxio Creator 10 or Studios 11 or Adobe Premiere 4.0....I have all of these programs because I wanted to see what the advantage would be for any of them.
HVR1600
Dazzle 100
Windows Media Extender Linksys DMA2100
DVD Read Write
Dual core processor CPU
2 GB RAM
I like my movies and I record my TV shows. I would like having back ups of my DVD's.
If I could load my DVD's up on the computer in a smaller file and store them in a folder on an extra hard drive then I would not have to keep DVD's. Of coarse with out loosing quality. BTW Linksys DMA2100 works well.
 Quote
QuoteSimilar Threads
-
Phillips DVP642/37 help with DTS Audio problems
By cram_it_2000 in forum DVD & Blu-ray PlayersReplies: 6Last Post: 24th Sep 2008, 15:29 -
Phillips DVP5982 vs Phillips DVP5992?
By jarko in forum DVD & Blu-ray PlayersReplies: 4Last Post: 12th Jul 2008, 13:41 -
Trouble makeing a DVD without Glitches
By mongoo13 in forum Authoring (DVD)Replies: 3Last Post: 27th Apr 2008, 04:51 -
phillips dvp642
By bored23 in forum DVD & Blu-ray PlayersReplies: 8Last Post: 11th Mar 2008, 07:54 -
Makeing DVD from avi. with Custom Chapters
By Eternal7331 in forum Authoring (DVD)Replies: 7Last Post: 18th Jan 2008, 21:31