


Hi,
Im having some trouble getting my DVD cover to print onto the dvd properly.
Im using Verbatim 16x DVD-R.
Says on the tub it is 119mm, 21mm:
If I use the measurements given, then I either get a white band round part of the edge of the DVD where it hasn’t printed, and round the middle rim as well.
I tried 120mm, 20mm instead, and it left no white bits it hadn't printed on, which was great, but I still have one problem.
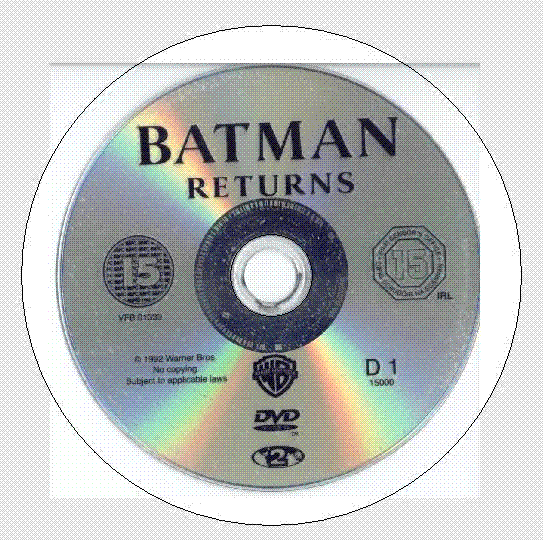
Look at the picture, don't care about the outer part, I know that’s totally wrong, that isn’t the problem - im showing you an example of what’s happening with the inner hub. In the picture, that should print the blank middle round the inner hub almost exactly, but when printed, the blackness is not in a circle like it should be, its skewed to the right.
Using epson print CD program supplied.
Please help!
+ Reply to Thread
Results 1 to 6 of 6
-
-
Member

- Jul 2004
- United States


What is the picture resolution? I print using the R200. All my pictures resolution is 300dpi and size is exactly the DVD size. I believe it is 4.73x4.73 inches.
-
Not sure what DPI but its a good quality image, just looks bad there.
Do you have to add 1mm to each outer/inner measurements as well?
I really want to fix this :/ -
Isn't there a nudge setting to shift it? If not, you can decrease the inner diameter a bit to overprint.
-
Member
- Jul 2004
- United States
-
I just remembered that I had similar problem with Verbatim. I think it is just the printing surface quality. The only way I was reduce it (not completely fix it) was to increase the size like you did.
However, you should be able to move the picture in any direction. There should be a nudge option. I think it is Yellow button on the left side. If not yellow, then green one. You should be able to move in 0.1mm increments.
TY DVDs printed good. No white bands on the inside or the outside.
P.S. DPI is dots per inch. The more DPI the better is picture quality. However, the size also increases. For example: Picture with size 4"x6" @ 300 DPI will look much better than the same picture size @ 150 DPI. -
It is very easy to resize an image to fit the print area. First, click on the image. You will then see four black boxes on the top and bottom and left and right side of the image. These are drag handles. Click on these one at a time and hold your left mouse button down and drag each edge so that it fits properly in the print area of the disc. The print area is the black circle that you see on the screen. It is a good idea to drag the edge of the image just past the edge of the print area to insure that you use the full print area.
 Quote
QuoteSimilar Threads
-
Epson R220 problem printing on discs
By nwo in forum MediaReplies: 3Last Post: 2nd Jun 2011, 13:15 -
Epson R260/R280 magenta color not printing
By rempro1 in forum MediaReplies: 3Last Post: 12th Apr 2009, 03:26 -
Anything I should know about the dvd printing for the Epson R280 printer?
By yoda313 in forum MediaReplies: 7Last Post: 19th Jan 2009, 17:33 -
Adding BLUETOOTH to Epson R300 using Dongle ... Which one works?
By Toaster in forum MediaReplies: 4Last Post: 13th Sep 2008, 08:19 -
Canon ip4300 vs Epson 260 for printing dvds
By ultraman36 in forum MediaReplies: 0Last Post: 13th Jul 2007, 14:03