


 / Vista 64bit
Intel Pentium D 950 @ 3400 MHz
SAMSUNG 250 GB / 80gig wd
1024 MB
Nvidia Corp GeForce 6600 LE
Avertv Usb2 / Winfast dvt2000h dvb
centrex , voxson , hyundia , xms888
liteon - xj-hd165h
LG / HL-DT-ST DVDRAM GSA-H10N
Ga - P4M800Pro-8237
Wintal dvdrx250 , Xbox360")
This guide explains the process as used by professional data recovery services ...
The process is used where the control circuit nolonger functions on the unit you wish to recover data from . However , you will need to source a replacement unit (used , functional , may have bad sectors) in order to recover data ...
In this case , my drive was a western digital 80 gig BB model .
The second unit (wd bb) was sourced from a retailer for $12.00 (p/h) , and was reported as having many bad sectors , but the controler circuit was fully functional .
---------------------------------------------------------------------------------
The first things you need are :
1: Another hard drive (matching model) , drive is tested prior to carrying out the rescue process (dosent make sence to do all this work if the replacement is stuffed as well)
2: Security socket kit (available from dicksmith / tandy / bargain warehouse) .
This kit should contain the 6 sided star bits , and you require 2 sizes .
If you are very good , you can also use hex keys , though alittle more fiddly , and awkward to use ...
3: Most important is a dust free work area .
Other items would be lint free cloth , as used for arm slings , so as to handle platters or a cotton glove (easier) and pipe cleaners (4 of) .
------------------------------------------------------------------------------
Ok , you have the tools , the matching unit , dust free work area , lets move on ...
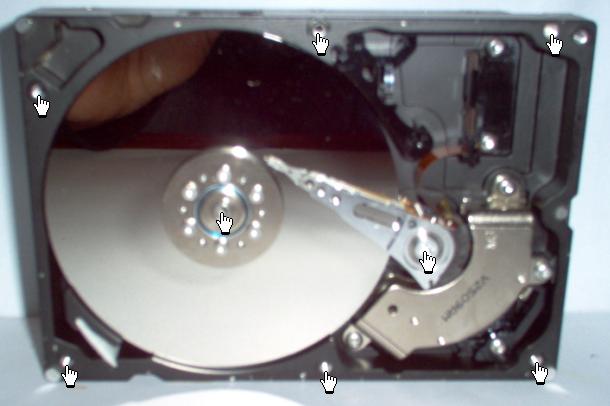
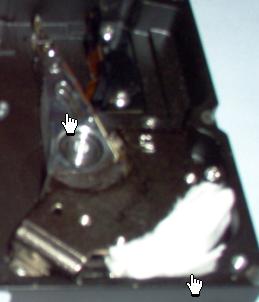
In this picture below , I have marked where the cover screws for the BB models cover are located with a hand cursor , note there is one under the unit label (smack bang in the middle) , and one under the round silver seal . So you will have 8 screws to remove first , before doing so , place the drive on a flat , clean surface .
You may after the removal of the screw's , need to use a small bladed screwdrive at each corner to assist in the removal of the cover , it should come off without any problem . Once loose , lift carefully straight up , then place it away to the side , with its screws .
Turn the drive so that the ide connector is facing to the right .
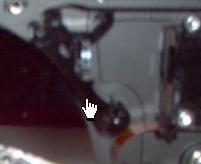
To start off , in the upper right hand of the picture is a plastic guide , this guide will slip straight up and out , so do that first ...
The guide :
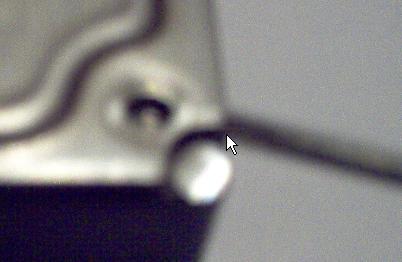
Next is the removal of the small magnetic lock , there is 1 screw to remove .
The magnetic lock :
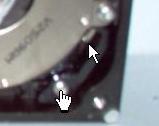
Look carefully and you will see the end of the armiture , and you'll notice a small metal tab , that sticks to this magnet .
You can use a small tool to gently push the metal tab to the left , just to break the magnetic hold .
Just under this location , is a small gap in the plasic guide , it is this area that metal tab will pass through so you can remove the magnetic lock from the drive .
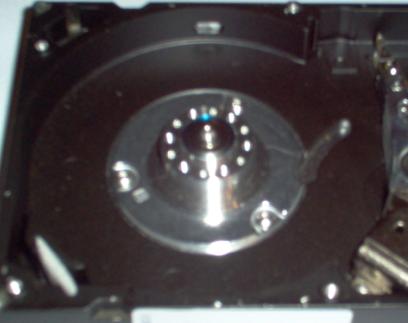
Ok , now for the platters :
Gently push the the armiture to this position :
As you will notice , I am using a small wad of linen to keep the armiture in this position , to prevent it from swinging back over to the platters .
Next : Platter removal
You should now put your cotton glove on or rap the hand that will hold the platters from turning in linen cloth (lint free) , the other hand will be busy unscrewing these 6 screws .
For this , I'll just use my bear fingers , I already rescued all I needed before , I'm just doing it for the guide .
Now the tool I am using for the removal of the screws is a hex bit which fits nice an tight .
Removing the screws in a diagonal pattern , once a screw is completely free , you should grab it , lift it directly up , then away , do not let the screw's or the tool come into contact with the platters .
Do this for all screw's .
Now to remove the platter assembly .
Place a piece of linen cloth over the hard drive .
Grab a dvd case , or other flat object like a hard cover book , and place it directly over the top .
Now grab the whole lot , including the drive , keep it together , and flip the whole thing upside down , so you are now seeing the control circuit .
Carefully withdraw the body of the hard drive straight up and then away from platter assembly ... done .
The empty carcase :
Take a break now ...
You now need to repeat the process with the replacement drive .
As this drive you are now dissasembling is the unit to be used for the data recovery , repeat all process's till platters are removed .
This is were you need to take your time , and be carefull , as there is no room for your fingers and the platters inside the hd carcase , so reinstalling the platters should be done slowly .
Sorry no photo for this one :
The easiest way to reinstall the lower platter is by using pipe cleaners , bent too form a craddle , where the platter is suspended between them , and all four ends are twisted together for you to hold onto .
Remmember "the lady of justice" holding the scales , just like the end of the scales , only the platter is suspended this way .
Looking at the platter assembly you want to install , provided you removed the same as the prior drive , the assembly will be upside down .
Take the first platter (the one on top) , turn it upside down , place into craddle , and lower into drive , once at bottom , you simply turn the cradle so you can slide the pipe cleaners out , over near the armiture .
Next , the spacer , turn upside down , and lower into position .
Last platter , turn upside down , and it can be placed by hand carefully .
The security ring , turn upside down , and install .
The screws should be screwed in , but not tight , just get them all installed on the platter assembly .
This is where my drives problem was , wd overtightened one of the screws which caused the noise , after I did this , the noise left , and the drive has been perfect ever since .
This will take carefull judgement on your behalf , you not only need to tighten them in a diagonal pattern , but all must be tightened with the same amount of pressure .
Now , once you are sure the platter assembly is secured , hold the armiture , and remove the wad that secured it from coming back to the platter assembly .
Turning the platter assembly in an anticlockwise direction , allow the armiture to move towards the platter assembly .
You may need to supply a slight amount of pressure to the side of the armiture in order for the heads to to remount onto the platters .
Now move the armiture to the left so the heads are near the center of the platter assembly .
You may now reinstall :
and
Followed by reinstalling the cover .
The drive is now ready for recovery process .
Firstly , I use an old atx power supply , which has the reset wires connected to each other , so as to test the drives power up abilities .
After passing ok .
Having a few old pcs laying about , I then test the drive to see if the unit can be seen in the bios .
If the bios can detect the drive , but reports wrong size , thats a bios limitation .
This is normally fixed by modifying the number of heads , sectors and cylinders , for this info , please search for "diskgo" , used to be developed by seagate , but is now developed by another company , however , the bios tweak should be relatively easy to find for those who need it .
Its a bios overlay tool ...
If the drive can be seen , even though the bios reports incorrect size , and the drive seems stable , and the test pc hasnt had any problems , then the drive itself can be considered ok for return to the pc that will perform the recover .
I have personally used diskgo on a bios limited pc when I installed a 20 gig drive , installing the repaired hard drive on the second ide connection worked , but only required the bios tweak , the changing of cylinders , heads and sectores for the second ide .
----------------------------------------------------------
Should the drive not perform to satisfaction , you should retrace your steps to locate the fault .
The drive used in this guide is still working well , but I wouldnt recommend pulling them apart more than twice .
The platters from the replacement unit weren't in good shape , so they were trashed , along with the old hd carcase , but I took the spindle / motor assembly and armiture before doing so , as spares .
---------------------------------------------------------
Currently about to release the 700+ music dvd ... sorry ... but tree plantings have taken a considerable amount of my time this year ... cant wait for my first batch of cherries , pistachios , boysenberries ...
+ Reply to Thread
Results 1 to 1 of 1

 Quote
QuoteSimilar Threads
-
DVD player to connect to a PC hard drive, or a networked hard drive?
By lifengwu in forum DVD & Blu-ray PlayersReplies: 0Last Post: 8th Oct 2010, 20:40 -
SATA, Hard Drive, Desktop only picking up part of the hard drive?
By Ghtpua in forum ComputerReplies: 9Last Post: 16th May 2010, 19:46 -
Sony Vaio with partitioned hard drive(Want full hard drive space on C)
By neworldman in forum ComputerReplies: 11Last Post: 17th Mar 2010, 14:42 -
Hard-Drive write caching,Is my hard drive faulty
By jezzer in forum ComputerReplies: 33Last Post: 27th Sep 2008, 12:06 -
Replace Dead Hard Drive From DVR 533HS With Working Hard Drive From DVR 640
By gordo1811 in forum DVD & Blu-ray RecordersReplies: 2Last Post: 12th Dec 2007, 16:58