


This guide will describe the basic steps how to convert DV to WMV (or other interlaced captured material such as TV to WMV) using Windows Media Encoder. Windows Media Video is a useful video format if you want to share your dv video over the net, it usually doesn't require any additional codecs on windows systems.
Tools Required
DVIO or WINDV (Copy/Capture the DV to your HD)
Windows Media Encoder
Guide
Copy the DV to the HD
Use WinDV or DVIO and copy the DV your HD. Use type2 dv. Remember that DV is huge, around 217MB/minute so you need lots of free hd space.
Convert to WMV
Start Windows Media Encoder.
Close the Wizard
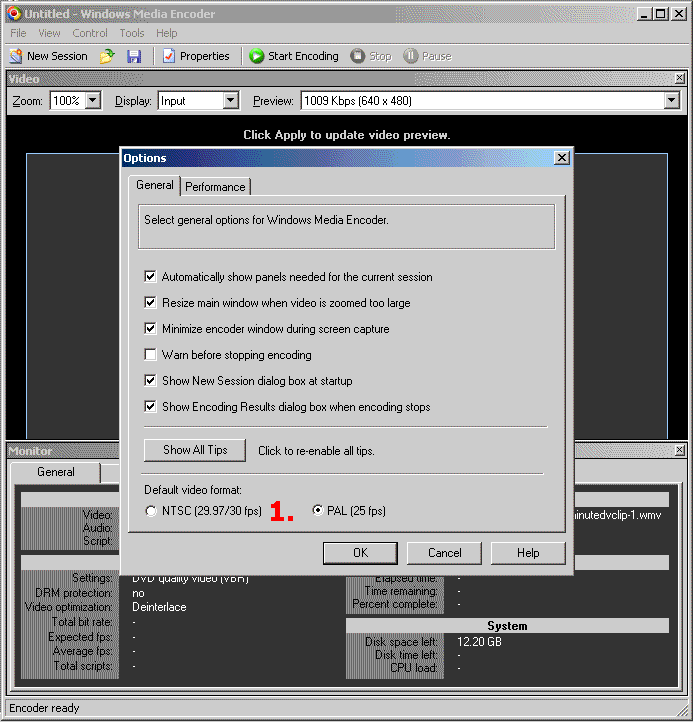
Set the Default Video Format to match your DV source.
USA,Canada and Japan = 29,97(NTSC) and the rest of the world 25 fps(PAL)
Restart Windows Media Encoder if you changed the Default Video Format.
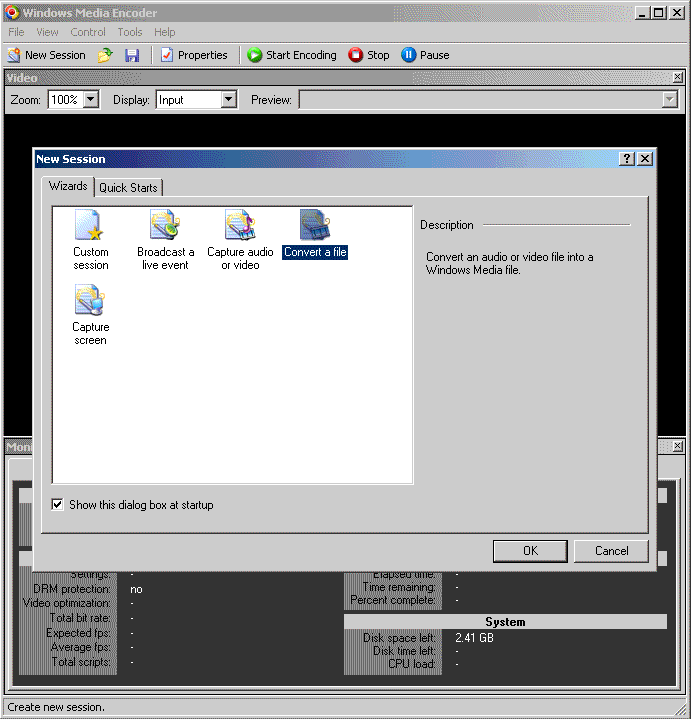
Click New session
Select Convert a file
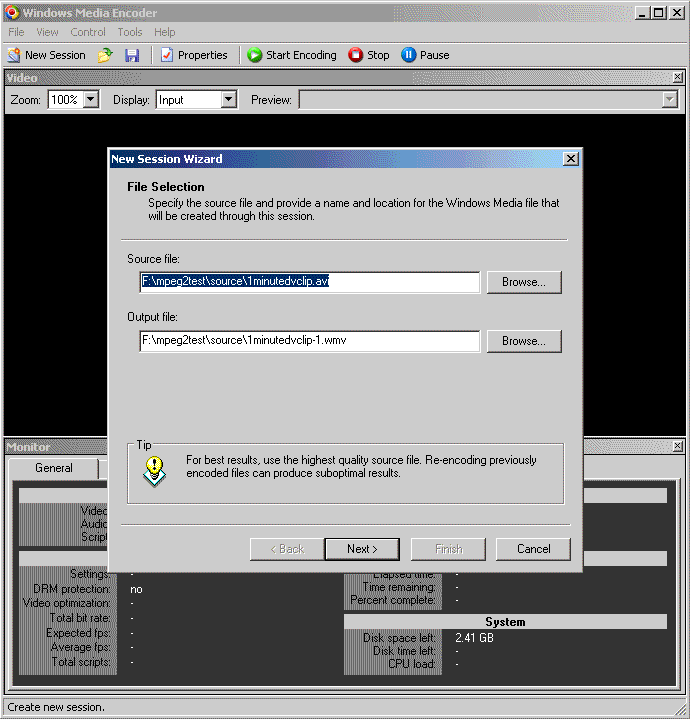
Open the video, if you can't open it try install the Panasonic DV Codec. If you still can't open the DV try convert to DV Type 2 with DVConverter or Canopus DV File Converter or DV Type 1 to DV Type 2 Converter.
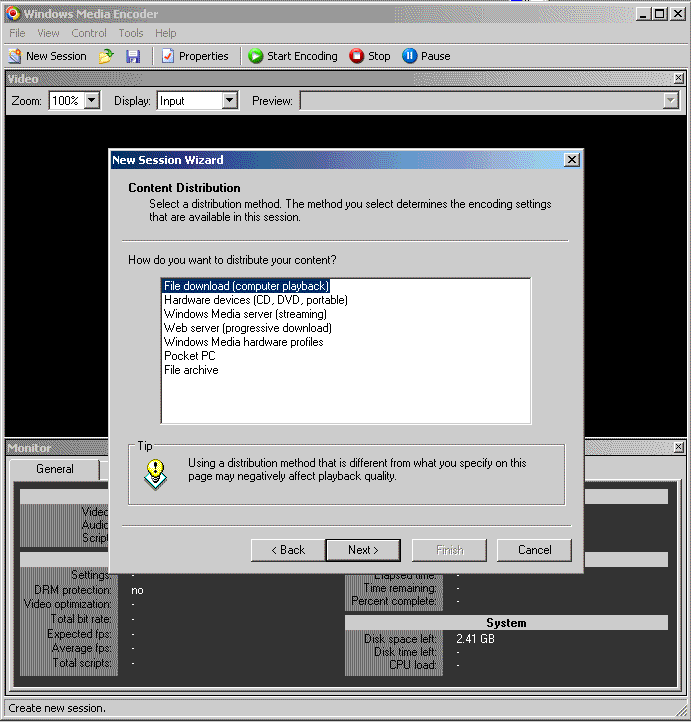
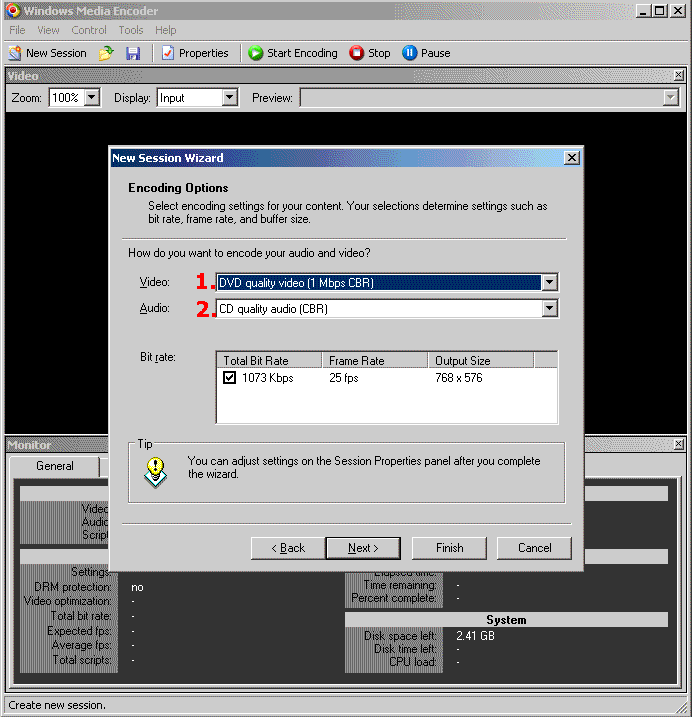
Select File download(computer playback)
1. Set the Video bitrate, I use DVD video quality 1 MBits CBR
2. Set the Audio bitrate, I use CD quality CBR
WMW output sizes:
DVD video quality 2 MBits CBR will be around 16 MB/minute.
DVD video quality 1 MBits CBR will be around 8 MB/minute.
VHS video quality 250 KBits CBR will be around 2 MB/minute.
Higher bitrate means higher quality, the WMV DVD video frame sizes is 768/640x480 and WMV VHS is 320x240. You can change the bitrate and the video frame size later.
Disable Begin converting when I click Finish
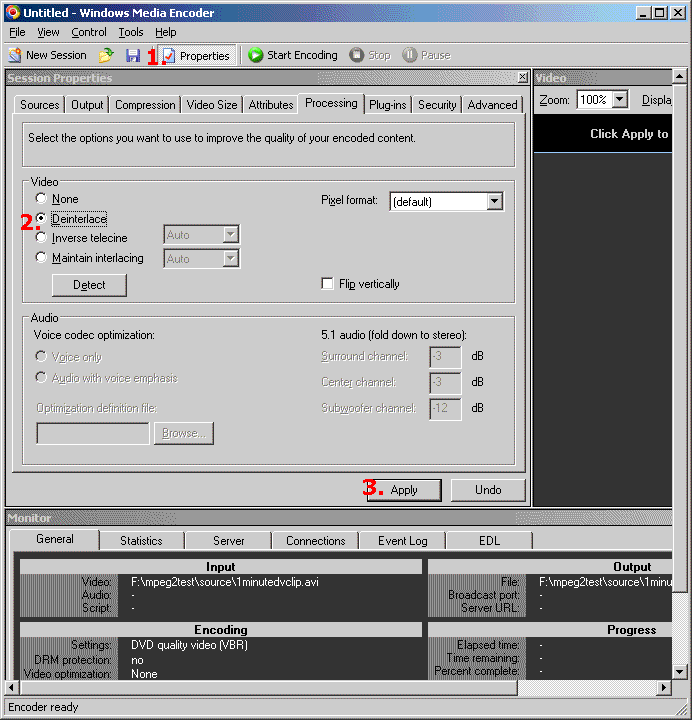
Deinterlace
Most DV Cameras captures interlaced and if you watch it on your computer you will notice interlaced lines so we must remove them by deinterlace the picture. Read more about interlace over at www.100fps.com .
1. Select Properties
2. Under Processing select Deinterlace
3. Apply
Video frame size
1. Select Video Size
2. Change the Frame Size to 640x480 or lower. Some common 4:3 sizes are 640x480, 512x384,384x288, 320x240
3. Be sure that the Output aspect ratio is 1.33(4:3)
If you use lower video frame size you can decrease the bitrate and make smaller wmv files and still keep the video quality pretty good.
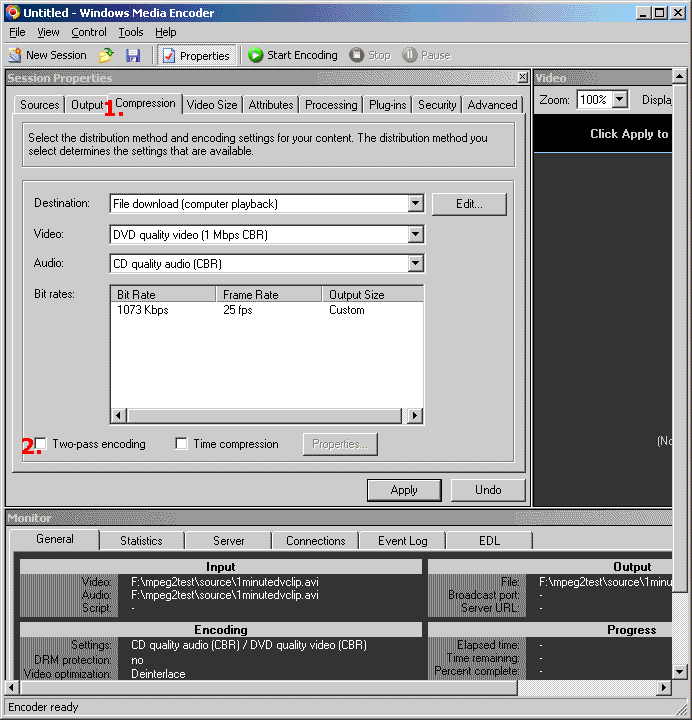
Compression
1. Select Compression
2. Disable Two Pass Encoding ( you can enable this if you want better quality but it will take much longer to convert)
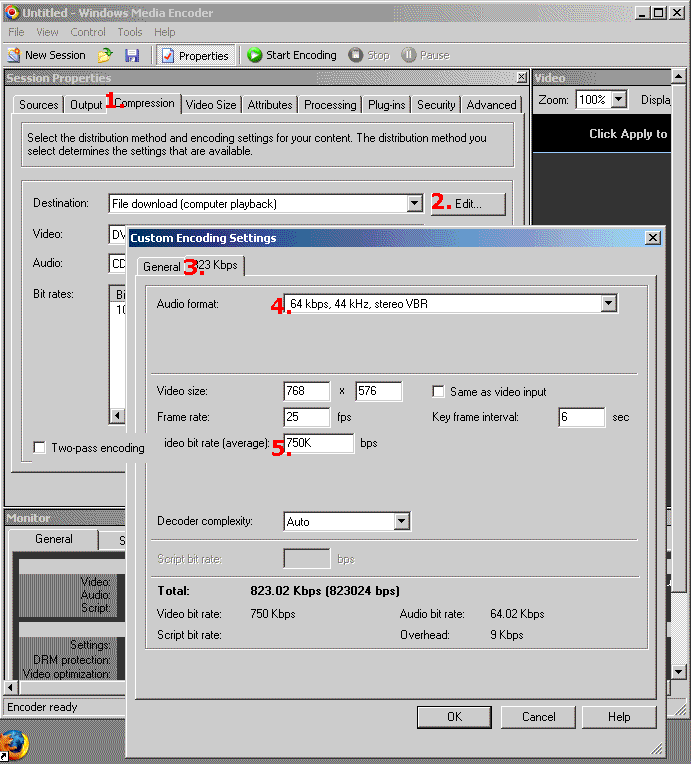
Custom video bitrate (this step is optional)
1. Select Compression
2. Click Edit
3. Click on the xxx kbps
4. Set the audio bitrate
5. Set the video bitrate
You can use our VideoHelp Bitrate Calculator to calculate the bitrate. If you use low bitrates, below 750kbs, be sure to lower the video frame size also or it will look really bad.
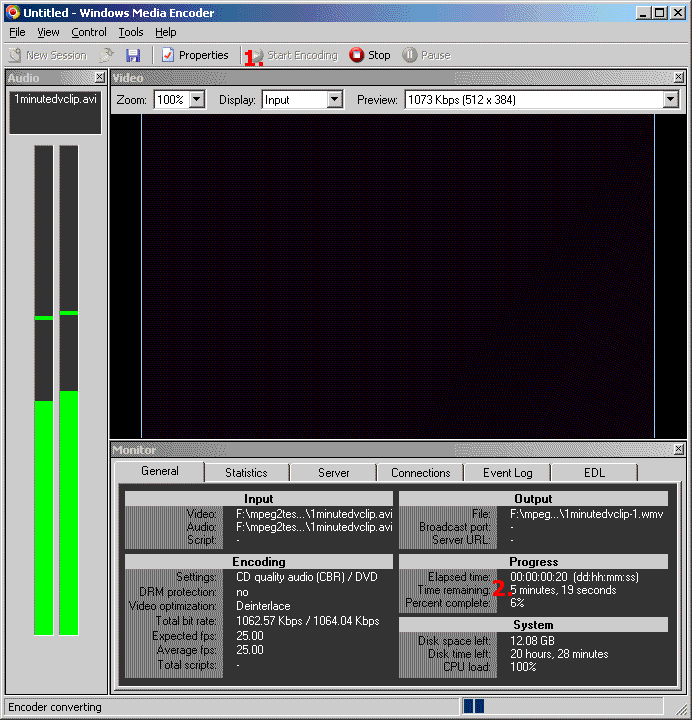
Convert
1. Last Hit Start Encoding to convert
2. Check the time remaining...windows media is slooooooooooow on my Athlon 1.2GHZ, 6 minutes to encode 1 minute video.
Done.
+ Reply to Thread
Results 1 to 11 of 11
-
I'm a MEGA Super Moderator

- Aug 2000
- Sweden


-
Great guide.
One comment though: I do any resizing and deinterlacing of DV footage in a professional video editor first (Adobe Premiere, output format uncompressed avi). It's my experience this gives better quality in the end.
I only use Windows Media Encoder for what it does best: encoding. -
I'm a MEGA Super Moderator
- Aug 2000
- Sweden
-
I know, deinterlacing and resizing is better in other tools like the smart deinterlace plugin for virtualdub or some avisynth scripts. But this guide is just the basic steeeeeps, not the best quality method.
-
When I follow these step, I usually get a diagonal line, sort of sync problems between different frames. Could you advise me how to get rid of it?
Thanks,
karthik -
I'm a MEGA Super Moderator
- Aug 2000
- Sweden
-
do you deinterlace?
-
yes, I did. I didn't see any horizontal lines which I would usually see incase of an interlaced video. Only the diagonal lines.
-
Hi there,
New to this forum, looks great for a video guy! I was trying to follow the guide but hit two problems,
when I export from Avid Express Pro as an AVI, Windows Media Encoder tells me that this file type is not supported. So I exported as WMV and it worked, but should I be using AVI files? And secondly, can I use 16:9 video instead of 4:3? How do I change the setting and will it provide "flags" for a 16:9 monitor?
Thanks for the help! -
I'm a MEGA Super Moderator
- Aug 2000
- Sweden
-
why convert to wmv with wme if you can convert to wmv with avid???
-
hey im following this guide, however the 2 pas encoding option is grayed out, and i cannot uncheck the box. What gies? The second pass incredibly slow (and i find uncessary for my needs).
help?
-
If this is supposed to be a simple "capture DV, edit & output to WMV", wouldn't it be easier to use WindowsMovieMaker? It can do all those things in one app.
Scott -
I'm having the same problem, anybody know how to turn off two-pass encodingOriginally Posted by shiz1
 Fight overpopulation, eat babies :spell:


 Quote
Quote
Similar Threads
-
Need help getting RID of subtitles in wmv (Windows Media Encoder)
By BooBerry in forum Video ConversionReplies: 4Last Post: 6th Feb 2010, 09:58 -
Windows Media Encoder: AVI to WMV Two-pass problem
By apoon204 in forum Video ConversionReplies: 1Last Post: 24th Mar 2009, 02:45 -
HELP! How to Streaming more than one wmv file in Windows Media Encoder
By smcalpine in forum Video Streaming DownloadingReplies: 4Last Post: 16th Jul 2008, 09:19 -
Cant convert DV into WMV using Windows Media Encoder
By Viola123 in forum EditingReplies: 2Last Post: 2nd Dec 2007, 14:57 -
Stream to WMV without using harddrive? (windows media encoder)
By spanoj in forum Capturing and VCRReplies: 4Last Post: 20th Aug 2007, 07:37