


Sorry for my grammar, hopefully it will be undersoodable.
If you’re using a Mac and you’ve managed to follow all the steps but only the key_boxes directory is created (without the private_keys directory), you should do the following:
1. Pull the libwvhidl.so file from your device:
2. Use nm to inspect exported symbols:Code:adb pull /vendor/lib64/libwvhidl.so
You will get output like this:Code:nm -gD libwvhidl.so
3. Add these symbol names to the KNOWN_DYNAMIC_FUNC array in dumper/Helpers/script.js. The updated first line should look like this:Code:000000000017de28 T tfayzalk U time@LIBC 000000000017f6f0 T umsygtib U unlink@LIBC 000000000017f23c T vauxqowp 000000000017dbe8 T vlezovbp 000000000017daac T vngfjbek U vsnprintf@LIBC 00000000001802a0 T vyxlkkyb 000000000017e504 T ydihlccg
4. Run the process again. This time, the private_key directory will be generated with the correct files.Code:const KNOWN_DYNAMIC_FUNC = ['ulns', 'cwkfcplc', 'dnvffnze', 'kgaitijd', 'polorucp', 'vauxqowp', 'vlezovbp', 'vngfjbek', 'vyxlkkyb', 'ydihlccg'];
credit to This GitHub comment
+ Reply to Thread
Results 781 to 810 of 856
-
Last edited by streetf22; 12th May 2025 at 13:15. Reason: I've managed to help my self.
-
I've really followed the instructions with the help of ChatGPT because I'm not comfortable with python. The only changes I've made are the ones listed above.Originally Posted by suwofis

-
Someone could tell me where the problem may be, he's been trying to load the bitmovin page all the time and he always restarts.
-
Bitmovin was an impossible issue for me because of CloudFlare not liking a virtual device legitimately. I had to use another streaming page using widevine in my country to trigger the DRM and the tool.Originally Posted by JBR2001
-
A rapid Google search pointed to this page: https://reference.dashif.org/dash.js/latest/samples/drm/widevine.htmlOriginally Posted by JBR2001
The website I've used requires a French IP and a paid account. -
I had the same issue. What worked for me was this:Originally Posted by JBR2001
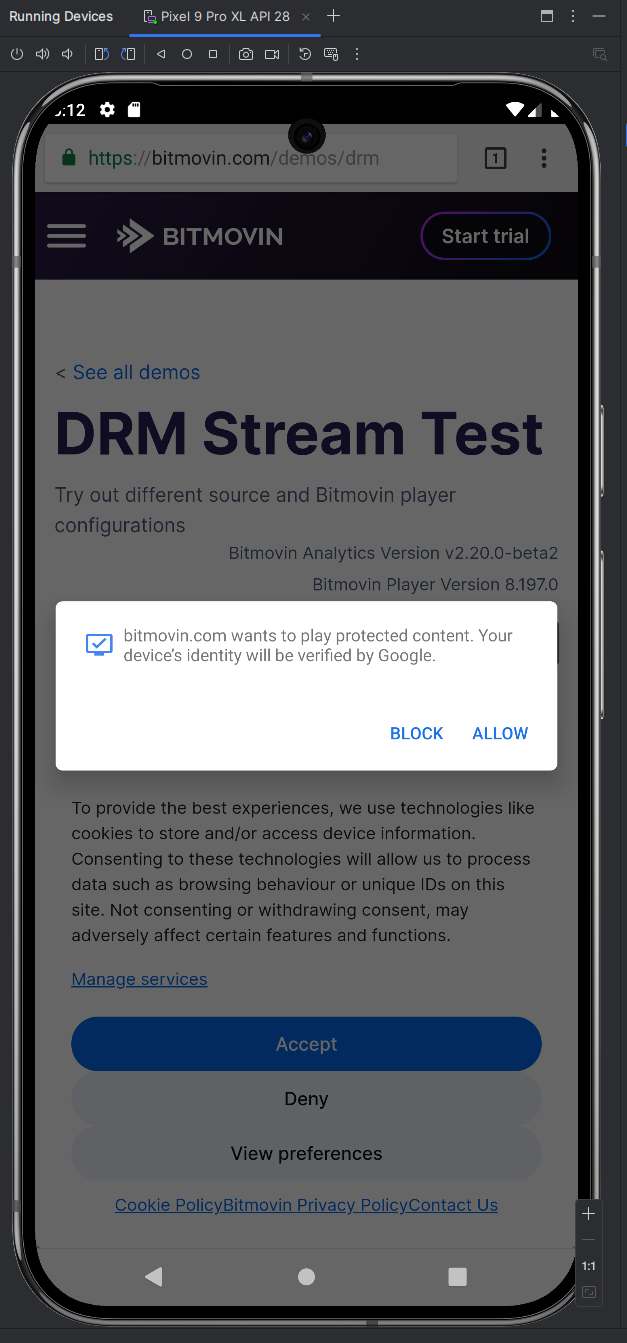
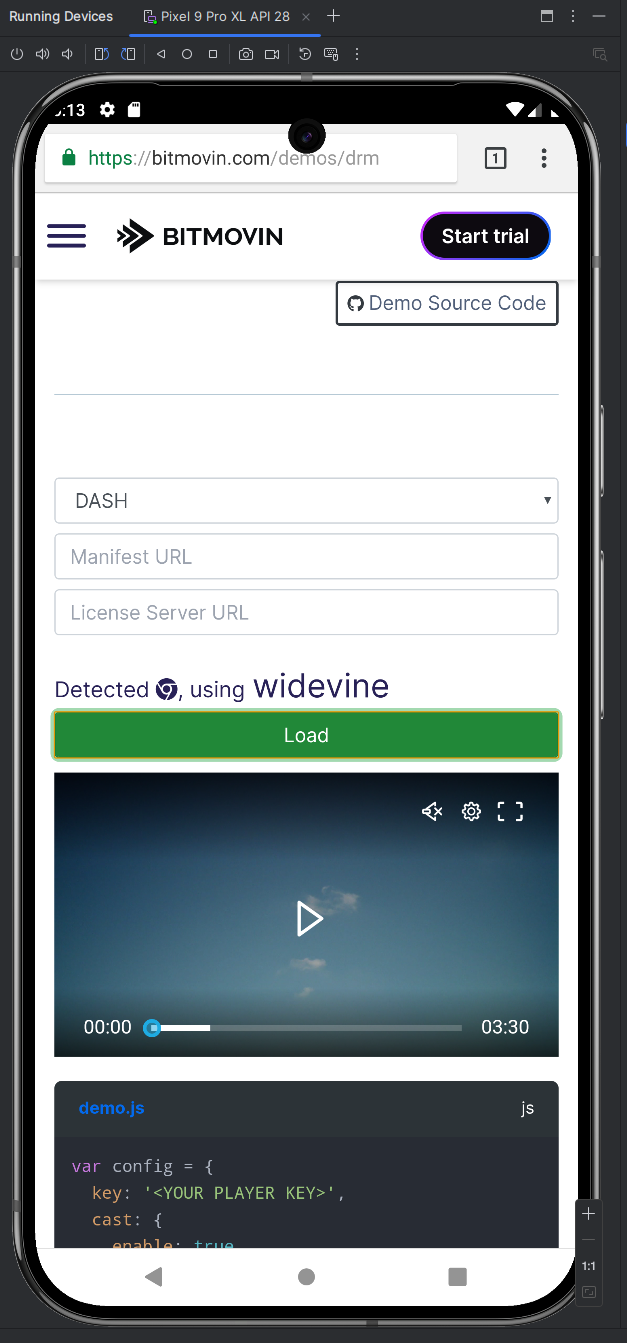
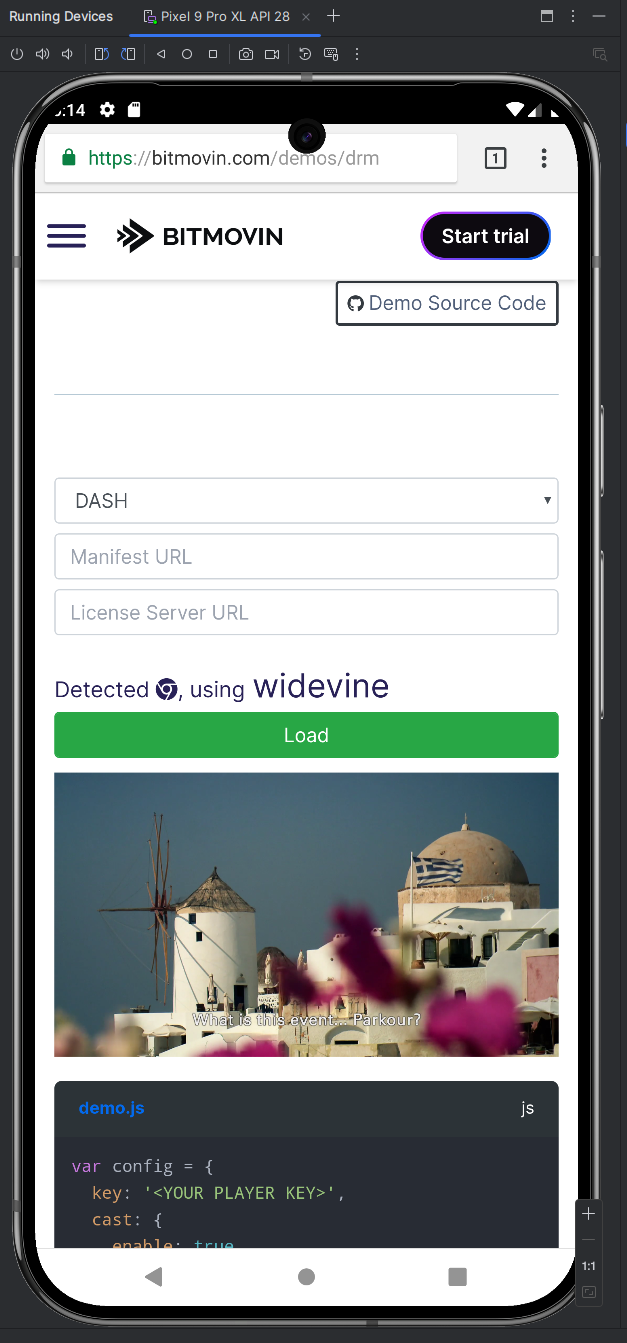
1. On the virtual device, open Google and search for “bitmovin”.
2. Go to the main bitmovin.com site — if the first result doesn’t work, scroll down and look for another bitmovin.com link.
3. Once you’re on the main page, manually add /demos/drm to the URL.
4. If it still doesn’t work, try closing everything, on the virtual device, and repeating the steps — it should eventually work. -
Hi Guys,
from long time i read and try to understand but i lost the way
i succesfull got client_id and key.pem over frida and dumper py
succesfull create device.wvd
succesfull pssh
succesfull download mp4 contents
i follow many thrends around about decrypt over ffmpeg but i not understand ;-( someone can help? -
Originally Posted by streetf22
Thank you so much for posting this! I was completely stuck.
And thank you, OP, for the updated post! -
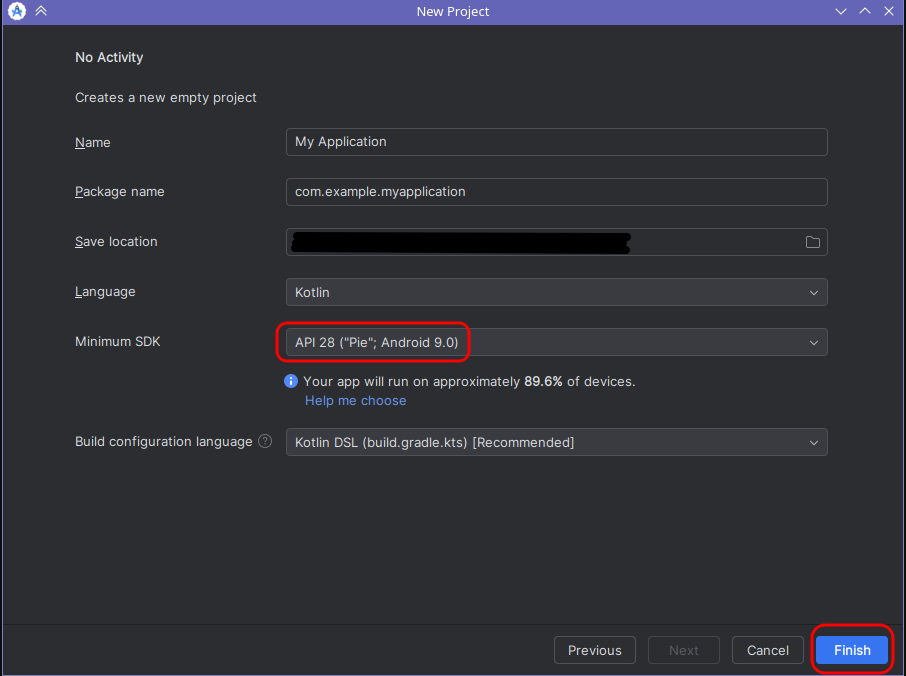
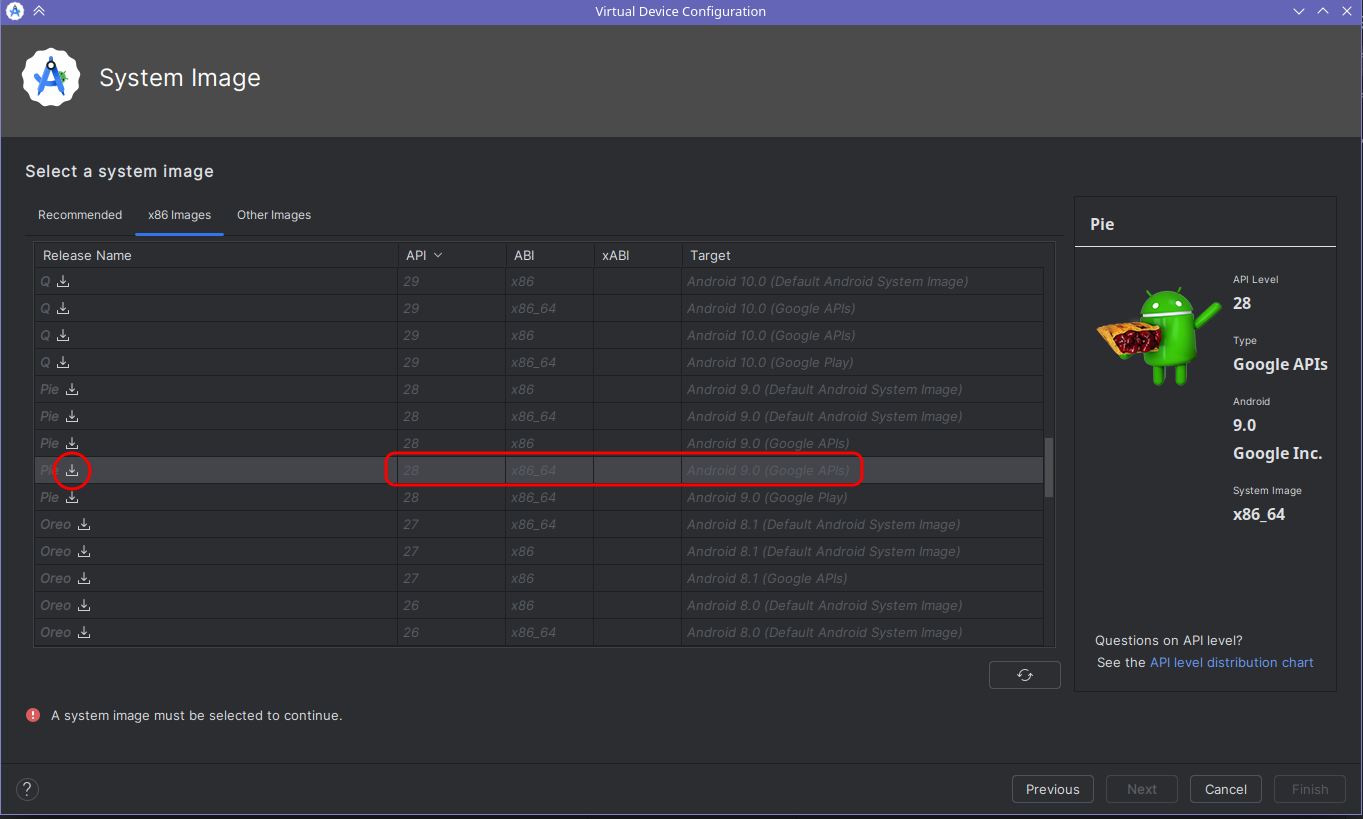
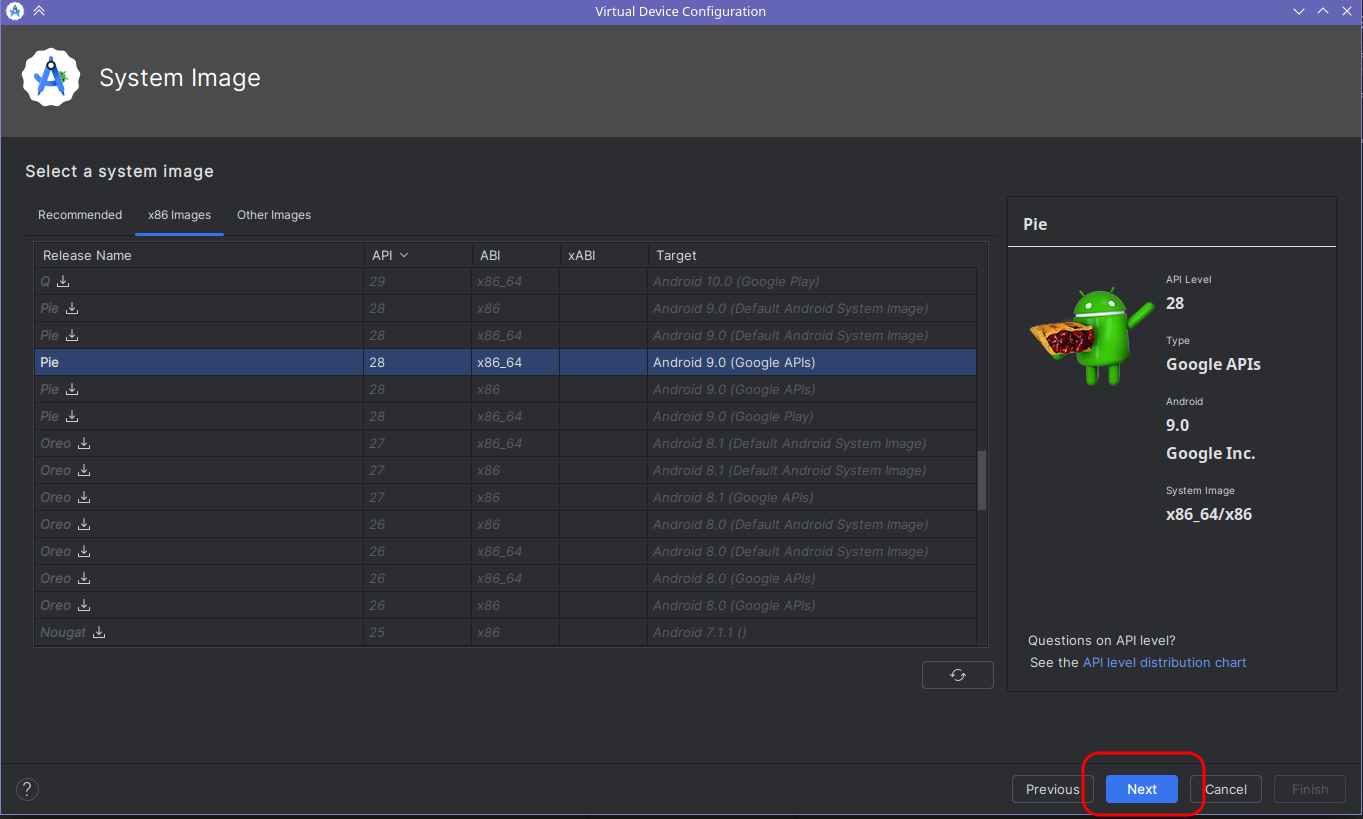
I'm sure I'm making a dumb mistake, but on the step in the updated 2025 instructions "On the next window popping up, go to the second tab called x86 Images, then scroll down until you find Android Pie, API28, x86_64, Android Pie (Google APIs), and click the down arrow to download it:", I'm not getting the same screen in the screenshot, instead get this:
[Attachment 87100 - Click to enlarge]
What am I missing here - thanks for any help or suggestions! -
Originally Posted by DoomDash
I couldn't get this to work with anything higher than a Pixel 3 XL. And that gave me fits (using API 28) until I switched to API 29. That said, I'm working on a mac, so maybe there are subtle differences between this and the PC version.
Regardless, the mistake you're making (in the picture you attached, which I marked up below) is that you are going with the default system image, which for your device, is API 36 or something like that. Click on the dropdown box (where it gives you the choice of API, see red arrow) and select something earlier. If you're still finding nothing, then try clicking the "show unsupported" checkbox at the bottom (red arrow #2). If all else fails, then change your device to something that actually supported that API -- eg, the pixel 3 XL.
[Attachment 87101 - Click to enlarge]
One final note, I had trouble getting chrome to work with that image, so I just loaded the web page using a shell command. This seemed to work great, and since many of the images I tested didn't even come with chrome installed, I thought it might be a useful thing to add to the discussion (not necessarily for you, but for anyone else who runs into this issue). The command I used was:
Code:adb shell am start -a android.intent.action.VIEW -d "https://bitmovin.com/demos/drm"
(Or, if you have trouble with bitmovin, a good alternative site was "https://shaka-player-demo.appspot.com/demo/") -
Wow, what a process and tutorial!
Last edited by Navii3; 25th May 2025 at 19:30.
-
I use an anti-detect browser with a fake UA. Can i set up this tool using the spoofed UA data or does it need to be my real?
-
I followed all steps carefully and it all went well until running the python script. The script connects to my emulated device but in the end I get this error:
frida.ServerNotRunningError: unable to connect to remote frida-server: closed
I have not closed my frida terminal and it's still running in the background. If anyone know any fix, please let me know. I would be really thankful for any help. -
Any chance the version of Frida running on the emulated phone is different from the one that you downloaded to your machine? That seems like the most likely culprit.Originally Posted by m7king
Alternatively, if you didn't see the previous comment (quoted below) there's a specific version of frida that seems to work best with this (or at least it did for me):
Originally Posted by cedric8528
-
If anyone ever gets this error
[Attachment 87163 - Click to enlarge]
when trying to dump the keys, you have to add
rpc.exports = {
inject: inject
};
to the bottom of "script.js" in the "Helpers" folder -
FYI i had major issues using dumper due to multiple function error's. I have spent 4 hours working on it and I finally got the dumps. I will say if you are using Windows and have basic to intermediate IT knowledge use Google Gemini not chatgpt when troubleshooting any errors. It was miles better. Helped me understand and troubleshoot dumper, frida, javascript and android errors than chatgpt. The hooker function was giving an error when running the key dump for example. Gemini helped me re-write the entire function. I will say it took some time as it did spin other error's but Gemini literally helped me get to each step until I finally got the key dumps. It even helped me find the exact answer to an error that was not specific by making a debug js file and loading that under dumper which allowed it to pinpoint one of the problems and solve it. To be honest Gemini helping me rewrite functions that were generating errors may have helped but that may have not been the problem from the beginning. It could have been the latest version of Frida I was using (apologies if this has been mentioned. I didn't think about Frida being the problem until I started thinking about until the end).
Virtual Phone Model: Pixel3xl
OS: Android 9 (x86_x64)
Frida Version: Frida 16.1.4 and Frida 16.1.4 android x86_x64
Hope this helps anyone in the future
-
I have checked if the frida version and frida server version is the same or not for more than 5 times now. I still have the same error.Originally Posted by InvalidUser
-
thank you so muchOriginally Posted by rvlnnb
-
Has anyone had trouble getting this to work now? I've used it before just fine.
I just set it all up again; but im not able to get past the CF page for any sites behind CF (including bitmovin); and i've tried about 10 different dash mpd players with no luck. the videos that have played; im not sure if they have DRM as I dont see any change on dumper-main and no Android Emulator directory created.
Think its to do with the outdate version of Pi (API28); but if I try and use Pixel 9 in the above post its using API35+.
If I try and use that again I don't see any movement on dumper-main
[Attachment 87291 - Click to enlarge] -
I am in the same boat, able to do all the steps except dumper doesn't seem to do anything. :/Originally Posted by Jarsky
-
plz some help .. what i missssssssing here
[Attachment 87389 - Click to enlarge] -
Sorry, if I select Pixel 9 can't select api 28 now, only 35 or higher.
By the way, dumper is not run. STOP IN hooks completed -
Hi, I searched on Google for an older version of Android Studio because the current versions only support Android 12 and above, while the older ones still allow Android 9. I installed it and everything was fine at first, but my C: drive is only 100GB and had 12.5GB of free space. Due to lack of space, I had to move the SDK folder to my D: drive, which has 1TB, because the mobile device wouldn’t start otherwise.
After that, everything worked fine and I was able to use the device without any issues. I followed the steps in the guide, but when I got to the end and ran "python dump_keys.py", I got the errors shown in the screenshot. The "hooks completed" message does not appear, and I cannot get the key_dumps folder.
Does anyone know why this is happening and can help me, please?
[Attachment 87441 - Click to enlarge] -
Many of us (see posts above) couldn't get the Pixel 9 to work with the old (Android Pie) system image. But that's fine, just follow the same instructions but look for a device that *does* work with API 28 (or 29 works also).Originally Posted by TUNGLINWU
This would include things like the Pixel 3 XL, Pixel 3a, Pixel 2XL, etc. -
I have managed to complete the process until the hooks part successfully.
However dumper_main is not producing any output.
I am using Pisel 3XL with Api 29. Frida-tools 13.0.3 and Frida : 16.5.2 with up to date Frida Server (17.1.5)
Any workaround? -
I use it, but I meet error like #804 ERROR.Originally Posted by InvalidUser
-
Use KeyDive instead, works flawlessly even with API 36(Android 16)Originally Posted by Scudsworth
 , also use same version of frida client and server, based on your post you are using mismatched versions, 16.5.2 ≠ 17.1.5.
-
Aghhhh. I used to be a computer scientist before I got long COVID with terrible brain fog and now I can't even do this. Plus I'm exhausted from trying. I started at 6PM and it's now.. whatever time it is now (5AMish).
I followed every step in the original guide. After a half-hour of housekeeping to make the ~25GB required, I ran up against the new rearrangement of Android Studio discussed in other posts, so I created five different machines with varying versions and API levels. I then ran into the same problems as another few posters with ADB push, chmod, and executing binaries to get Frida working. I eventually sorted it out. protip: trailing slashes (or not) present a problem as adb shell isn't particularly well-programmed IMO; just keep trying different combinations until something works and set chmod 777 recursively because it's not like you're securing a server (and make sure you don't mix up "temp" and "tmp" as in the guide). Also, feel free to cd around instead of typing full dir names.
Then I fell headfirst into the same problem everyone else is now having with Dumper. I reached the same conclusion as the very helpful poster who also figured this out (the following must be pasted in the global scope of Dumper's scripts.js; the bottom of the file is fine):
It does force Dumper to work. Or at least forces it to the end phase:Code:rpc.exports = { inject: inject };
2025-06-20 11:11:34 PM - root - 25 - INFO - Hooks completed
(I'd already been up for hours more than intended at this point. Nice quads timestamp, btw.)
From there, I thought I'd cracked it. But no matter what I opened, I was either stonewalled by Cloudflare or finding that playing WV-encrypted content didn't work (I tried a few plain old <video>s, successfully, albeit tediously slowly, to be sure). I tried Chrome; I tried Webview; I tried Firefox just to get a different engine in there. I tried several different VMs/configs. Nothing. I was sometimes getting errors suggesting I didn't have any level of DRM/EME support (weird, huh? Anyone else run into this?). All of the messing around in AVDs was painfully slow - we're talking a minute to open a browser - as I have an ancient i3 laptop with 8GB of RAM.
So then I saw that the new solution is KeyDive and naturally I followed the lead. It seemed promising. I had to resolve a Python packaging conflict between Dumper and KeyDive. Note: Dumper flat out requires protobuf 1.8.0 (for complex reasons that'll never be fixed) whereas KeyDive requires a much newer version (essentially the most recent). You might want to use venvs if you're going down this rabbit hole, even if they're not technically required on Windows. This isn't the only pip conflict you might encounter.
My heart sunk upon performing the suggested steps for KeyDive and finding the following:
2025-06-21 02:57:32 [W] Cdm: L1 provisioning deactivation appears incomplete. Consider using a web dump or forcibly terminating the process to ensure proper disabling.
2025-06-21 02:57:33 [C] keydive: 'oem_crypto_build_information'
2025-06-21 02:57:33 [I] keydive: Exiting
I wasn't sure what "oem_crypto_build_information" meant (beyond the obvious, but there's no context) but the result, overall, made sense: why would an official Android VM have L1 completely disabled? Sure, Android emulation is software but that doesn't mean L1 can't be emulated to an extent. Or, at least, it can pretend it's emulating hardware crypto. So then I went in search of ways to disable L1 DRM on an AVD. Naturally, I immediately tried killing the DRM processes in an adb shell, using the & operator to ensure I got them all at once, but they just kept respawning (kinda like Search Indexer or many system processes in any modern Windows). I did some brief research into Android's DRM processes but they're poorly documented and I wasn't entirely sure which ones I needed to kill (no permutation of any of the promising ones would stay dead anyway).
I focused on these three processes:
media 1596 1 15452 4956 binder_th+ f4fdcb39 S android.hardware.drm[at]1.0-service
media 1597 1 20732 4604 binder_th+ 79221b17f317 S android.hardware.drm[at]1.1-service.clearkey
media 1598 1 25656 7884 binder_th+ eefa4b39 S android.hardware.drm[at]1.1-service.widevine
Realising that I'd need to kill them at the kernel boot level and looking for a more permanent solution, I found the Magisk module liboemcryptodisabler... Now, I just had to find a way of rooting an AVD -- or at least leading Magisk and associated su apps into believing I was running a rooted device so that they would install and run liboem. I used to be a pretty competent hacker with several commercial products cracked (purely for fun) but I've never messed around much with Android beyond flashing a new ROM or whatever, so this was never my area of expertise. I wrote some basic Android 2.1 (IIRC) software at uni but I haven't even flashed a phone in a decade. I wasn't expecting my quest to take me down the road of advanced Android again.
Okay, so then I found rootAVD. After spending a good 15 minutes parsing its terrible UX, readme, and non-standard syntax (great tool BTW, just ugly; those lines that look like examples at the bottom of stdout are actually results), I was on my way to running it on the ramdisk.img that I felt was my best chance (Pixel 3 XL, 9.0, 28). After several stalls on "[*] Searching for pre installed Magisk Apps", I figured out that you have to uninstall any existing Magisk APK to prevent hangs. For liboem, you apparently also need Magisk v27.0, not the latest v29.0 (note: you also need the module MagiskFrida in order to gain Frida's hooking powers at boot). Anyway, after removing Magisk, rootAVD did what it promised: a whole heap of stuff before auto-"rebooting" my VM. But however it works, it isn't clean because I had to remove a file lock on my VM (which I had to find through Process Hacker) before I could start it again. I don't know why you'd be replicating my odyssey of failure but you need to remove %USERPROFILE% or ~/.android/avd/<avd_name>/.lock
Anyway, I eventually got it running again and.. nothing had changed in Magisk. It didn't claim to be rooted. At this point, I realised I was going to be stuck in bed for days after the effort I'd already put into this. I considered doing it on bare metal but I wondered if my £30 Android Go phone would even fit the bill for rooting. The amount of effort required to root my model with the backup/restore it entails was not worth the risk of failure -- and there seems to be some debate as to whether it's even possible. Plus I'd just be chasing sunk costs. All I wanted to do was save some football matches as I like taking them to hospital appointments. Most are on services like iPlayer, ITVX, All4 etc. It's not like I wanted to become a big pirate. I pay for ITVx. ******* fantastic. (HDCP bypass and capture cards aren't an option for me for the same reason as recording them: I don't have a cable sub/DVR box/TV. And good capture cards are way out of my price range.)
There's probably some pathway to success if you're more persistent than I can afford to be. As a starting point, if you're switching between Dumper or KeyDive, I'd suggest creating a clean VM before doing the other. The versions they want are totally different! I still think Pixel 3 XL, 9.0, 28 is the best option in current Android Studio if you're using Dumper (if you're using KeyDive, DO NOT try to fight its desire to work with Android 12+). To get a device closer to the original tutorial, you could try an earlier version of Studio but the newest version is labelled 2024 - before the second tutorial with screenshots of a completely different layout - so it suggests there's some dynamic Electron-type shenanigans going on behind the scenes (which, ofc, CEF/web-based apps allow). If you're going to try an old version, it'd probably have to be quite a bit older -- maybe go back to when Pie was new.
Thanks to the two main posters for the excellent, detailed guides and the experts who chipped in with top notch advice. The tutorials were easy to follow (especially the second one) but breaking changes and incompatibilities etc. have arisen in the software that makes this process currently a total mess (or, at least, with my setup and system, it is). There are large threads on this forum focused on using hardware + KeyDive and software + Dumper but, as far as I can tell, no such corpus on using KeyDive in Android Studio.
I surrender. I just had to vent, and I was logging my process and progress for reference anyway. If you feel incompetent, maybe my story will cheer you up. I'm supposed to be an expert and I failed. And maybe someone will learn something useful. I don't think I did anything particularly wrong -- I just didn't have the luck, skill, and stamina to bypass the obstacles. Congrats to everyone who manage[s|d] it!Last edited by use a name; 1st Jul 2025 at 02:17.
-
Hello i'm having issues with dumper main action
Im using frida-server-17.2.4-android-x86_64 and phyton 3.12 from MS.
Thank your for the help.Last edited by Chopssuey; 28th Jun 2025 at 09:41.
 Quote
Quote


Similar Threads
-
Dumping L3 from Android 10, 11 and 12
By Diazole in forum Video Streaming DownloadingReplies: 45Last Post: 9th Jan 2023, 07:13 -
Can you set up a working CDM from an Android device running a custom ROM?
By scryclwn in forum Video Streaming DownloadingReplies: 2Last Post: 27th Nov 2022, 12:46 -
Error getting the keys with dumper, cdm L3 android 9
By Brift_Bv in forum Video Streaming DownloadingReplies: 15Last Post: 23rd Sep 2022, 02:33 -
How To Dump L3 CDM From Android Device's (ONLY Talk About Dumping L3 CDMS)
By Dannyboi in forum Video Streaming DownloadingReplies: 226Last Post: 1st Mar 2022, 03:34 -
How To Dump L1 CDM From Android Device's (ONLY Talk About Dumping L1 CDMS)
By mintolik in forum Video Streaming DownloadingReplies: 13Last Post: 20th Feb 2022, 14:33