


,
ATi AIW 9600XT, AIW 7500, HD6570
RD-XS34, ES20, ES15, DENON + OPPO players,
AVT-8710, PA-100, BVP-4, Panny + Sony VCRs circa 1991-98,
Adobe AE CS3, IPS monitors, EyeOne D2, some TMPGenc")
Sorry -- bad weather here, with cable internet down for several hours.
A question for the film-to-analog tape experts. This sample video clip began life as 8mm silent film (i.e., progressive video). It was then recorded off a projection screen (progressive) to tape with a webcam (interlaced ??). The tape was then captured to AVI with a decent tbc-equipped VCR. OF course, that process created some imaging problems, but aside from that: the captured AVI can be processed as either interlaced or progressive. It appears to be 20 FPS progressive with pulldown flags for 25 FPS playback. I would think 8mm silent film is 18FPS, but every ivtc or decimation mode I run gives back 20 FPS. Whether I run filters with the video interlaced or deinterlaced, I get exactly the same results. So I'm treating this clip as progressive and will restore pulldown with DGpulldown later. That is, unless someone educates us further about this kind of source.
+ Reply to Thread
Results 31 to 60 of 109
-
Last edited by sanlyn; 25th Mar 2014 at 14:24.
-
Making progress. Simplified the task, don't need DeVCR, santiag, or NeatVideo (the latter is overkill at this stage). Now having a problem with color banding. But getting better....
BTW, not only did the internet go down for several hours, but so did power in my area. Technology's nice, but Mother Nature still rules.Last edited by sanlyn; 25th Mar 2014 at 14:24.
-
I do not know how to thank you for all your trouble!
Albie -
Appreciate the good words, but -- LOL -- when you see howu much work is invo9lvced with restoring damaged video, you might be frightened away from the forum!!

Sorry for yet another delay. Memorial Day weekend here in the USA. My idea if a "holiday" is to sit at home, not to drive all around the countryside, but wives and kids have other notions. My, the past 2 weeks have been such a circus! Will have scripts and demo in the morning.Last edited by sanlyn; 25th Mar 2014 at 14:24.
-
Original (1932) standard 8mm film was shot at 16 FPS, silent super8 at 18 FPS. In any case, The webcam source is 20 FPS progressive with pulldown flags applied for 25 FPS playback. Played on a VCR, the pulldown frames play "as if" interlaced (two video heads) and look that way after capture, with combing effects on periodic frames. Load the AVI directly into VirtualDub, which plays all the pulldown frames, and you see this combing effect (source fame 110, brightened to show effect):
[Attachment 18066 - Click to enlarge]
Each frame in interlaced video contains two images: if you separate the top and bottom fields, you will have two pictures. This is most apparent when an object moves in the frame. The top field will show one instant of the movement, the bottom field shows the next instant. With progressive frames, if you force separation of top and bottom images you should get the same image, even if something is moving from frame to frame. The first thing noticed with this progressive clip is that each video head is playing a different image. Understand, the two images of the forced separation will be the same object at the same instant. But in this case, Even and Odd frames have different noise and luma levels; the even fields are darker, with more noise.
The two 720x576 images below are from the sou8rce AVI. Frame 110 has been bob'd into images 276 (top) and 277 (bottom). Click on an image to view it full-size in the forum viewer, then click "First" and "Next" repeatedly to see the difference between the two images:
[Attachment 18067 - Click to enlarge]
[Attachment 18068 - Click to enlarge]
To see what each tape head is playing in a supposedly progressive frame, you can use this simple avisynth script. The Bob() filter forces separation of progressive frames into top and bottom fields and enlarges each smaller field into a full-sized "frame". You can then play each "frame" (which is really a field) image-by-image in VirtualDub. Bob() isn't the cleanest deinterlacer, but it's handy for studying the nature of a video.
For processing, the pulldown frames must be removed. There are several ways to do this in Avisynth. I chose to remove the pulldown effect and make the video purely progressive with TIVTC. To make changing and tweaking easier, I worked in 5 steps. The 5 steps can be combined later. Here is the script I'm currently using, which removes pulldown, makes a basic levels and chroma correction (the capture is too dark), and removes some dirty chroma noise:Code:AviSource("drive:\path to folders\avz10.avi") AssumeTFF().Bob()
The image already shows a few signs of improvement, but there's a long way to go. Will be back later today with more on the work I did this weekend. Attached is the Avisynth CNR2 plugin.Code:# --- STEP 1 ------------ #------------------------ # --- source is YUY2 ---- AviSource("drive:\path to folders\Welgegund Mei.avi") TFM(order=1).TDecimate(rate=20) Levels(2, 1.4, 255, 8, 235, coring=false) ColorYUV(off_y=-16,off_v=3) MergeChroma(Cnr2(mode="xxx",scdthr=8, ln=12, lm=192, un=20, um=255, vn=20, vm=255, log=false)) # --- use "fast recompress" and save as YVY2 ----Last edited by sanlyn; 25th Mar 2014 at 14:25.
-
After typing a sample script essay tonight, I suddenly realized that the scripts I would be proposing were quickly becoming variations on the scripts using QTGMC, posted on 20 May, in post #17 (https://forum.videohelp.com/threads/355843-Virtualdub-filters-For-8mm-Film-That-Was-Cap...=1#post2242610). The mkv video posted from that script didn't have pulldown applied for 25 FPS playback, but that would be easy enough to add with DGPulldown. The codes posted in #17, while still a bit noisy, were the fastest scripts and the easiest to tweak; the Avisynth code was the basic cleanup, with VirtualDub's filters and NeatVideo fortifying the results. I'd say that post 17's texts are the easiest place to get started. If you have more questions about that post, feel free to ask. The "brilliant" scripts I worked with all this weekend were giving results that in many ways were inferior to post #17.
Last edited by sanlyn; 25th Mar 2014 at 14:25.
-
A few questions/comments and thanks again for all the work
Post 17
Working with so many duplicate, blended, and interlaced frames was a headache. The closest I could get to the original super 8 frame speed was 20 FPS.Just a few points:Original (1932) standard 8mm film was shot at 16 FPS, silent super8 at 18 FPS. In any case, The webcam source is 20 FPS progressive with pulldown flags applied for 25 FPS playback.
I personally captured the original films with a Eumig film projector. These films are/were (since they are missing!) standard 8mm films shot by my grandfather taken in the 50's. I also have original super 8mm films, taken by my father. I projected this film that we are working on, against a white paper against a wall and captured with a JVC-C camcorder in the mid 1990's. These compact cassettes were then transferred to the big VHS cassettes by connecting the camcorder to a VHS recorder by the usual play/record method.
Do not know if this might help?!
This might be a totally irrelevant, but I was just thinking, is it not possible to split these frames and therefore have appr 40 fps (I realize that the quality would vary between the two frames) and then Pulldown to 25 frames. BUT, if I read your last sentence, I see that the noise and luma difference will most probably cause too much problems.Each frame in interlaced video contains two images: if you separate the top and bottom fields, you will have two pictures. This is most apparent when an object moves in the frame. The top field will show one instant of the movement, the bottom field shows the next instant. With progressive frames, if you force separation of top and bottom images you should get the same image, even if something is moving from frame to frame. The first thing noticed with this progressive clip is that each video head is playing a different image. Understand, the two images of the forced separation will be the same object at the same instant. But in this case, Even and Odd frames have different noise and luma levels; the even fields are darker, with more noise.
I'd say that post 17's texts are the easiest place to get started.Rather than start all over from scratch and get the same resuls, I'll prepare some notes on what the code in post #17 is doing.
Extract from post #17
The 20FPS version has fewer rips and spots. Getting rid of all of them wasn't possible, but I used three pluigins to get what I did: RemoveSpots (which also removed some chroma noise and rainbows), DeVCR, and ReplaceFramesMC.I was considering to use one script for the whole video and having done that, establish what additional editing might be required on some of the bad sections.Code:
Levels(2, 1.4, 255, 8, 230, coring=false) ColorYUV(off_y=-15,off_v=3) # -------- input is YVY2 ------------ # ---- Use mt_masktools-25.dll ------ AssumeTFF().QTGMC(preset="very fast") ConvertToYV12(interlaced=false) Srestore(frate=20) santiag.avsi RemoveSpots() DeVCR(20) ReplaceFramesMC(21,2) ReplaceFramesMC(29,2) ReplaceFramesMC(46,1) ReplaceFramesMC(77,1) ReplaceFramesMC(77,1) ReplaceFramesMC(251,2) ReplaceFramesMC(261,1) ReplaceFramesMC(274,1) ReplaceFramesMC(286,1) mergechroma(awarpsharp2(depth=20, type=1, blur=1, chroma=4)) AddGrainC(1.5, 1.5)
Should I therefore start with QTGMC and continue with RemoveSpots, DeVCR, and ReplaceFramesMC? I am just unsure if I should use ReplaceFrames, as this video is more than an hour long.
What are your ideas and perhaps some guidelines on settings of the different plugins, etc?
Many thanks
Albie -
Thanks for the information. I was just reworking this sample clip (again!). The reason I often use multiple scripts is to separate fast-running plugins from slower ones. QTGMC coupled with inverse telecine to remove pulldown effects can run at a slow 3.5 fps, but the remaining plugins run 3x as fast. Also, if subsequent tweak plugins need changing, I don't have to run the entire task again. The deinterlace/IVTC operation is usually a slow one that almost always comes first.
Meanwhile, after some experimentation I restored the original standard-8 16fps structure. No pulldown effects, no duplicate frames. BTW, pulldown or telecine doesn't remove frames, it adds them. Sometimes the added frames are hard-coded, meaning they are literally part of the recording (as they are in your sample clip when you recorded them with your camera and played them on your VCR). Or they can be coded flags in the video's information header that tells a player to repeat extra frames or fields to attain a target playing speed. So I'm tweaking the scripts at 16fps. When the clip is encoded, pulldown flags can be added later with DGPulldown for 25 fps.
I decided to eliminate deVCR. Due to so much camera movement, it didn't accomplish much. You might be surprised that spots aren't the biggest problem, even if some of them can be eliminated. The biggest problem is color noise and rainbows (blue and red) and streaks. The other trouble makers are projection bulb and lens problems, the way the images are reflected off the screen (low contrast that drowns shadow detail), the projected video's color temperature (too cyan), damage from tape playback, and macroblocks and color banding from the player's DNR (common problem with noisy sources and the older, less sophisticated DNR circuits of the past). But I'm finding ways to handle those, one by one.
This is how the original 16fps speed was restored: Sometimes the solution is right there in front of you, you just don't see it at first. The result is a few imperfect frames (they can be repaired) due to the way the images were recorded by the camcorder.
What do these lines do? First, they ran at about 3.25 fps (!!!, but not unusual). The first line loads the AVI. The second line creates a video clip called "deint" (which is a name I invented. "deint" is a place in memory that I created simply by naming it in the script; it will contain data, and the memory location with that data is named "deint"). Deint will contain a video clip that will be deinterlaced and initially denoised by QTGMC. The last part of the second line is ".SelectEven()", which selects only the even-numbered frames from that clip and discards the odd frames. The even frames are a bit darker, but the odd frames had much more damage.Code:AviSource("drive:\path to folders\Welgegund Mei.avi") deint=AssumeTFF().QTGMC(preset="very fast",TR0=2,ChromaMotion=true).SelectEven() TFM(order=1,clip2=deint).TDecimate(mode=2,rate=16) return last
The third line runs two functions from the TIVTC plugin. TFM() analyzes the video clip for duplicates, pulldown effects, etc., and marks the frames to be selected for output. It will choose those frames from the deinterlaced "deint" clip. That's a crude explanation, but basically that's what happens. Then TDecimate() takes up TFM's signals and creates the final 16fps output. On the fourth line, "return last" returns the last object that the script worked on, which is the video that TDecimate produces.Last edited by sanlyn; 25th Mar 2014 at 14:25.
-
You removed unique frames and made it play jerky. If, after the hard telecine is removed it plays smoothly at 18fps, as you did it before - no missing frames, no duplicate frames - the way to slow it to 16fps is with an AssumeFPS(16). I've not studied the first sample, but you seemed satisfied earlier that 18fps was the framerate in that sample.Originally Posted by sanlyn

You can, in effect, slow it to 16.67fps by taking that earlier 18fps script, encoding it for the required 25fps, followed by applying DGPulldown for 16.67->25fps.
The lowest framerate that can be pulled down for PAL is 16.67fps (2/3 of 25fps). Even if you set it up for 16->25fps, judging from the resulting D2V I made from it, it's 16.67fps anyway (3:3 pulldown). For NTSC, the lowest that can be pulled down is 19.98fps (2/3 of 29.97fps, also 3:3 pulldown).The attached m2v is 16fps with pulldown flags added. -
The missing frames in the 16fps version are the same frames that are missing in the unprocessed AVI. The 16->25 pulldown moves only very slightly fast, there's too little difference to tell. The original AVI has 4 missing frames and a lot of dupes; so does the 20fps ivtc'd version.
Just ran 18fps. The first time I tried that, I didn't specify mode=2. That gave me 20fps, no matter what I asked for. Looking over the 18fps run now, still spot 2 of the same "missing" frames -- but that could be in the capture, I don't know. I'll use 18fps with the same plugins for cleanup and see how it goes.Last edited by sanlyn; 25th Mar 2014 at 14:25.
-
OK, thanks. I'll have a look at the original sample when I have time later on today. If it's really missing frames from the beginning, though, perhaps it was captured incorrectly. It's a cinch the original film isn't missing any.
-
Frankly, even at 25FPS, motion in the movie seems to be faster than "normal". Maybe I've been staring at it too long.

Last edited by sanlyn; 25th Mar 2014 at 14:26.
-
The 'real' framerate as on the video is 17.5fps as near as I can tell. I think it should be unblended, even though that forces the use of bobbed fields to replace the progressive frames. Something like this does a decent job:
AVISource("Welgegund Mei.avi")
ConvertToYV12(Interlaced=True)
Yadif(Order=1,Mode=1)#or a better bobber
Srestore(Frate=17.5)
I get something without dupe frames and I think also with no missing frames. Here's a 9MB XviD of it at 17.5fps (MP4 insisted on using whole framerates and gave me 18fps): -
Just tell me if there is anything I should do to help!
This specific Eumig was bought by my father in the early 80's and has 2 settings- one for 8mm and one for super 8mm. The initial capturing was therefore done on the 8mm setting.I noted in O.P.'s earlier post, the Eumig projector might be Super-8 which was 18FPS. Standard-8 in the early 1950's had been 16FPS since 1932. The projector might make the difference if it's a Super8. I didn't think the later projectors could play both formats (the frame sizes are different), but I don't know 8mm projectors that well.
Thanks again. -
@manono: thanks for taking a look. I'll revise the script and work with 17.5+Srestore.
avz10: thanks for info on the projector. Most helpful.
I'm debating the use of RemoveSpots and looking it over today. It does remove some spots (but misses many due to camera motion).. It has advantages: it smooths some grain and annoying thin lines, and helps clean the red/blue rainbows and flashes in dark areas. On the other hand, film ought to look like film -- not like over filtered DV. With film and VHS tape alike, most of the perceived detail is really grain and miscellaneous noise. Resharpening a soft image like this unfortunately sharpens the banding and makes it look worse. I'll be working on that today. It's not that filters are "creating" the banding effects; those effects are in the source capture. The "official" process for dealing with strong banding is use cleanup filters (which reveals more of the banding), then add grain and other patterned effects to mask the banding. In other words, clean the noise, sharpen, then add noise again (!!!). But the idea is to restore the natural fine-grain and detail perception of the original.
Also trying to make this easier for you and keeping the filter list short. At the same time I'm mindful that this is family history of personal value, so I'll see if we can make the best recommendations.Last edited by sanlyn; 25th Mar 2014 at 14:26.
-
Well...this is a curious result, but in the long run I have two scripts that give the same 17.5FPS video.
Code:# ----#1:---- deint=AssumeTFF().QTGMC(preset="very fast",TR0=2).SelectEven() TFM(order=1,clip2=deint).TDecimate(mode=2,rate=17.5)
Both give 272 frames. But a few differences: In frame 0, the title card in #1 is in a different position than in #2 . Frame 47 in script #1 is frame 48 in script #2. The scene change in the next shot is at 53 in #1, 54 in #2 (yet both scripts have the same number of frames). Script #1 looks like a dropped frame between frames 209-210, but it doesn't appear that way in #2. Srestore gives slightly sharper images. TIVTC and Srestore do work differently, and TIVTC was working with only half the frames; but the image quality is so similar in both versions that one has to compare frame-by-frame to see anything different.Code:# ----#2:---- AssumeTFF().QTGMC(preset="very fast",TR0=2) Srestore(Frate=17.5)
TIVTC ran at 3.5 fps. Srestore ran at 1.5 fps (obviously because srestore is looking at twice as many frames). Considering slightly sharper pictures and a little less noise, I'll use Srestore for now.
So I think the speed problem has been satisfactorily resolved for now (with manono's help), and we can MOVE ON!Last edited by sanlyn; 25th Mar 2014 at 14:26.
-
Great!!
Let me know if you are close to the "final" if I should upload another short scene to see if this is working.
Albie -
Working away, and stuck between a rock and a hard place. I hate decisions! Couldn't decide between RemoveSpots and discarding it. But there are so many bad frames with really ugly spots and dozens of annoying VHS white streaks. RemoveSpots is cleaning some of the chroma noise nicely, even cleaning many of those annoying streaks, and getting most of the big spots.
It does soften things a bit. But without RemoveSpots I need ReplaceFramesMC2 to manually repair 24 bad frames and big black splotches. With RemoveSpots, I repair only 8 obvious glitches. I'll work with two versions, one with RemoveSpots, one without. It depends on how much the O.P. hates those white streaks.Last edited by sanlyn; 25th Mar 2014 at 14:26.
-
Just a comment or two:
Remember the info of the "master tape", posted earlier. I copy it again- it will basically be practically impossible to remove all the bad frames.
Secondly-MediaInfo about the "master" file of the posted clip
General
Complete name : E:\Videos\1. Projek\Welgegund 9 Mei.avi
Format : AVI
Format/Info : Audio Video Interleave
Format profile : OpenDML
File size : 38.4 GiB
Duration : 1h 53mn
Overall bit rate : 48.3 Mbps
Video
ID : 0
Format : Lagarith
Codec ID : LAGS
Duration : 1h 53mn
Bit rate : 46.8 Mbps
Width : 720 pixels
Height : 576 pixels
Display aspect ratio : 5:4
Frame rate : 25.000 fps
Standard : PAL
Color space : YUV
Chroma subsampling : 4:2:2
Bit depth : 8 bits
Bits/(Pixel*Frame) : 4.512
Stream size : 37.2 GiB (97%)
Audio
ID : 1
Format : PCM
Format settings, Endianness : Little
Format settings, Sign : Signed
Codec ID : 1
Duration : 1h 53mn
Bit rate mode : Constant
Bit rate : 1 536 Kbps
Channel(s) : 2 channels
Sampling rate : 48.0 KHz
Bit depth : 16 bits
Stream size : 1.22 GiB (3%)
Alignment : Aligned on interleaves
Interleave, duration : 171 ms (4.27 video frames)
If possible, I will prefer a relatively sharp image, with a "film look" and I agree with what you say that one should remove "some grain and annoying thin lines, and helps clean the red/blue rainbows and flashes in dark areas." But to try and remove most spots- I really do not think this is necessary!(but I do like a more sharper than softer image)I'm debating the use of RemoveSpots and looking it over today. It does remove some spots (but misses many due to camera motion).. It has advantages: it smooths some grain and annoying thin lines, and helps clean the red/blue rainbows and flashes in dark areas. On the other hand, film ought to look like film -- not like over filtered DV. With film and VHS tape alike, most of the perceived detail is really grain and miscellaneous noise. Resharpening a soft image like this unfortunately sharpens the banding and makes it look worse.
Just one other question:
Should I crop now, or wait until the end of the editing? -
Spots -- No, impossible to remove them all, and it would look a bit odd anyway.
Well...yes, it is possible to remove almost every spot, frame by frame, but your grandchildren would have to finish the work.
Cropping is usually done as one of the last steps, but not always. Many will crop and replace borders as one of the last steps because filters and color correction will affect border colors. Note that there are width and height restrictions with different colorspaces when cropping edge pixels, due the differences in the way color information is stored. Keep the following values in mind (this chart is from the Avisynth wiki page on the Crop() function: http://avisynth.org/mediawiki/Crop).
To restore the proper frame size, use AddBorders() in Avisynth to replace pixels. You don't have to use the same border numbers that you cropped -- for example, you can crop 8 pixels off the left, then add 4 to each side and center the image.
Today, not working with RemoveSpots. I experimented with other plugins to subdue chroma noise. Very strong chroma cleaners and filters called "smoothers" can be harmful as well, if the video has poor detail to begin with. The original 8mm film frame was smaller than the center hole in a DVD disc. Add perceived detail loss due to magnification on a screen, and the low resolving power of consumer projection lenses (unless your Eumig was a pro studio model, which few people could afford), and there's not much "detail" to work with. But cleaning up the worst noise and the color cast, and improving gamma and other factors, will make a big difference.Last edited by sanlyn; 25th Mar 2014 at 14:27.
-
Just a comment- the screenshot is a part of Table Mountain; Table Bay in the front and this is where my ancestors arrived in 1699. (Three boats from the Netherlands). Robben Island, where Nelson Mandela spent a large part of his life is to the right, but not included in this shot.
-
I find the video very interesting, even from the few images and the short sample. My wife even sneaks a peak now and then, even though she usually ignores video projects and thinks we're all insane.
I'm actually making progress here, while trying to do two things: getting a better if not perfect video, but making it easy for someone new to all these plugins (and for any other insane readers who might be following this). Will post some info and scripts this weekend, mainly to explain what these filters are doing in Avisynth and VirtualDub, why some work and why some don't. Even picked up a couple of new plugins myself! I realize I'm taking a while here. Usually the work files and "experiments" are discarded, but I'm saving most of it for documentation.
Thanks for the background info.Last edited by sanlyn; 25th Mar 2014 at 14:27.
-
See you in the morning. Had some info to upload, but found errors to be corrected before I can post.
")
Last edited by sanlyn; 25th Mar 2014 at 14:27.
-
Well...this is quite a project you have on your hands. It's best to take your time learning this new stuff. Once the initial unfamiliarity is past, you'll find it's easier than it looks, although time-consuming.
I'm submitting some script ideas and methods that have been used earlier, although some of these plugins are new. You already have a useful arsenal with QTGMC and its support files. But I'm attaching a .zip of a few more plugins with their required files, plugins that are in common and daily use for all kinds of video, regardless of condition. The attached .zip hasa contents file explai8ning the plugins and where they should be installed.
Because color banding is such a problem here and elsewhere, a popular method for alleviating severe banding problems is the dither() plugin package, which is included. Don't be intimidated by all the material in the dither package. The most that you would use is the colorspace conversion functions and the handy GradFun3 function (GradFun3 is a short name for "Gradation Function", which attempts to smooth clumpy, coarse-grained, hard-edged areas between gradual changes in hue or luminance, such as soft shadows or large areas of bright sky). You'll see the dither functions used in the scripts I'll post.
In your sample clip there are two major problems I've had much trouble with. I experimented with known methods for solving them, and some of them actually work -- but there's not much video remaining after the fixes are applied. One of these problems is ragged edges and extremely poor definition, as seen in this 2X zoomed image:
[Attachment 18186 - Click to enlarge]
It's one thing to have blurry edges, but these are extremely rough and ill-defined. Edges like these aren't usually seen on film; they're a hallmark of analog tape. I see rough edges like this on VCR's with dirty or worn heads, and with composite output cables.
The other problem is dark ghosting on high-contrast edges. This is another analog tape phenomenon. There's not much one can do about it. They tend to look darker with crushed or murky blacks.
[Attachment 18187 - Click to enlarge]
In the image above you'll also note bright pink specular highlights and discoloration. I've seen these caused by chromatic aberration in projector and camera lenses, and in clipped highlights where the contrast is too wide for video.Last edited by sanlyn; 25th Mar 2014 at 14:28.
-
I divided the scripts and processing into several steps. You can combine some of the steps if you want, but the first two would run very slowly if done in one step, which can be annoying if you want to change either of them. The processing is pretty much a different version of the same plugins and processing used earlier, with a few new plugins like LSFMod and dither. The processing stages are: (1) in Avisynth, remove duplicate and blended frames, attain an original progressive frame rate of 17.5 FPS, make basic level and color corrections, and subdue some of the red/blue chroma noise blotches. (2) in Avisynth, more cleanup of chroma noise (trying not to work hard on luma, which has more to do with "sharpness"), avoid degrainers that cause banding and destroy what little detail exists, and repair some frames and bad spots with ReplaceFramesMC2. (3) conversion from YUV to RGB, then work in VirtualDub. (4) Return to YUV colorspace for encoding, and a little sharpening and debanding again. I'll also have examples of how I encoded with HCenc and applied 25FPS pulldown flags with DGpulldown.
These scripts are suggestions. VHS and home movies vary tremendously between tapes and scenes. You'll see that filters which look OK in many scenes will suddenly encounter a scene where they are completely inappropriate. This clip contains a couple of these troublemaking shots: the first title shot, and the last scene.
A-STEP1:
You've seen some of this code earlier. The first 4 lines beginning with "AviSource" work with the original YUY2. You will need the "2.5" version of MVTools as shown here. SmoothLevels() is part of the SmoothAdjust plugin. It attempts to keep luma and chroma within the valid RGB 16-240 range. Its parameters for dithering, smoothing, and attention to smoothing chroma to help avoid banding are set at their max values. SmoothLevels isn't perfect here (the image will look washed out because of all the dense, dark edges), so ColorYUV is used to bring the histogram's darks back down to the area around RGB 16 so that they will look "black" instead of gray.Code:LoadPlugin("Drive:\path to plugin\mt_masktools-25.dll") # <- "2.5" version LoadPlugin("Drive:\path to plugin\mvtools2.dll") Import("Drive:\path to plugin\SRestore.avs") # ------- Input source is YUY2 -------- AviSource("Drive:\path to folder\Welgegund Mei.avi") AssumeTFF().QTGMC(preset="very fast",TR0=2) Srestore(Frate=17.5) Cnr2("xxx",4,5,255) ConvertToYV12(interlaced=false) SmoothLevels(8, 1.4, 255, 15, 250, chroma=200, limiter=0, smooth=200, dither=100) ColorYUV(off_y=-20,off_v=3,cont_u=-50) SGradation(gamma=0.90) return last # -------- save as Lagarith YV12 --------- # -------- with "fast recompress" --------- function SGradation(clip clp, val "gamma") { g=float(default(gamma,1.0)) gc=clp.GreyScale() dk=gc.Levels(0,1.0/g,127,0,127) lt=gc.Levels(235,1.0/g,128,107,0,coring=false) r=Overlay(dk,lt,mode="add") r.MergeChroma(clp) }
The SGradation function works to raise detail levels in the darkest areas without making midtones and brights too contrasty. Its default "gamma" parameter is usually 1.0; lower values increase low-level detail, high values over "1.0" will make them darker. I could have set gamma to even less than 0.9, but with no results; because of the projection and reflection qualities, there simply is no detail below a certain darkness level. "off_v" slightly raises red in the image, and "cont_u" reduces blue oversaturation. Green is problematic in YUV without changing the other two colors, so that will be handled in VirtualDub later.
Cnr2 is a chroma cleaner. Here, it works on luma and chroma noise.
The SGradation function could have been "imported" as "SGradation.avs", but here the text of the function is copied at the bottom of the script below the last line of executable code.
I saved the results as "A_STEP1.avi", and saved it in YV12 using Lagarith and then set "fast recompress" in VirtualDub before saving the results. This script ran on my system at a slow 2.5 FPS. The STEP2 script is much faster, but I wanted to study results before moving ahead.Last edited by sanlyn; 25th Mar 2014 at 14:28.
-
STEP2 uses the dither plugin, with its colorspace conversion and GradFun3 anti-banding function. GradFun3 also helps (a little) to smooth edges. Banding is in the original; this makes it almost impossible to remove completely, but at least it helps prevent it from looking worse.
This script ran between 5 and 7.5 FPS. If you watch VirtualDub's progress bar while the script runs you'll see the speed vary with changing camera shots, some scenes having more problems than others. The input is YV12 source from STEP1.Code:Import("Drive:\path to plugin\ReplaceFramesMC2.avs") # ------ Load Dither plugin files ------- LoadPlugin("Drive:\path to dither plugin\avstp.dll") LoadPlugin("Drive:\path to dither plugin\dither.dll") LoadPlugin("Drive:\path to dither plugin\mt_masktools-26.dll") # <- "2.6" version Import("Drive:\path to dither plugin\Dither.avs") Import("Drive:\path to dither plugin\mt_xxpand_multi.avs") AviSource("Drive:\path to folder\A_STEP1.avi") # ----- Input is YV12 from STEP1 ------ fft3dfilter(sigma=.1, sigma2=.3, sigma3=.5, sigma4=8, plane=3) AddBorders(4,0,4,0).ChromaShift(c=4,u=4).ChromaShift(v=-4).Crop(4,0,-4,0) mergechroma(awarpsharp2(depth=30, type=1, blur=1, chroma=4)) # ----- Tweak contrast after effects of filters ------ ColorYUV(gamma_y=50,cont_y=20,off_y=-8) ReplaceFramesMC2(11,1) ReplaceFramesMC2(13,1) ReplaceFramesMC2(18,3) # <- Fair results, surprised that this worked. ReplaceFramesMC2(25,3) # <- Fair results, surprised that this worked. # ReplaceFramesMC2(33,1) # <- No. Too many bad frames + motion ReplaceFramesMC2(36,1) ReplaceFramesMC2(40,1) ReplaceFramesMC2(47,1) ReplaceFramesMC2(56,1) ReplaceFramesMC2(68,1) # ReplaceFramesMC2(70,3) # <- No. Too many bad frames # ReplaceFramesMC2(78,2) # <- No. Too much distortion ReplaceFramesMC2(79,1) ReplaceFramesMC2(83,1) ReplaceFramesMC2(85,2) ReplaceFramesMC2(144,1) ReplaceFramesMC2(163,1) ReplaceFramesMC2(219,2) ReplaceFramesMC2(228,2) ReplaceFramesMC2(239,1) ReplaceFramesMC2(250,1) ReplaceFramesMC2(255,1) ReplaceFramesMC2(258,1) GradFun3(thr=1.1,mask=0) Dither_convert_yuv_to_rgb(matrix="601",interlaced=false,tv_range=true,cplace="MPEG2",lsb_in=false,output="rgb32") Crop(12,6,-8,-6).AddBorders(10,6,10,6) return last # -------- save as Lagarith RGB32 --------- # -------- with "fast recompress" ---------
fft3dfilter is a plugin that comes with QTGMC's source files. It is configured here to work on chroma noise only (plane=3). You can think of the sigma parameter as a strength setting. fft3dfilter is a multistage plugin that uses a sigma value for each stage. If you don't specify individual sigma values for sigma, sigma1, 2, 3, etc., all the sigma parameters take the value of just "sigma" alone. Here, we'd want to work on fluctuation chroma noise that varies wildly from frame to frame, so all the sigma's are set to low values, but sigma4 is set high to address those fluctuations. This is an idea that came from the Doom9 thread on this filter.
ChromaShift is used to handle the leftward chroma shift, mostly of blue, and move that shifted chroma bleed to the right. Borders are added to help mask the fact that color around the borders will be affected. Then some of the shifted chroma is shifted back so that right-hand edges won't display an opposite problem. Then the borders are removed.
aWarSharp2 is also used to reduce chroma bleed. By using "mergechroma", you make aWarpSharp2 work only on color. MergeChroma simply tells a filter to work on the color channels only, then merge the color results back into the original image without affecting the luma channel.
ReplaceFramesMC2 interpolates new frames from surrounding frames. Sometimers it works, sometimes it creates weird distortions. I left some of the "bad" attempts in the script in case you want to look at those frames. Normally you would hope to interpolate only 1 frame, while 2 is a bit clumsy, and 3 seldom works. But in two cases, 3 frames did look OK (Surprise!). This function was used to repair some blended frames, some bad streaks, and some bad spots. Couldn't get them all.
GradFun3 (in the dither plugin) helps smooth banding artifacts and adds some fine grain to mask the effects. Dither's YUV->RGB conversion creates a 16-bit colorspace from the original 8-bit space, makes the conversion, then returns the video to 8-bit color. It also makes overall color conversion look "cleaner".
Finally, the dirty old borders are cropped off and replaced with new ones that make the image more centered within the frame.
In VirtualDub, set colorspace to "RGB24" (don't worry, the RGB32/RGB24 matter will be handled correctly by VirtualDub), set compression to Lagarith RGB, and set "Video" to "fast recompress" before saving the result as B_STEP2.avi.
All the parameters for these plugins are discussed in the plugin documentation.Last edited by sanlyn; 25th Mar 2014 at 14:28. Reason: correct STEP2 wcript for sigma4 value
-
STEP3 is run entirely within VirtualDub. Open B_STEP2.avi in VirtualDub (the file is already RGB), set color depth to RGB24, set compression to Lagarith RGB default, and set "Video" to "full processing" mode. Then you can loadd the C_STEP3_VDub.vcf file into VirtualDub. It will load 4 filters with the settings I used: camcorder color denoise, deflicker, Color Mill, and ColorTools (the last one is disabled). A .vcf file can be opened in Notepad if you want to see what's in there. The .vcf is attached as a .zip file.
You can open the filter list and enable or disable the filters to see what they're doing. I used the camcorder and deflicker filters in place of NeatVideo. NV would be the better choice, but not everyone owns it.
Save the results as C_STEP3_Vdub.avi using full processing mode.
Will return later with STEP4 RGB-to-YUV and the encoding steps. STEP4 also does does sharpening. Sorry, but I just found some stupid typo errors in those procedures. Phooey.Last edited by sanlyn; 25th Mar 2014 at 14:29.
-
Step4:
The last returns the video to YV12 for encoding. It's the reveres of the dither plugins that converted YV12 to RGB. Note the "lsb" parameter in the convert statement: here, it's lsb=false. In the earlier YV12->RGB script the proper term used was "lsb_in=false". I don't know why the lsb terms are different. The lsb parameter tells the function whether the source is 6-bit input or not.Code:# ------ Load Dither plugin files ------- LoadPlugin("Drive:\path to dither plugin\avstp.dll") LoadPlugin("Drive:\path to dither plugin\dither.dll") LoadPlugin("Drive:\path to dither plugin\mt_masktools-26.dll") # <- "2.6" version Import("Drive:\path to dither plugin\Dither.avs") Import("Drive:\path to dither plugin\mt_xxpand_multi.avs") LoadPlugin("D:\AviSynth 2.5\plugins\mvtools2.dll") AviSource("Drive:\path to folder\C_STEP3_VDub.avi") # ----- Input is RGB32 from STEP3 ------ Dither_convert_rgb_to_yuv(matrix="601",interlaced=false,tv_range=true,cplace="MPEG2",lsb=false,output="YV12") ColorYUV(cont_y=-5) LSFMod(defaults="slow",strength=50) GradFun3() AssumeFPS(25) # ----- Save as YV12 with "fast recompress" ------
Dither's color conversion functions always seem to me to pump contrast just a bit. The dark areas in this video can look rather grim and dank if they're not "just right". So ColorYUV brings contrast back down a bit. LSFMod is used as a sharpener at half its default strength. The VirtualDub filters removed some grain and revealed banding again, so GradFun3 is used at default values to address this. The result is more grainy than I'd like, but the old Ektachrome movie film was pretty grainy anyway. NeatVido would have been a tad cleaner and sharper, but I didn't use it here.
AssumeFPS(25) is used to fool the encoder into thinking that this 17.5 clip is really 25FPS. Many MPEG2 encoders will balk and complain about 17.5 FPS. If you play the resulting clip, it will indeed play faster than the original. Never fear: that 25FPS will be fixed after encoding.Last edited by sanlyn; 25th Mar 2014 at 14:29.
-
I don’t know how to thank you.
As you can imagine, there will be a lot of questions, but I’m learning fast.
I suppose this should be the settings to save when I run the script?
Secondly, it did not want to open the avi file and gave me this error message:I saved the results as "A_STEP1.avi", and saved it in YV12 using Lagarith and then set "fast recompress" in VirtualDub before saving the results.
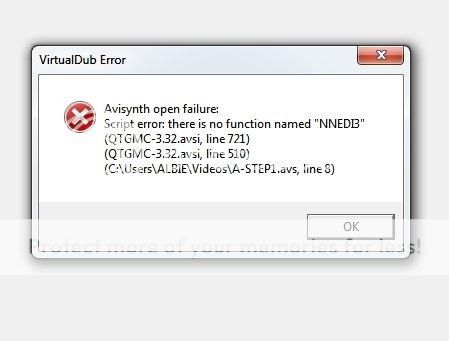
I shortened the script and it did open the avi file.
Can you help me with these settings?LoadPlugin("C:\Program Files (x86)\AviSynth 2.5\plugins\mt_masktools-25.dll") # <- "2.5" version
LoadPlugin("C:\Program Files (x86)\AviSynth 2.5\plugins\mvtools2.dll")
Import("C:\Program Files (x86)\AviSynth 2.5\plugins\sRestore.avs")
# ------- Input source is YUY2 --------
AviSource("C:\Users\ALBIE\Videos\Welgegund.avi") -
Do you have the NNEDI3.dll in the plugins folder?
 Quote
Quote
Similar Threads
-
please list the virtualdub filters to remove vhs tape video noise
By perfection in forum Newbie / General discussionsReplies: 6Last Post: 7th Jan 2020, 13:45 -
Suggestions on filters and adjustments on captured VHS Video
By Xmetalfanx in forum EditingReplies: 2Last Post: 26th Nov 2012, 08:31 -
Telecine Machine for 8mm film super 8 film transfer to dvd
By igotregister in forum Capturing and VCRReplies: 5Last Post: 2nd Feb 2009, 16:50 -
Any good VirtualDub filters to remove common VHS color bands?
By rijir2001 in forum Newbie / General discussionsReplies: 1Last Post: 15th Nov 2008, 17:10 -
8mm Film and Menus
By ia2azbound in forum Authoring (DVD)Replies: 7Last Post: 26th Aug 2008, 18:17