


EDIT: PLEASE NOTE - This guide is intended for people who are interested in creating entirely brand new edits. Whether it be for fan music videos, or such. This is not a DVD backup guide.
----------------------------------
Alright, so here's my first guide (I think). Hope all goes well, since I'm not good at these
This guide assumes you already have a prepared VOB to edit. Acquiring it won't be convered here. Here's my VOB.
This guide uses all free software:
Software:
DGMPGDec
http://neuron2.net/dgmpgdec/dgmpgdec.html
VFAPI Reader
https://www.videohelp.com/tools/VFAPI_Reader
HeadAC3he
https://www.videohelp.com/tools/HeadAC3he
VirtualDub
https://www.videohelp.com/tools/Virtualdub
Notepade (included in XP)
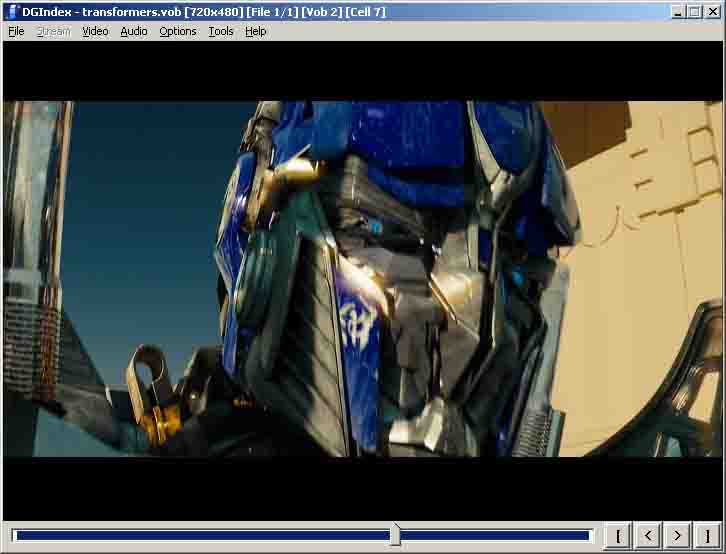
So let's get started. Load your VOB into DGMPGDec.
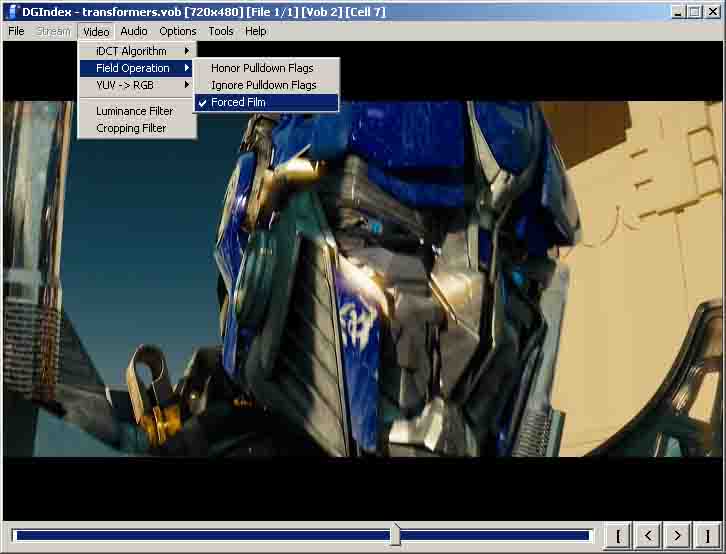
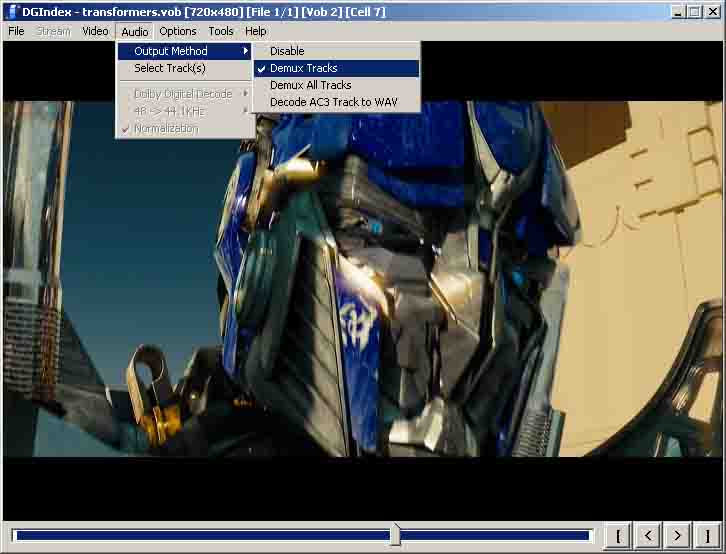
Choose FORCE FILM and DEMUX tracks.
Note, you can use any settings you want. But this guide is assuming we want a 24p source.
Save the project.
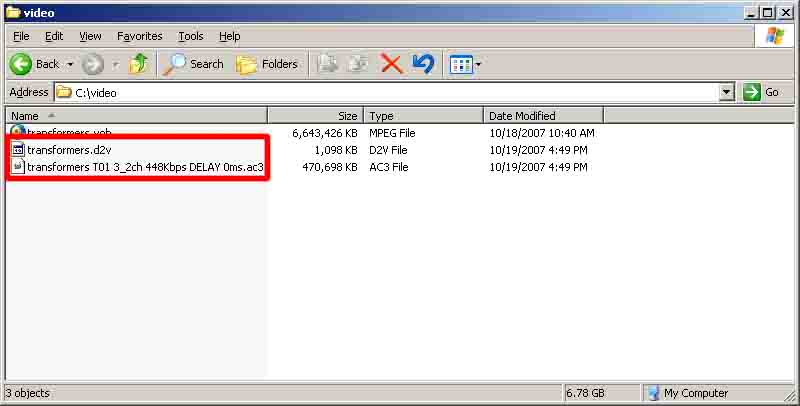
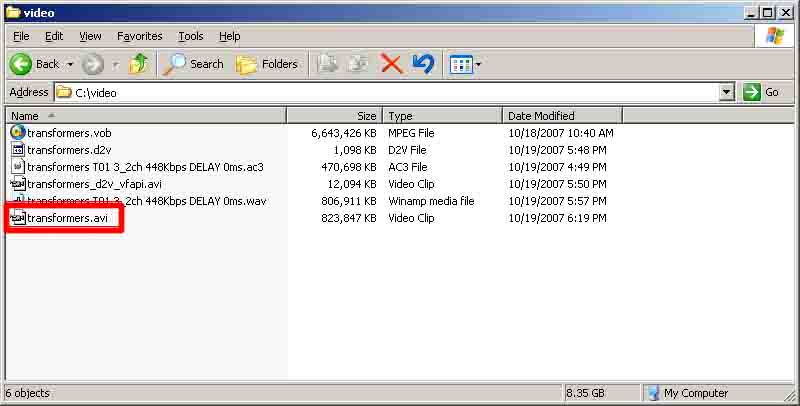
When it is done, you will have 2 files. One D2V file and one AC3 file.
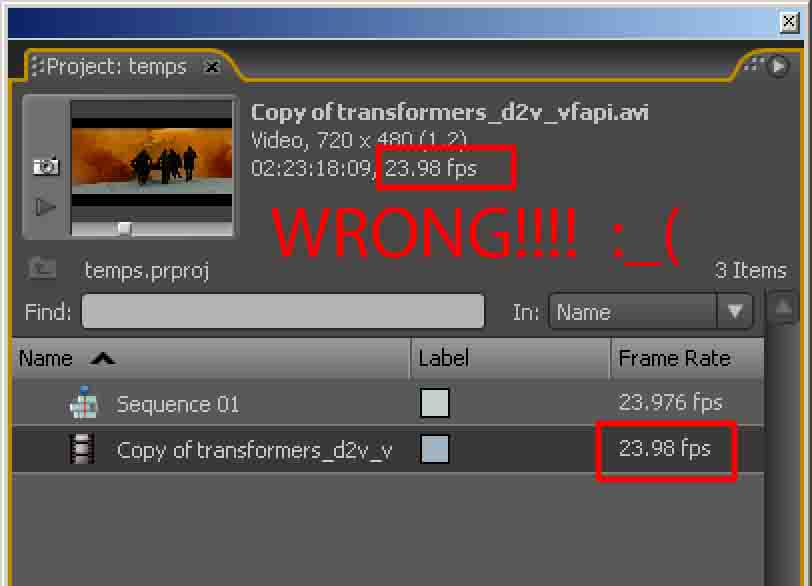
Now, there is a 23.98 / 23.976 frame rate discrepancy that exists. Inside Premiere, if your file reads 23.98, this is wrong, and will cause audio sync issues and slipped edits.
It's not just Premiere, but exists across the board for all video and editing. Including Final Cut Pro.
You can fix this by editing the D2V file.
Force open the D2V file inside notepad. And you get this:
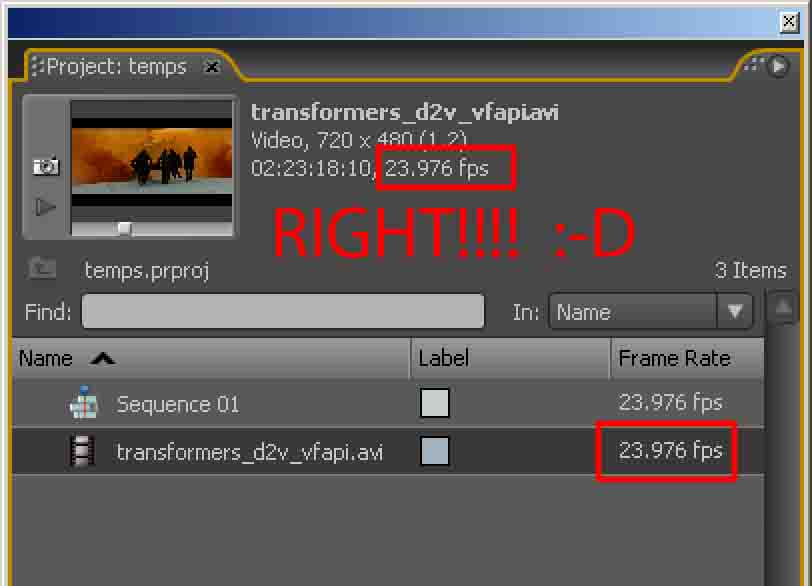
The line we are looking for is: Frame_Rate=23976 (24000/1001)
This is how 23.976 is calculated. 24000 / 1001 = 23.976023976023976023976023976024 <--- This number causes rounding issues
Change it to this: Frame_Rate=23976 (2997/125)
Now the calculation is: 2997 / 125 = 23.976 <-- A perfect fraction that won't cause rounding issues.
I have not been able to get a true straight answer from the video community about 23.976 calculation. All I know is 23.98 and 24000 / 10001 have ALWAYS caused problems for me. In both Premiere and Final Cut Pro. If anyone can elaborate on this issue please reply to this thread. Also, 23.976 renders coming out of After Effects are always stamped with 2997 / 125. This is how I originally found this fraction. Anyhow, WAY off topic. But this is why this step is required.
This is how your new D2V file should read. Now save it over itself.
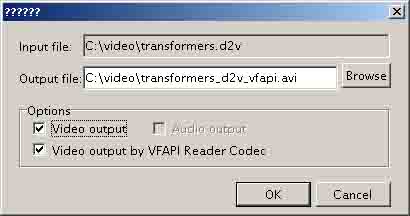
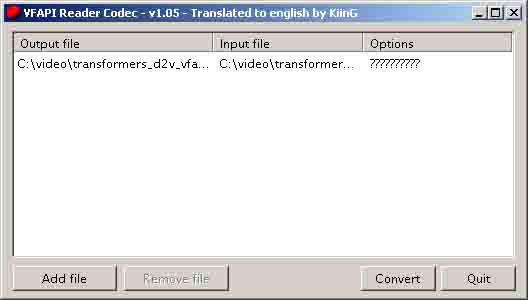
Now load your D2V file into VFAPI reader.
Once loaded, push CONVERT.
A brand new "dummy" avi file will be created.
Now you have an AVI file of the entire vob that can be loaded into anything. But we are going to go farther by adding the audio.
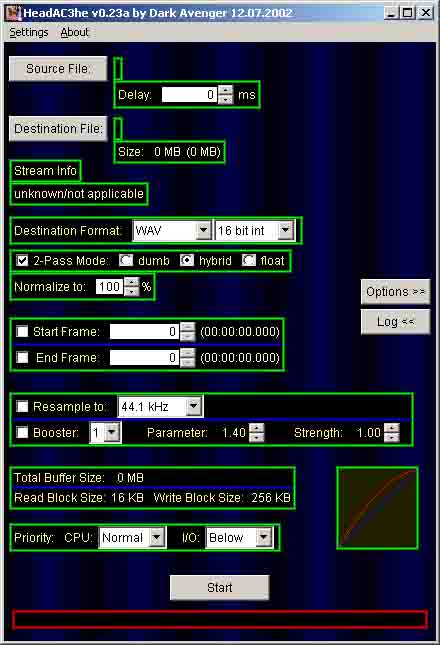
Start HeadAC3he.
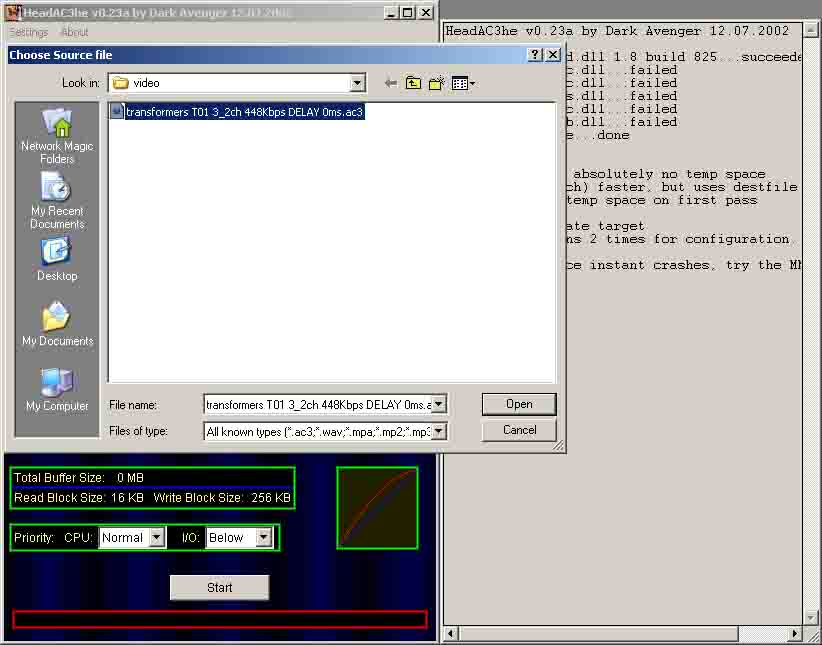
Load your AC3 file.
The current settings are fine, as it is WAV which we do want to convert to. Click OPTIONS:
Now you can choose any settings you desired. But for this, we want the CENTER channel. Since the CENTER channel is mainly dialogue only, this will allow you to seperate it from any music that might be present. Note though, you will also loose any realistic seperation in the sound. Though this is probably note an issue if you're editing a brand new video (or don't care).
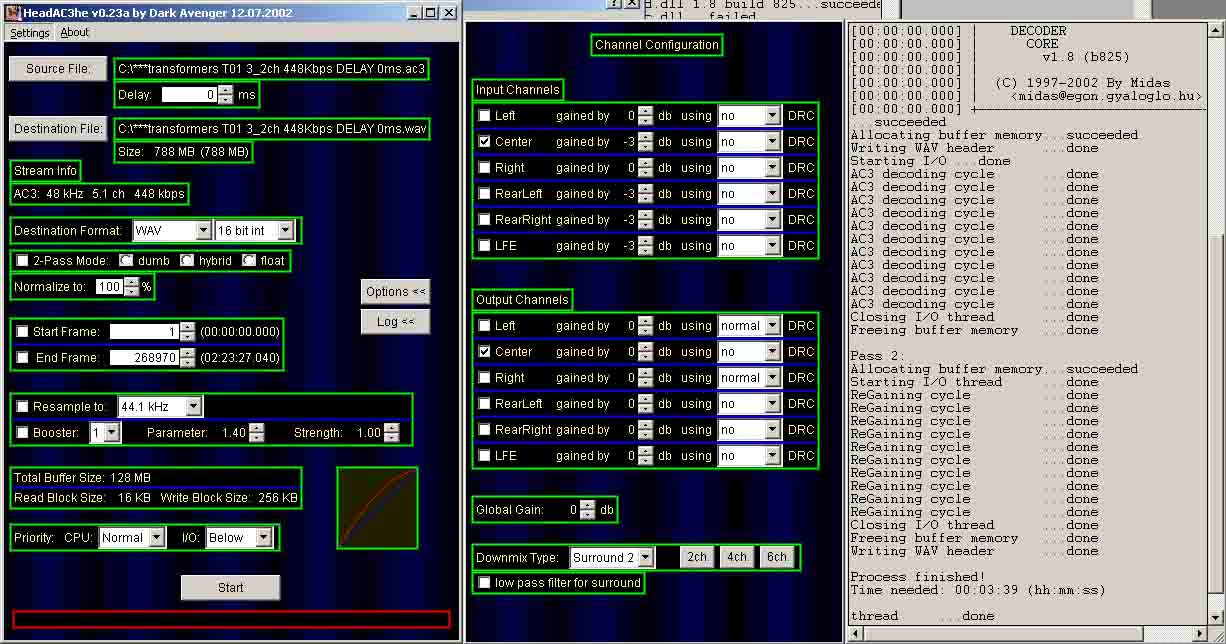
Deselect 2-pass (we don't need it). For INPUT CHANNELS choose CENTER. And for OUTPUT CHANNELS choose CENTER.
Then push START.
Other stuff: if your AC3 file had a delay (such as transformers T01 3_2ch 448Kbps DELAY -24ms.ac3 ), you would enter it into the DELAY field. We have no delay, so we don't need to use this. But keep this in mind as you will come across delayed AC3 files. Positive or negative (sooner delays or later delays)
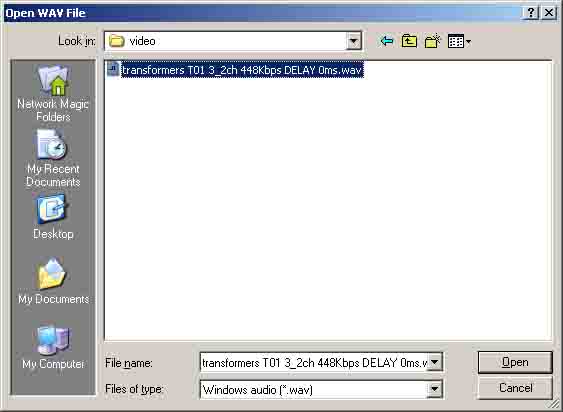
When it is done, you will have a new 1-channel WAV file.
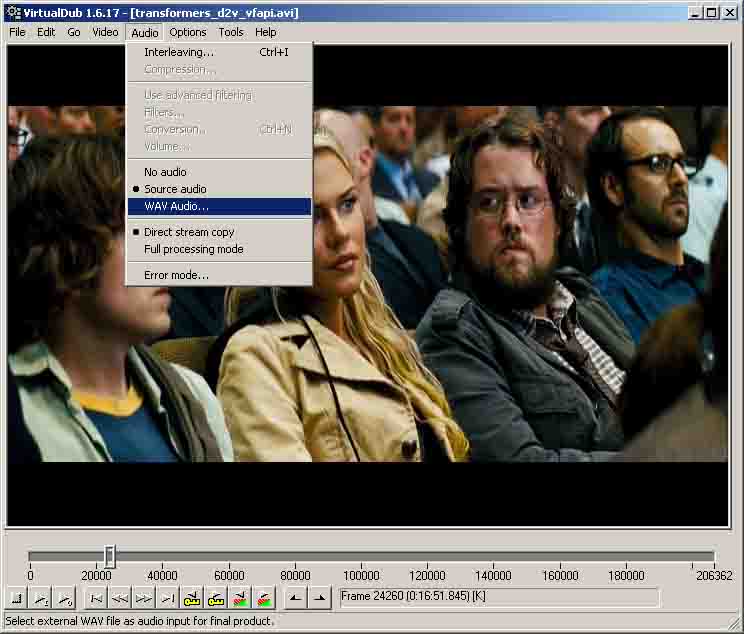
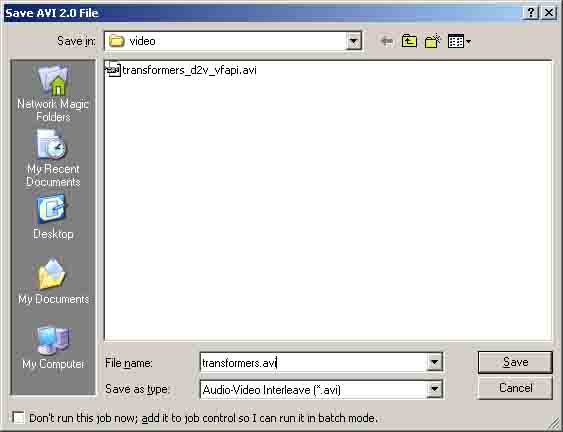
Now we will put the AVI and WAV file together.
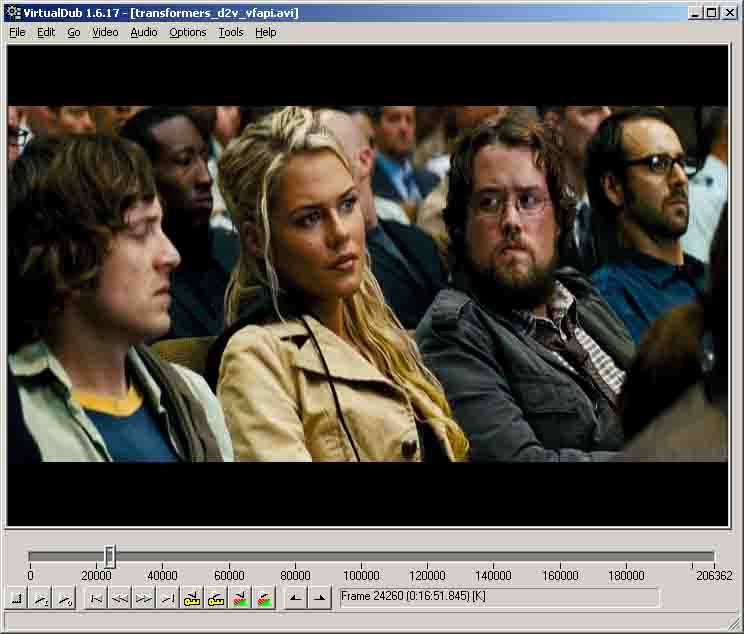
Start VirtualDub. And load the dummy AVI you created with VFAPI Reader into it.
Load your audio as well.
Now that you have your video/audio loaded, you can play it back to check it.
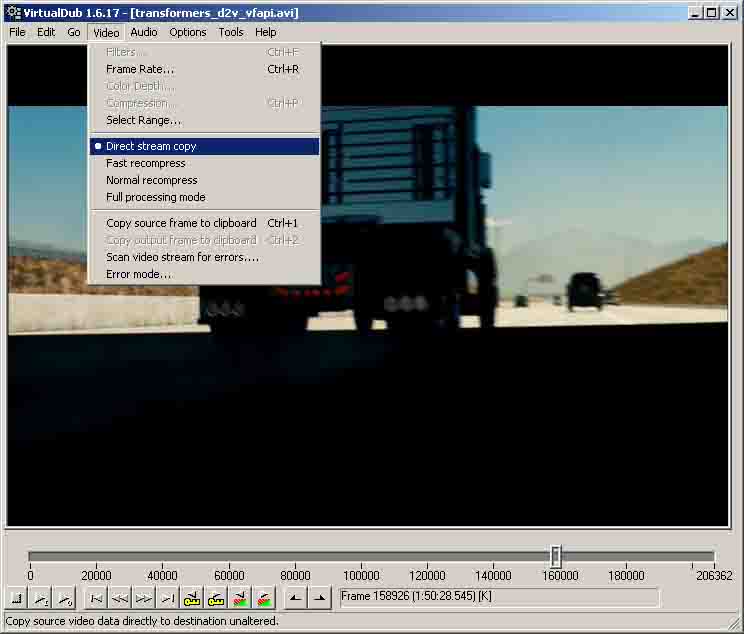
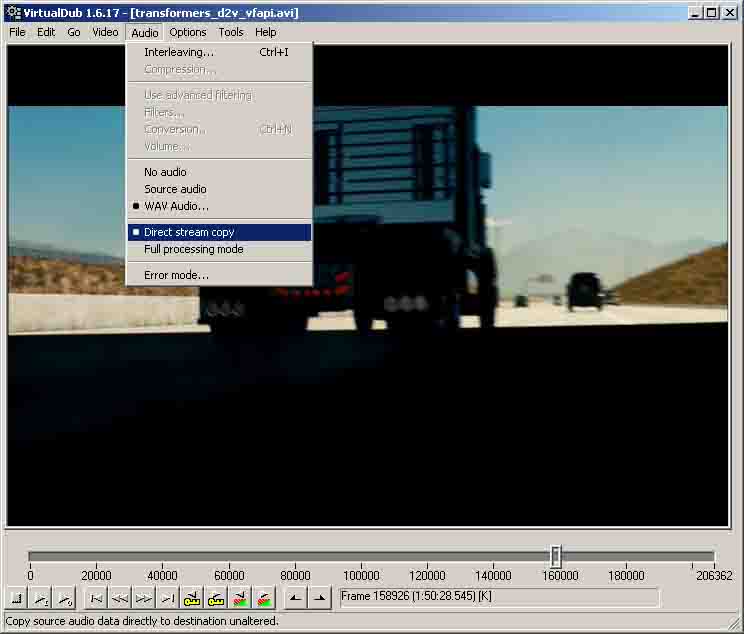
We don't want to re-encode the audio or the video. We just want to MUX it. So, to do this, choose DIRECT STREAM COPY for both VIDEO and AUDIO.
Now save the AVI.
VirtualDub should zip through this at a very speedy pace. The status window should read anywhere from 2000-4000fps. (I get 6000fps sometimes).
Once that is done, you should have a brand new muxed AVI file that has both your video/audio.
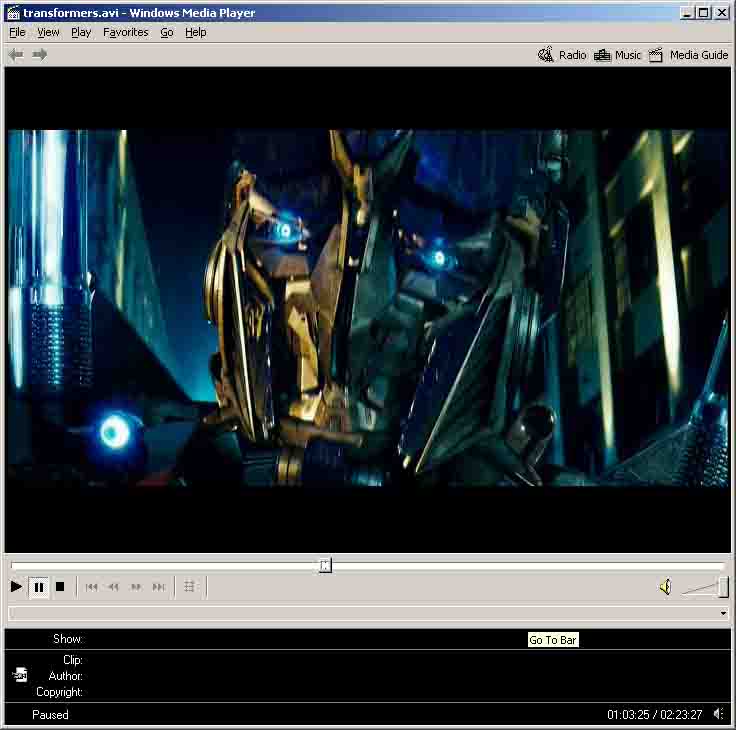
You can playback the file to check it.
There you go. Now you can load it up into your favourite editing program, and go at it!
-------------------------------
Alright, on to the second part.
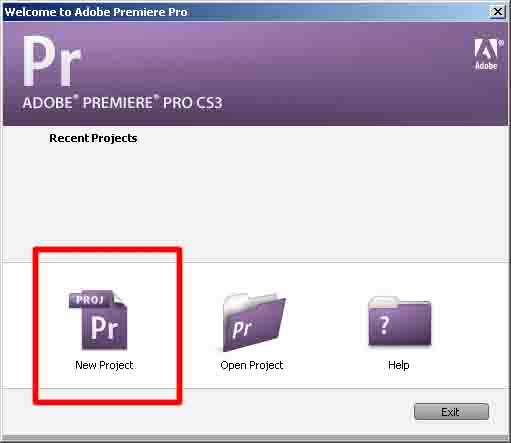
So now that you have your AVI, it's time to edit it
The screens may look different, but you can follow this in any Premiere Pro version 1 to 3.
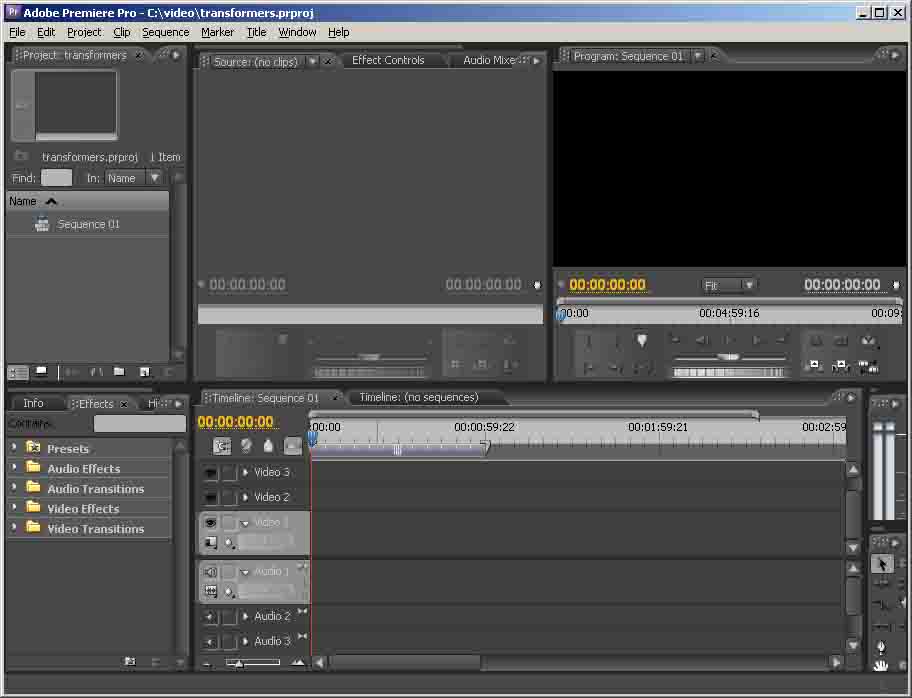
Start Premiere Pro. And selet NEW PROJECT.
You will be greeted by a screen with an assortment of presets. You can choose anything, but we want to pick the proper preset that suites our video source. We have created a 24p - 16/9 source, so we want to load: DV 24P Widescreen 48KHz.
Enter a the filename, and click ok. The program will load.
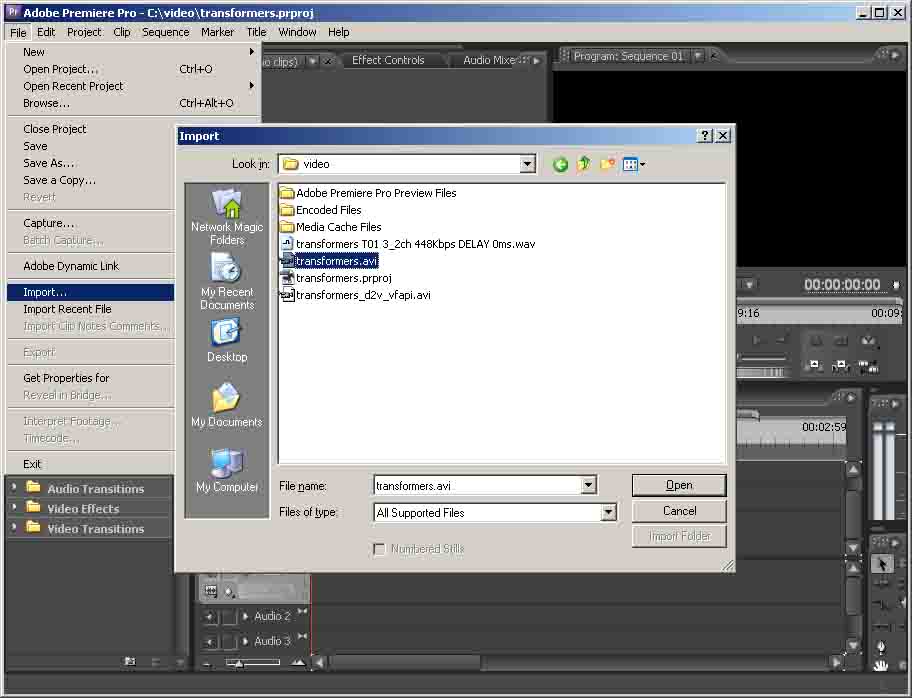
Now we want to import our AVI.
Premiere will begin conforming the file. This will take a minute
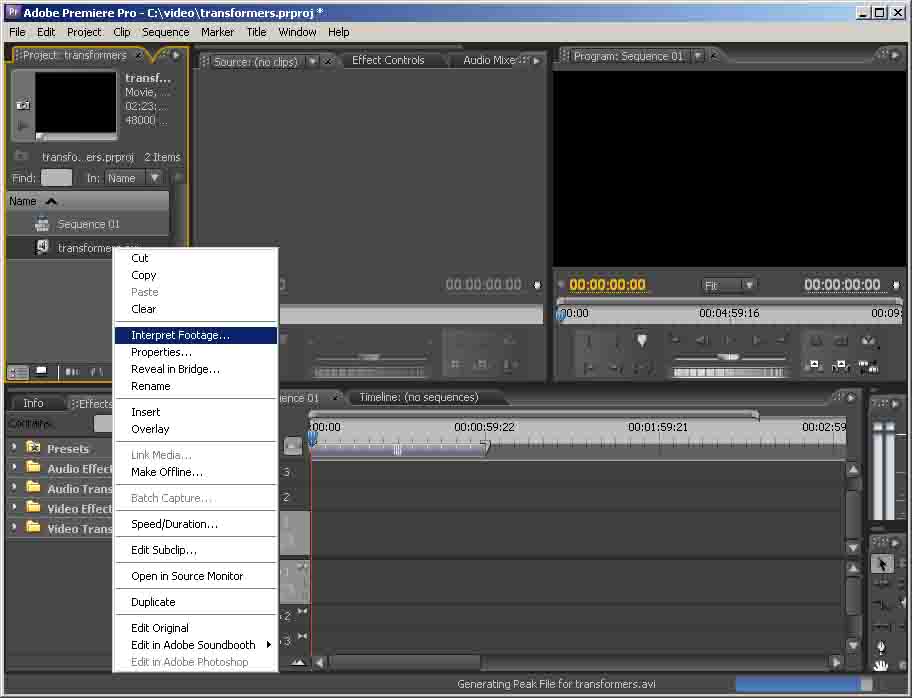
Now, at first, Premiere just loads the file into it's defaults. Whenever a 720x480 source is loaded, it assumes that it is 4/3 DV. Because our source is 16/9, we have to override this.
To do this, right mouse click on the source, and choose "Interpret Footage"
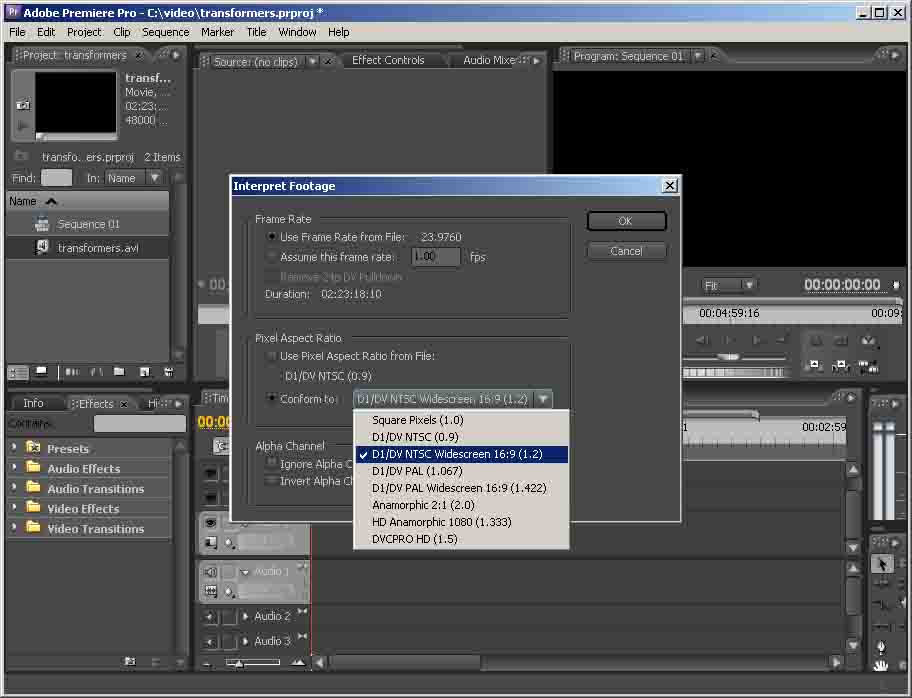
A window will pop up with the current settings.
Choose CONFORM TO: DV/D1 NTSC Widescreen 16:9 (1.2) Then click OK.
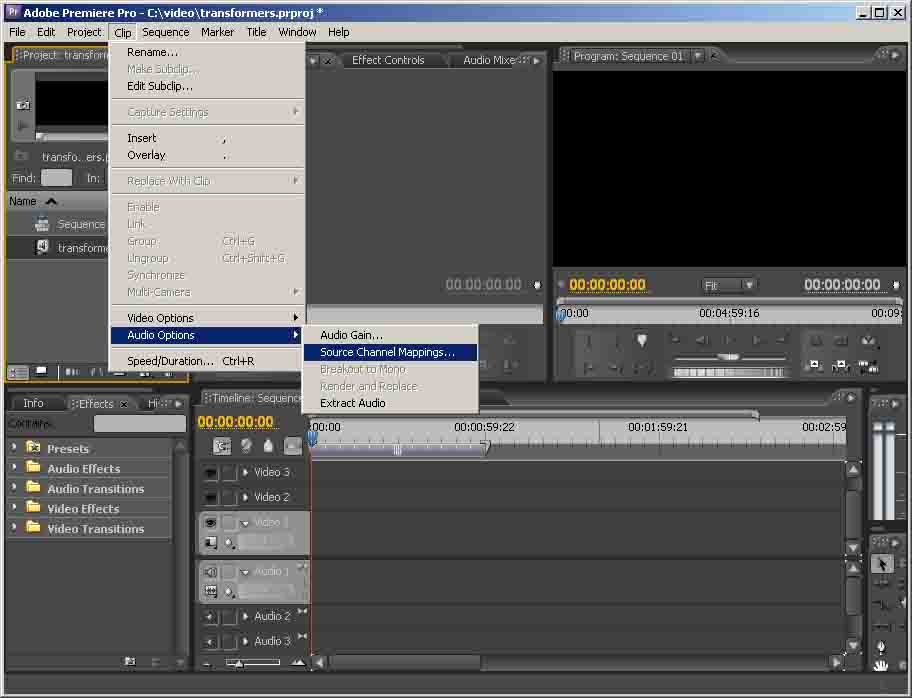
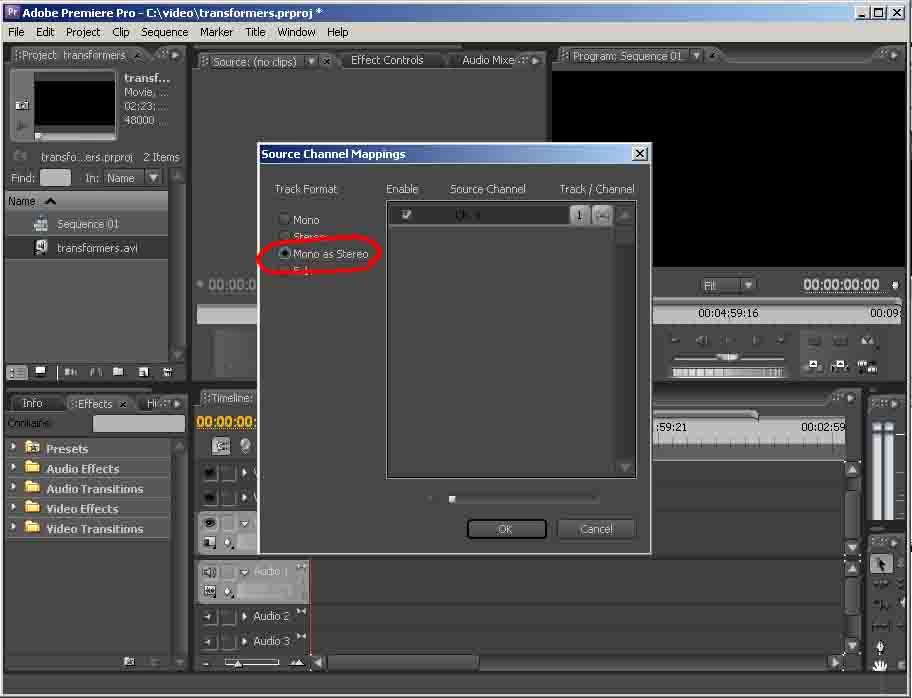
You are near ready to go. One last thing you need to do is change the audio mapping.
Because our source is 1-channel MONO, we can't mix and match it in the current set of tracks (well, you can, but it will create a brand new MONO track. We don't want that).
Change the audio mapping BEFORE you begin editing. This process can't be done once the file is inside a timeline. The only way to change it would be to delete the file from ALL timelines, and we don't want this.
So, with the file selected again, choose CLIP, AUDIO OPTIONS, SOURCE CHANNEL MAPPING.
Then choose MONO AS STEREO. Click OK
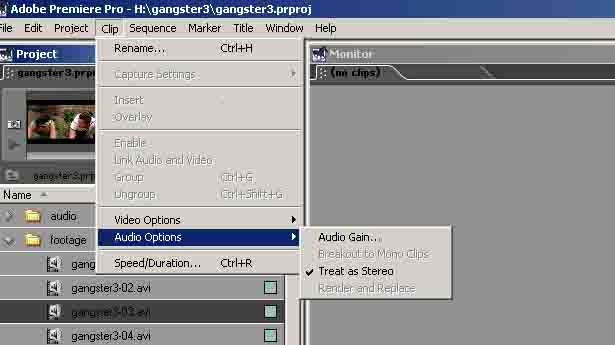
Note, in Premiere Pro 1.0, this step is simply TREAT AS STEREO
You're done!
Import music, graphics, etc, and start editing!
Any spelling mistakes or other errors please reply
Try StreamFab Downloader and download from Netflix, Amazon, Youtube! Or Try DVDFab and copy Blu-rays! or rip iTunes movies!
+ Reply to Thread
Results 1 to 30 of 44
Thread
-
-
Hi Guiboche ;
2 things:
1) How do you handle a PAL video that is 25p - it wont let me do Force film?
2) I think you should mention that you don't use all freeware. Premier Pro is part of adobe creative suite and it is very expensive.
Needless to say, I got as far as the second part only to find out I couldn't convert the AVI I made back to DVD b/c I didn't have the software, but I found another guide to help with that step that uses freeware.
For it, you need FAVC, Avisynth, Microsoft .NET v2 and imgburn. -
For PAL, you'd use HONOR PULLDOWN FLAGS.
And, this guide doesn't really cover converting back to DVD. Though there are MANY other guides around here for that
Also, the guide uses all freeware software to "Prepare" the files. Not to edit them. As these AVIs can be imported and edited into anything once prepared. I guess I should have mentioned that. Sorry
Later
-
Hi, thanks for all the info, will give a try. Just bare with me as I'm fairly new to video editing, i've use Premiere at college putting together my showreel but when it comes to redediting DVD's it get's tricky.
Basiclly I'm trying to edit out certain audio segments of my DVD "Transformers".
I would just like to know does the avi file you created loose quality to the original DVD or is it just a reference file that links to the original vob file?
So lets say I convert the vob to avi format, edit the audio sections I need in the avi. Then do use something like All-In-One DVD Converter to just burn that avi to a 8GB DVD?
Will I see any quality loss, as when i publish my home videos I record with my camcorder with cruddy software like Power producer the quality is awful.
Shot, God Bless. -
Yes, the AVI is a referrence file that is pointing to the original VOB file.
Second, you will always go down at least 1 generation if you want to burn the file back to DVD. And quality will depend on what piece of software you use to encode.
Overall, it should look nearly identical to the original file.
Here's some of the edits I made using this method. Every vob is 1 generation DVD loss.
http://www.guiboche.ca/fantrailers/mywifeisagangster3/mywifeisagangster3-fantrailer.vob
http://www.guiboche.ca/fantrailers/alias-s1/alias-s1-fantrailer.vob
http://www.guiboche.ca/fantrailers/ultraviolet/ultraviolet-fantrailer.vob
http://www.guiboche.ca/fantrailers/soclose/soclose-fantrailer.vob
Oh, and depending on how you want to deliver the audio, it will either remain first generation DVD (if you keep it a way file). Or, it will go down 1 generation in AC3, or MP2.
If carefully handled though, the 1 generation loss should still look and sound excellent. -
Awesome, thanks for feedback.
Also just wondering what format am I going to export the file as when done editing in Premiere, will it still just be a reference file or will it be a complete video file of it's own at this point? As far I followed from your tutorial it looks like you export to DV AVI?
Do I need to use encoding software or can I just dump that file straight to a 8GB DVD & play it in my DVD player?
Thanks alot for the info, seriously been wanting to do this for ages. -
You would export to lossless AVI. Not DV. As if you use DV AVI, then you will definitely go down 2 generations. 1 generation for DV, and 1 for DVD.
Either use a lossless codec for export, or just NONE for the codec.
And, yes you would need to use encoding software for DVD. Anything that encodes to MPEG2 should be fine.
But, of course, if you are wanting to burn it to DVD, you will have to use whatever software supports the strict standards required for DVD authoring. Personally, I use TMPGEnc DVD Author.
Oh, just on a side note, in this tutorial, I do use a DV 24p preset. Even though your timeline will want to render to DV, Premiere will always point to your original files when you export. So you don't have to worry about the generation loss that will ultimately happen in your rendered timeline. Those rendered preview DV files is not what Premiere uses.
This is good for 2 reasons:
a) You can use any available DV camera (or DV controller) for TV out.
b) When your project is done, you can readily export it to DV tape. And, you can export a lossless AVI master (if you so wish). -
Is there any reason not to just load the VOB into ReJig, (or DVDShrink) select a compression factor, and click "process"? And why convert the audio to mono?
If you want to cut sections of the video, you can use an MPEG editor rather than going through AVI and encoding back to MPEG. If you cut enough, you might be able to fit the movie on a DVD with no further compression. -
This guide was intented to be for creating entirely brand new edits. Whether it be fan trailers or music videos. Not to shrink or fit a movie onto a single DVD.
It sounds like this is what Weapon-X wants to do.
I've edited the first post, as to not cause this confusion. -
K, I've got my AVI but it's 4:3 & not 16:9 when played, although my streaming vob is 16:9, any idea plz?
I have tried it in Adobe Premiere & it works like a charm ^^
still 4:3 though ;_(
When exporting with no compression takes 30GB for like 10mins of footage & I don't have AVI lossless codec option, will try download. I see the files you posted above are in vob format, do you publish back to vob after you export from Premiere?
PS: On a side note I kept all the audio channels as the quality was far better. What was you intensions of just keeping just the center channel?
Thanks for all the info so far, seriously a major help. -
Pixel size and aspect ration don't seam to translate to AVI. At least, not in these ones with these codecs/settings. The file will just playback in whatever pixel resolution it is. In this case, 720x480. There is no resolution loss though. Just no support for aspect ratio stamp.
If you source is indeed 16\9 then you must override the default 4/3 setting. This is outlined in the tutorial. As is the reason for center channel seperation.
And yes, I export a lossless AVI from Premiere, then use a second program to create the final VOB. -
How is this "without intermediate files" ???
 If in doubt, Google it.
 -
Because you don't have to convert the footage to DV, or any other sort of lossless AVI.
These AVIs are pointing directly to the original VOBs.
This is also saving up on TONS of disc space. -
I get all the way to importing the 'dummy' avi file into virtualdub, then I get this annoying message:
"Couldn't locate decompressor for format 'vifp' (unknown)
VirtualDub requires a Vidoe For Windows (VFW) compatible codec to decompress video. DirectShow Codecs, such as the ones used by Windows Media Player, are not suitable"
How do I fix this? -
You have to install VFAPI Reader.
Find this file that comes with VFAPI vifpset.bat and double click it. -
I tried following this guide and every time I get an AVI file that comes out darker than the original VOB. Does this method some how compress the luminance level of the VOB and make it darker? I'm sure I'm following the steps correctly.
-
Nope. Not at all.
I suspect your hardware playback of vobs on your system might be playing back at 16-235. Since when this method is done, you will see the full 0-255 range in the created AVI. That might be why your AVIs look darker.
Are you running an NVidia card? The levels are all messed up on them, and 16-235 is forced on DVD playback/vobs/anything that request hardware playback. -
Thanks Guiboche, this is definetively one of the most useful guides I've found. It's great!
I have one question: I've used it several times (I work with PAL vobs) and it worked perfectly but in one case ("Ben-Hur" R2 PAL italian dvd) I got an audio-video sync issue.
Any idea of what's happened? -
Is there a delay number attached to the AC3 file? If so, HeadA3C should read it, and delay the converted WAV accordingly.
If not, it could be one of two things.
a) There is EXTRA attached to the starting vob. Sometimes, menus, copyrights, etc, are attached to the beginning of the movie. Or even black. Because that part of the video had no audio, the extracted AC3 won't have a delay rate attached to it.
or
b)The copy protection that lies about delay rate on purpose. This also appears on the Ultraviolet disc. Where it says the delay rate is in the 30,000 or something.
In both cases you'd have to fix the delay rate manually inside VirtualDub. Once you have both loaded, you can set Interleaving. This is found in AUDIO > Interleaving, or just CTRL+I. You set it in: Delay Audio Track By.
Sometimes, setting a definite IN and OUT point (even if it's right at the beinning and right at the end) inside DGMPGDec helps problem files. If I've had delay problems of the extracted AC3, I have found this helps. -
Wouldn't the colorspace 16-235 make the video look darker and 0-255 look brighter since the range is a lot shorter? After a little more inspection, I found that the VOB played back on a media player looked darker than the same imported VOB on Vegas. The VOB files on Vegas look brighter, the way it should be. On that note, the AVI files in Vegas look the same as the VOB files being played back on the media player, which if you're right is 16-235. Does that then mean the AVI is 16-235? Anyway, the real question is if the AVI and VOB files are both being played back on Vegas both at the same range, why does the AVI still look darker than the imported VOB?
And yes I'm running a NVIDIA card. -
No, 16-235 would look brighter. Because the range is squashed. Where 0-255 is the full range.
Here's the difference:

16-235 is the shorter range. Because there is no pure black, as it is now not 0, but 16, as per white.
That is how 16-235 makes an image look brighter.
And, I can't be sure what range the original VOB is unless I had it. But, if it's film source, it's 99.9% likely the range is 0-255. But, of course, VOBs support BOTH ranges. So even though source is 0-255, the information exists in the file to create 16-235 (for NTSC) when needed.
I didn't mention it in the tutorial, but make sure the YUV-RGB range inside DGMPGDec is PC SCALE. As the TV scale creates 16-235 levels.
You say though you are running an NVidia card. There is a huge 0-255 and 16-235 problem with them. But, this is ONLY for when hardware is requested to render video to the screen. This doesn't affect the original levels in the video.
Read here:
http://forum.inmatrix.com/index.php?showtopic=5661&st=0 -
If the VOBs also contain the 16-235 information, Vegas is probably displaying it at that color range on the timeline. I read somewhere that DV footage imported onto the Vegas timeline are seen as 16-235 - don't know if the rule applies to other formats, but I think it's safe to say the VOBs are. Then again, I'm not entirely sure. On the other hand, if the AVIs are 0-255 and that's the way it's being displayed on Vegas, then it probably just depends on the file.
The only problem I have now is rendering back to MPEG-2 as you mentioned; the video comes out much darker than the original. I guess it's probably the NVIDIA card. I'm going to have to look into more when I have the time. -
Yeah, but the Nvidia card should only affect how the video LOOKS when hardware is requested. It doesn't change colours in the video file.
It might be just how Vegas handles the files. But I can't be sure. I never used this program.
You can always shut off all hardware acceleration to check what the REAL range is. This way, your video card won't be used to display the file.
The option to Shut off all hardware acceleration is inside the display properties. -
Thanks for the reply and the tips.
Another question: which do you think is the best way to render the final video (with Premiere Pro) if it will go on a dvd again? -
That would definitely any sort of lossless AVI
-
Hi Guiboche, I've managed to edit the vob's in several different ways.
I tried just renaming the vob to mpg & premiere accepted it. Then I tried your method aswell which work perfectly using VFAPI "Dummy AVI".
So I can easily edit vob files now, my problem lies with the resolution. I'm using Premiere 6.5 & not Pro so my settings are slightly different. The problem I run into is that when I export "using lossless or no compression" I get slight pixelation on the boarder of the visuals. It seems to be from me resizing to a 16:9 resolution.
It reads as 720 X 576 but when I export this is not correct as the aspect ratio is out for one & the pixelation problem presists. I've also tried your resolution of 720 X 480 but with the same aspect & pixel problem.
I've actually seen that unlike your dummy avi, mine straigtht from creation losses it's aspect ratio & becomes squashed into 4:3 unlike yours that retain it's 16:9.
So I've found a export resoultion in premiere that returns the footage proportions to that of the original vob, using a strange 768 X 432. The result looks identical to the original vob, except for the pixel edges.
The DVD I'm editing is Transformers PAL, 25fps.
Please help? -
It seems to be the pixel aspect ratio in Adobe Premiere 6.5 that doesn't function correctly. If I export straight to MPEG and use the settings there it's fine.
Still have the problem with the pixelated edges on the visual though??
Yeah, maybe I'll have to fork out some cash & go buy Premiere Pro... -
Please help me!!
I have been trying for HOURS to get this DVD in an editable state. I want to take footage from a DVD so that I can edit it with Premiere CS3. I have a perfectly awesome video file that I ripped from the DVD, but Premiere will NOT read it.
Maybe if some basic questions are answered for me, maybe I can take it from there. I have been using many guides, downloaded many programs and codecs, and still cannot get this to work. Maybe it is my Vista 64, I don't know. Anyway, here are some basic questions:
1- How do I make a VOB file from the DVD so that I can follow this guide?
2- Using VirtualDub, how do I save using the Pana DV codec? On the compression tab, I do not see a setting for saving it as a Pana DV file so that I can edit with Premiere.
I had no problem with this sort of task last year, but then again I had XP and everything was nice and easy. Now I am so frustrated because I think I have tried everything to get this to work. But I cannot. I would greatly appreciate any help at all. Thanks immensely!! -
The way you are requesting to get video into premiere is COMPLETELY different then what I have written in this guide.
If you follow this guide step-by-step, you should have no problem getting the video into premiere.
How to get the footage into DV format will not be covered here. There are other guides for that method. This guide is the frameserve method.


 Quote
QuoteSimilar Threads
-
Mr Noob from Noobsville (edit mp4 H.264 1080p using intermediate file?)
By A-thru-Z in forum Newbie / General discussionsReplies: 10Last Post: 24th Sep 2009, 17:45 -
edit .VOB files
By vali in forum Newbie / General discussionsReplies: 3Last Post: 2nd Aug 2008, 03:23 -
Edit VOB files and save to dvd
By NickyJ in forum Newbie / General discussionsReplies: 9Last Post: 1st Jul 2008, 12:59 -
edit Vob files in DVDR movies?
By SUPERIOR in forum Newbie / General discussionsReplies: 6Last Post: 12th Feb 2008, 11:12