


This guide is on bovs as used in dvdauthorgui , using the gimp for all editing and ms paint to save out as a 16 colour bitmap
This is because the gimp only supports bitmap output in rgb at 24 colours , and not 16 colours .
For those using linux , please check out xnview for a linux version , as it can save out the images in 16 colour format ready to go .
http://www.xnview.com/
I'd like too thank liquid 217 for there advice and futher input , which is why this guide exists for newbies or anyone wanting there own buttons for there projects .
Those with jasc paintshop pro (not free) , can create these buttons easily , just follow the rules specifically to colours used , the number allowed per picture , and format .
The rules :
No picture may contain more than 4 colours (black is background , is not seen in playback of menu )
Only these colours specified below will work .
(well , not entirely sure about that , but stick with those mentioned would be easier)
The gimp - being freeware , is accessible to ALL .
Buttons can be any size , but prefer to keep them the same size as used by dvdauthorgui , they look cooler ...
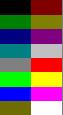
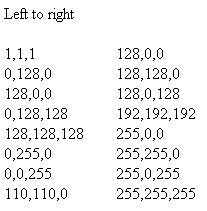
The colours by hex value :
That third down on the left is 0,0,128 .. opps
These colours are from one of the buttons in dvdauthorgui , so we know they work .
The average button is 90pixels x 90pixels , so that would be a starting point to work from , so lets go .
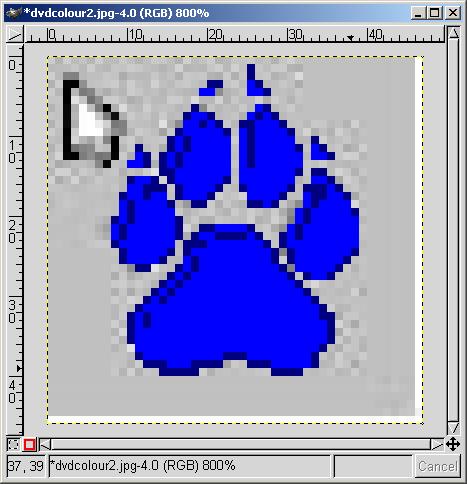
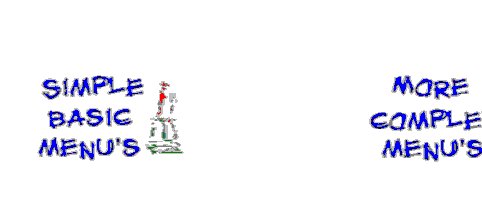
For this guide , I am using some pictures from a clipart collection , so here is a simple picture to use
I'll leave the arrow out , and just use the paw print for my needs ... so open gimp .
Click File , Open
E is where my picture is (double click) , then in other window , navigate down to file (double click it) , to open
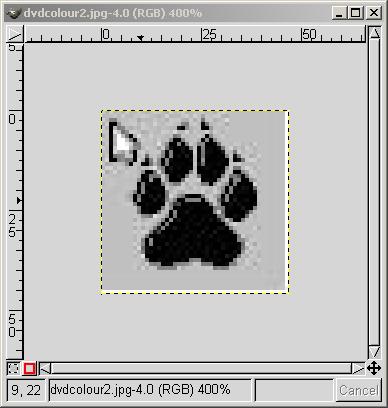
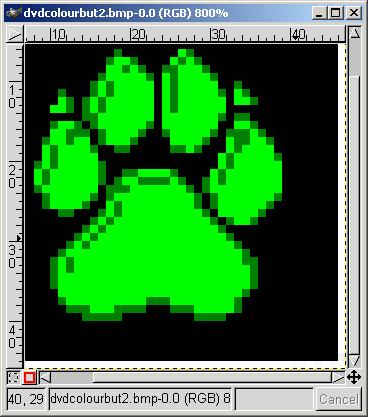
Right click on image and choose , View , Zoom , 8:1 to enlarge it enough to work with , then grab the lower right of the window and drag it open
to show the whole image .
Right click on the image and select from menu , Image , Mode , RGB , this will when finaly saving as bmp , produce 24 colour bitmap images .
Now as for this picture , all that is black will be painted for this guide , blue (0,0,255) , the area in a dark grey will be dark blue (128,0,0) , and background black (1,1,1)
The alternative will use light green (0,255,0) , dark green (0.128,0) around in that dark grey area , and leave that black area alone .
Each image will be saved as a different image in bmp format .
This image size initially is 47pixels x 47 pixels , a little small , but could be scaled up , but I wont do that now , just the paint bit .
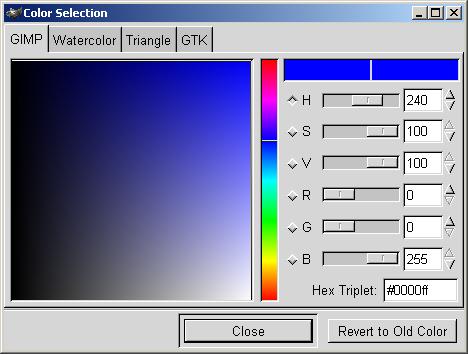
You will notice the pointer in that black square area , double click that and this window appears next .
In the RGB values , I have chosen to start with my blue , so 0 is placed in R , 0 in G , and 255 in B , then click close button .
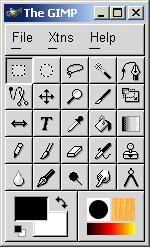
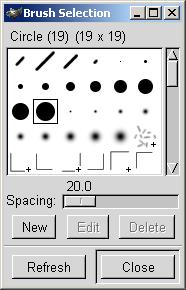
Now the paint tool , but first , click on the main gimp tool box , File , Dialogs , Brushes , and this appears
Choose the smallest dot available when working in small area's ... now to paint , I prefer the pencil as it allows me to only paint each pixel .
Here is the image so far ...
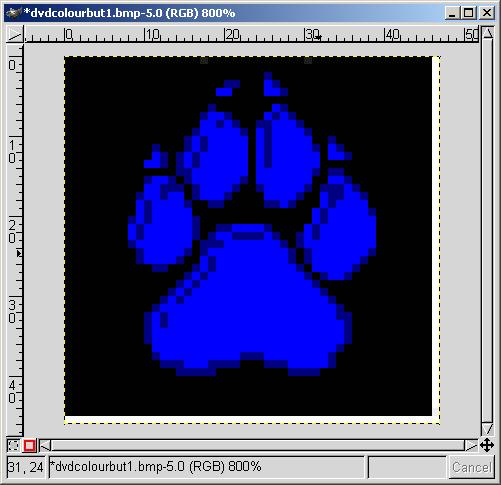
Thats 0,0,255 done , now back and change to 0,0,128 (dark blue) for those grey area's , and here that is ...
Just hit CTRL + Z if you mess something up ... now the final colour 1,1,1 (black) , and here is that pic ...
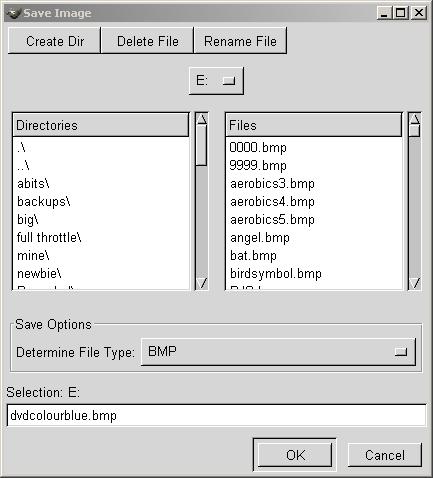
Now , on the picture , right click and choose , File , Save As
I have name it "dvdcolourblue.bmp" for now ... so here is my altrenative image file , done the same way .
The blue one is is my default button , the green one is my action button (performs action as required) .
To finish with , open each picture in ms paint , then File , Save As , change format too 16 colour bitmap , and there ready to go to work ...
Well , from here on , you should have a good understanding of how to produce buttons for dvdauthorgui in the gimp , just remmember the rules concerning colours , oh , and format required .
Size dosent matter , but keep them below 120pixels x 120pixels would be nicer looking ...
Before we finish , here's a snapshot of ifoedit playing back one of my projects .
The button you see here was created using pixia ... that was me screwing about trying to figure the buttons in pixia , and it too worked ???
Looks like an artist sitting down , painting .... just me fiddling about to see what other freeware paint programs can create buttons for dvdauthorgui ...
Of course , thats from my "Dvb for newbies" dvd I have been compiling over the last 2 years as a teaching guide while they work on their pc's .
All the tools are located on a cd so they have access to all the free tools , and guides I have created , in a simple to follow format .
Other buttons so far :
And many more ... hundreds even .
Some 2 colours , 3 colours , and 4 colours .
Wont be happy till I have a minimum of 500 I think , by then I'll be ready for something else ... more pcgedit guides ...
==========================
Just an addon : Mwsnap can load you button graphic's and flatten then down to 4 bit ... another handy feature as to why you should have mwsnap in your tool box ...
====
Updated note : For the gimp output 16 color use ... image > mode > indexed
+ Reply to Thread
Results 1 to 4 of 4
-
Last edited by Bjs; 18th Mar 2011 at 05:06. Reason: gimp notation
-
Free Flying Soul

- Feb 2002
- United States


Wow, excellent work. I would like to include these in the dvdauthorgui installer, with your permission of course.
I do have one point to make. Its something I have been thinking about, but have never really said anything. The Aspect Ratio of all of these buttons are 1:1, but if they are authored onto a menu, they will appear squeezed in slightly (moreso for 720,480 NTSC). this means it may be necessary to create 2 sets of buttons, one for NTSC, and one for PAL. What do you think?
Again, great work. -
I think this is prone too converted menu's , and not the actual buttons if used with raw inputs as required in dvdauthorgui when creating a new project .
All appears fine in my ntsc project .
Converted menu's from pal 720x576 to ntsc 720x480 , tends to squash things about , and in reverse , it stretch's them out in height .
Menu's with characters or substantial animations are the most affected .
In case of the button problem , I use a sub ripping tool to grab a snap of the buttons , and reconvert them for reuse , then its a matter of finding a suitable solution for pal to ntsc downsize , and there are a number of ways to do this , but not all will be happy ... in those case's I say go buy it .
I prefer to build my own menu's , thus avoiding several problems , and reuse the reconverted buttons , this allows me to completely reuse all the commands previously used by this menu .
Most are happy with the way I do it , and if the original menu has never been seen by the person watching it , then there none the wiser ...
-------------------------------------------------------------------------------------
Well , I think the time has come to show users my way of correcting audio sync issues ... so I'll get too this guide and have it posted before saturday .
Which reminds me to find my pooh bear collection , thats just got to be converted ... for the kids . -
Another tool , better than ms paint is Free Image Editor found here : http://www.askedfiles.com/ ... it's free and packed with feature's .
Usefull tool for designing button's for dvdauthorgui ... and simpler .


 Quote
QuoteSimilar Threads
-
GIMP GAP Green Frames
By mixt in forum Newbie / General discussionsReplies: 9Last Post: 25th Apr 2011, 09:45 -
Menu Creation in DVDAuthorGui
By larrytxeast in forum Authoring (DVD)Replies: 3Last Post: 23rd Jul 2010, 12:52 -
BOV in DVDLap PRO
By grzegorz in forum Authoring (DVD)Replies: 2Last Post: 10th Apr 2008, 02:52 -
[SOLVED] Maintaining proportions: gimp - Cinelerra ?
By jdetwile in forum LinuxReplies: 2Last Post: 22nd Mar 2008, 10:51 -
GIMP 2 anyone? Animated Avatar size problem...
By fLYtRap in forum ComputerReplies: 15Last Post: 19th Jul 2007, 07:43