


01/02/04 Decided to re-tool the pictures and bring it back. Stay tuned!
Sorry about all the stupid watermarks on the pictures, but this is the way it needs to be.
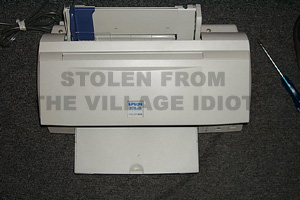
Well here it is... your guide to making a CD printer, on the cheap! This is not meant to replace your photo/text printer. It will only print to CD's after this mod. If you need one machine to do everything, you better just buy a machine that will work for CD's and paper.
I used an Epson Stylus Color 640 because I had one sitting collecting dust. This mod should work on all Epson printers that use this style of paper feed. They all use the same case too, so if it looks like this one, you should be OK. I have confirmed that the following models use the save style of paper feed, and should work just like this guide. All are Stylus Color models: 400, 440, 600, 640, 660, 740, 800. Also possible the 860 and 1160. The 6XX use 1440x720 heads. The 4XX uses 720x720 heads. These use the older style of ink cartridge that DOES NOT have an ink counter chip in it. This means refilling is a breeze, and the printer can be purchased used real cheap. You should be able to do the same thing with any of the printers in this series.
Make sure it operates correctly with paper, print some things, clean the heads, etc. Then when it comes to rest, turn the power off, and unplug the power cord!!!
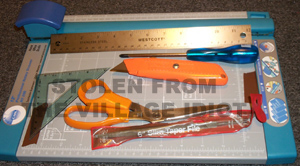
Here are the tools you will need:
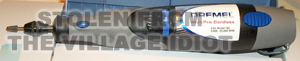
A #2 phillips screwdriver, scissors, utility knife, ruler, right angle triangle, paper cutter, a sharpie, some tape, a metal file, and an old coaster disk. And of course your weapon of choice to cut the plastic, a Dremel rotary cutting tool. The paper cutter just makes life easier, it is not essential.
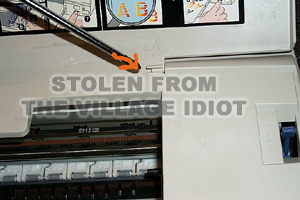
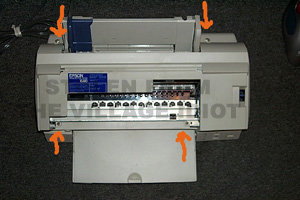
Next remove the lid over the print area. There is a clip that un-snaps on one side, then slide the other side out of the case.
#1
Then remove the 4 case screws.
#2
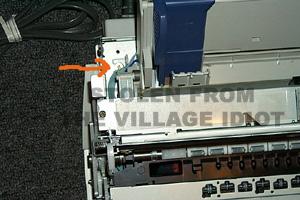
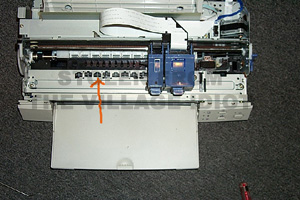
Before touching anything, you must mark one of the gears, so that when you assemble the beast, you can line up the gears properly. This will save you some errors when you try to load the caddy for the first time.
#3
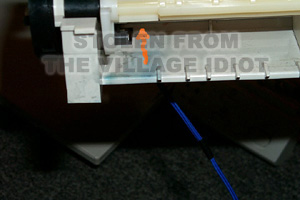
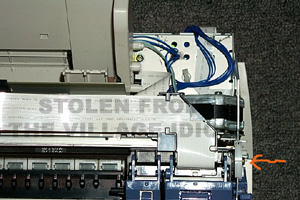
Now it is time to remove the paper feed assembly. It is held in by 2 screws, one on each side.
#4
#5
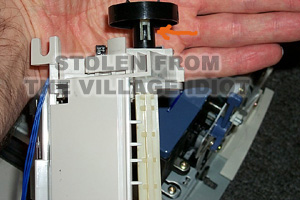
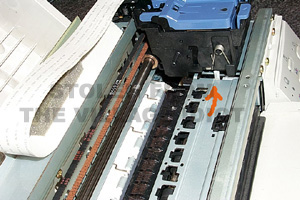
Slide the assembly to the side with the gears. This will let you pull the gear you marked in a previous step.
#6
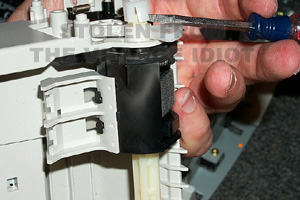
Wiggle it side to side until it pops off. Don't be too brutal, if you break it, your machine will not work. Then slide the assembly out of the printer. You may have to peel off some black tape holding some wiring down. Also pull the 4 conductor gray control cable out of the cable hook on the assemble next to the screw in image #4.
You can now unplug the blue wire harness from the sensor on the paper feed assembley. Inside the paper area, you will see a white plastic clip, near the black sensor wheel, pull that clip off.
#7
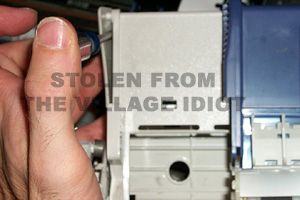
Next remove the retainer at the other end.
#8
There is a snap under the screwdriver, just lift a little and it will slide off. then slide the shaft towards the black sensor wheel. This will let you remove the sensor wheel. Just lift the tab, and slide it off.
#9
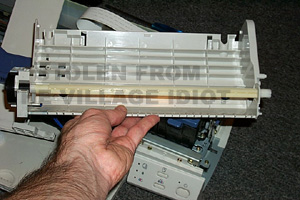
Slide the shaft all the way out. Remove the feed mechanism. One side will bend to allow you to remove it, the other side is much thicker, and will not bend.
#10
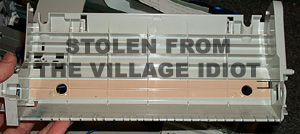
Take out the black plastic pieces that are on each side. They will have a small spring on each.
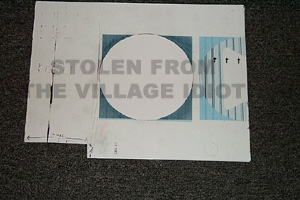
The input tray should look like the following picture.
#11
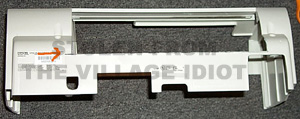
Now cut the shaded portion of the input tray. I cut mine in a straight line across the top and bottom of the 2 circles that can be seen in the previous picture. Also you need to cut the outer case to match. There is a curved portion on the back of the case. It is also a textured molding on the plastic. You need to cut about 1 centimeter below this textured area.
#12
This is my weapon of choice
You will need to remove the "pizza wheels" from the output roller. They just snap out.
#13
If you need to move the printhead, you will have to slide the white plastic holder out of the way. It is shown in this picture:
#14
You should adjust the printhead height to be higher above the paper. You do that by loosening the screws on the adjustors, and pulling them away from the frame. Then they will swing towards the output tray, and raise the printhead. There is one on each side, only one is shown:
#15
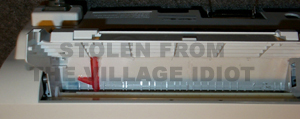
You are now ready to re-assemble this machine. You will need to put the shaft back into the tray, the black sensor wheel is the important part. You should also put the 2 cam shaped plastic pieces and 2 retaining clips back on. The shaft is keyed, so if the parts do not want to go back on, do not force them. Just turn the part until it slips on without force. It should look roughly like this:
#16
I have made an additional caddyguide to ensure that the caddy lines up the same every time. It is simply some plastic glued to the input tray and looks like this, the red part:
#17
Plug the sensor cable back into the sensor (blue wires) and put the loading tray assembly back into the printer. Line the cams up so that they are pointing up and slightly back (away from the output tray). Put the 2 screws back in, remember that one of the screws is meant to go in the left hand side and has a "step" cut into the head so that it can not be turned in too far. The other side is a normal screw with a washer on it. Don't get any of the wires caught under the tray. The only thing that is meant to be under the tray, is the print head flat ribbon cable.
Now put the gear back on, and line it up with the mark you made for its timing. Put the outer case back on, and plug it in, turn on the power. It should cycle through the cleaning and self test, then come to rest with no errors (no flashing lights). Now you need to make you caddy.
Mine was made out of cardboard for a first test. When I find better material, I will remake it! (done see below)
Letter size is good (or A4). On the side that enters nearest the control panel, and resting printhead, you will need to cut some material away. Cut a rectangle about 82 milli-meters down the length, and about 17 milli-meters into the width. I have found that the original 74mm may not be enough. Start with 75 mm and cut away more as you go until it will works everytime. So that it looks like this:
#18
The first time you feed it into the printer, it will feed all the way through and eject. This is normal and occurs with the EZCD printer too. Just wait until it stops moving things, and do it again. Put your caddy in until it stops moving and press the paper feed buttton. The printer will first run the paper out the back, and then feed it in. It doesn't start to feed the caddy until the printhead moves to the left side. If you got everything lined up correctly, then it will come to rest at the end of the notch that you cut. Now take your software, and print a disk onto the caddy. When it finishes, cut out the disk area. I am using free software from Avery, Design Pro limited. You can download it at their web site. I use Avery template #5931. If it doesn't size properly to fit your disks, you can modify the size with the custom button. Then glue some kind of backing material to the caddy. Don't forget to cut the notch out again. You are now ready to print CD/DVD's. I will be switching to a Photoshop template, as the Design Pro software is a little limited. Design of the template will be discussed after I make one that works.
I made a new pemanent caddy for my printer. This is made out of thin vinyl sheets. You will need one sheet 0.040 (approx 1mm) inches thick and one that is 0.010 (.25mm thick). You can get them from this link in the USA http://www.usplastic.com/catalog/product.asp?catalog%5Fname=USPlastic&category%5Fname=...id+Vinyl+Sheet. Product numbers are as follows: 0.010 sheet is #43315, 0.040 sheet is #43320. The numbers are incase the link doesn't take you directly to the page, just put them in the search boxes at the left of the USPlastics page. I am using a spray type of general purpose contact cement by 3M. I tried other PVC cements, but had little success. Use the same method as above to create your caddy, just cut the sheets a little longer, like 8.5 x 14 inches. Cut the 0.040 sheet to fit your disk, and then glue the 0.010 sheet as a backer to protect the written side of the disk. Here is the permanent caddy:
#19
Made from this template in Photoshop:
#20
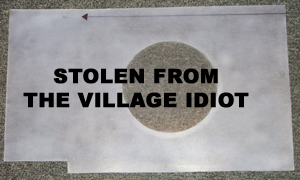
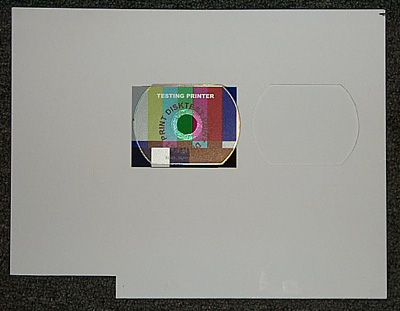
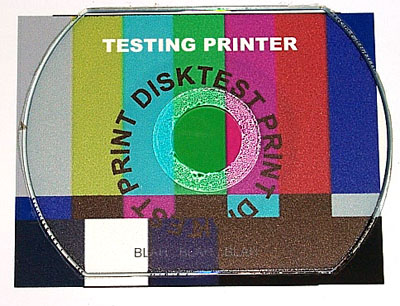
The template is made by starting a new project. Setting the dimensions of the project to 12 cm X 12 cm and 300 dpi. Then draw a circle that fills the top, bottom, left, and right sides of the project. Fill that circle with black. Make another circle slightly smaller and fill it with white. You can skip the white circle, but you will use more ink, and it will be messy when you cut the plastic. Now simply put your blank caddy into the printer and print. It should look like this (note pictured is the Lexmark caddy before cutting).
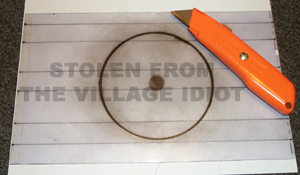
#21
You also see the tool I used to cut the circle out. Take your time, precision matters here! Do not try to cut all the way through the plastic in one pass. It takes me about 6+ passes to cut the circle. Make sure you have a sharp blade! Use your coaster disk to check the final size. Make sure it is not too tight, as trimming after the backer is applied is difficult. Then glue the 0.010 plastic to the back of the cut plastic, trim, and use. Don't get glue on the backing plastic where the disk goes. It will mess up your disks. Just tape a disk sized circle of paper onto the backer where the disk will go, or use a coaster. Then discard the paper circle (coaster) after assembly.
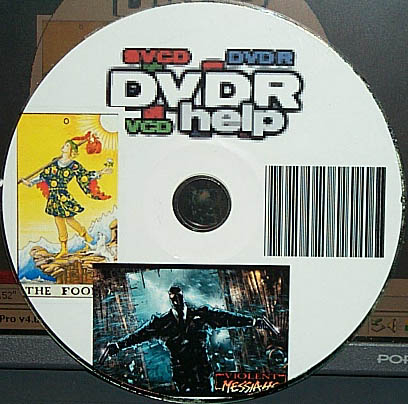
I don't have any printable disks yet, so I stuck a label on a disk, and then ran it through the printer at the best settings available. And it looks like this:
As you can see, the print quality is very good. It looks a lot better than I can show because of the file size limits for pictures. When I get some disks, I'll change the picture. The disks are on the way!
I just got some business sized printable CD's. And made a crude caddy.
And the disk:
The disk was dry to the touch in about 15 minutes, no special treatment. The image is a little darker than it appeared on the screen, so I'll have to adjust for that on the next one. Printed from the Avery software. But all in all, for what it cost me it works great. The materials for a real caddy should be in by the weekend. So soon no more cardboard caddies!
Please note: This disk was a Memorex Pocket Card CD. With "white markable surface for CD pens, paper labels, and CD inkjet printers". I think this may be a very important statement.
Please do not reply to this guide. Please make ALL comments and questions in the computer forum. Thank you.
Try StreamFab Downloader and download from Netflix, Amazon, Youtube! Or Try DVDFab and copy Blu-rays! or rip iTunes movies!
Closed Thread
Results 1 to 3 of 3
Thread
-
Member

- Apr 2002
- Adrift among the STUPID


-
Member
- Apr 2002
- Adrift among the STUPID
-
I should add, I didn't have any printable disks. So no pictures of the finshed product. Sorry
 Hope is the trap the world sets for you every night when you go to sleep and the only reason you have to get up in the morning is the hope that this day, things will get better... But they never do, do they?
-
I think we need a flatbed pen plotter.


Similar Threads
-
Idiot's Guide to Encoding
By sharpfocus in forum Newbie / General discussionsReplies: 4Last Post: 11th Sep 2011, 19:59 -
I need an idiot's guide to converting PCM to AAC or Vorbis!!!
By Nagashi in forum AudioReplies: 6Last Post: 4th Jul 2010, 17:07 -
An idiot-proof guide to converting DVD's to AVI/MKV/Whatever..
By krishock in forum DVD RippingReplies: 4Last Post: 12th Apr 2009, 13:49 -
VLC Media Player Needed: A Guide for the Compleate Idiot
By bryankendall in forum Newbie / General discussionsReplies: 2Last Post: 30th Nov 2008, 08:19 -
Sharing Epson Printer
By stiltman in forum ComputerReplies: 0Last Post: 1st May 2008, 23:12