


How to Backup DVD's for your GM PhatNoise MiniVan
If you have a GM Minivan (Chevy Uplander, Buick Terraza, Saturn Relay, Pontiac Montana SV6) with the Mobile Digital Media Powered by PhatNoise, you’ve got a 40GB hard drive that can store and play back video directly on the in-vehicle DVD. Unfortunately, the only documentation you received was how to unlock Nickelodeon content that was included on the unit. This guide will show you how to backup DVD’s you currently own into the appropriate format, and load them on the PhatNoise module to play in your vehicle.
Tools you’ll need:
FairUse Wizard
DivX Codec
PhatNoise Media Manager (came with your vehicle in the PhatNoise Box
DVD Decrypter is also a useful tool to have. If FairUse Wizard works correctly, you won’t need DVD Decrypter at all. However I originally had problems, and the workaround was to use DVD Decrypter to copy an ISO file off the DVD to my PC’s hard drive (an ISO file is one file that contains all of the DVD’s information), and then read the ISO file with FairUse Wizard. The last time I used FairUse, it worked perfectly, so hopefully this guide will be all you need.
You’ll also need the latest DivX codec for your PC. This is a free piece of software that tells your PC how to create the DivX file that you’ll play on your PhatNoise module. The DivX codec can be found at www.divx.com. Download the "DivX Create" bundle, but when installing, on the "Choose Components" screen simply expand the drop-down list for "DivX" and uncheck the "DivX Pro 6 Month Trial". This will then only install the free codec and not the 6 month trial of the additional programs.
Disclaimer: I am not a digital video conversion expert! I like to know basic information on how to get the job done, but don’t want to get buried in the minutia that one can in DVD’s / video. This guide is meant to provide the simple basics to get the job done. If anyone has any suggestions / improvements, I’d love
to hear them.
Oh yea – PhatNoise will play MPEG2 files, which is the format that DVD’s use. There are various tools that will pull the MPEG2 file off of your DVD. However DivX (an MPEG4 format) files are much smaller and will take up a lot less room on your PhatNoise hard drive, and leave room for lots of movies and your music.
This guide shows you how to make DivX backups of DVD’s you own. Let’s Get Started!!!
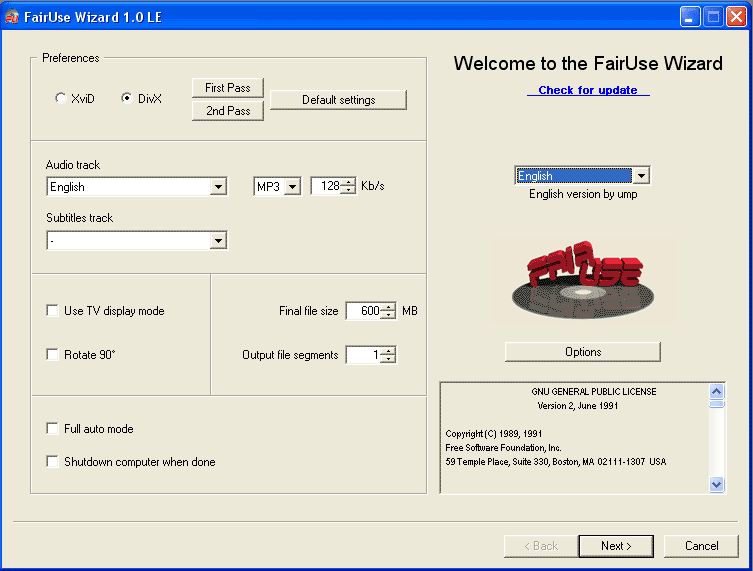
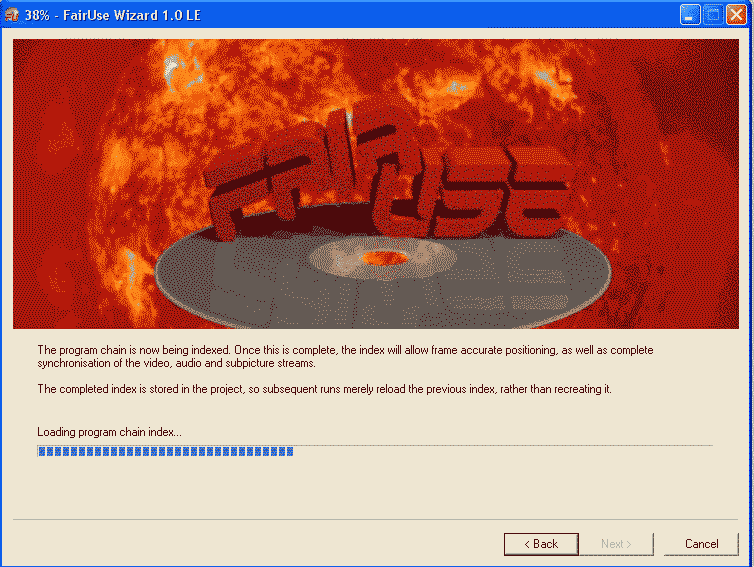
STEP 1: START FAIRUSE WIZARD (assuming you’ve installed the DivX Codec).
I’ve got nothing to add to the defaults from the first screen. The "LE" addition will only encode video to a maximum size of 600MB. Considering you’re going to be watching them on a 7" screen, this isn’t a problem.
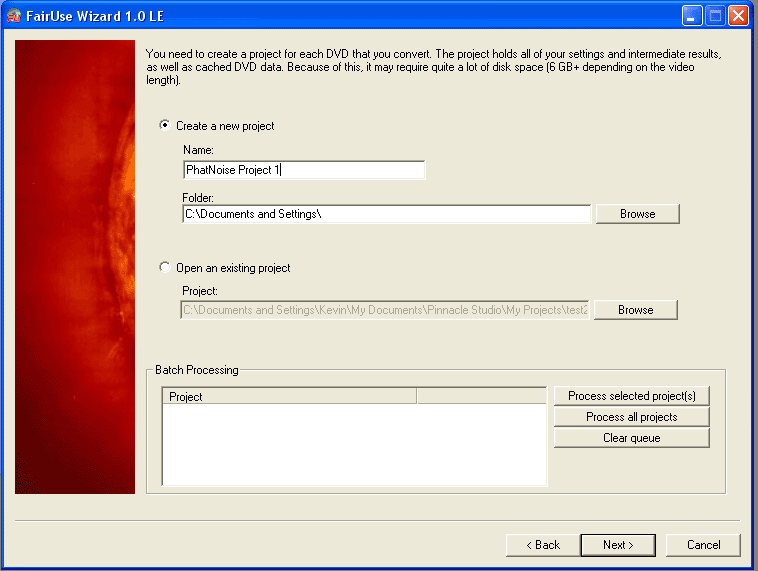
STEP 2: NAME YOUR PROJECT
Select "Create New Project", and give it a name and location on your hard drive.
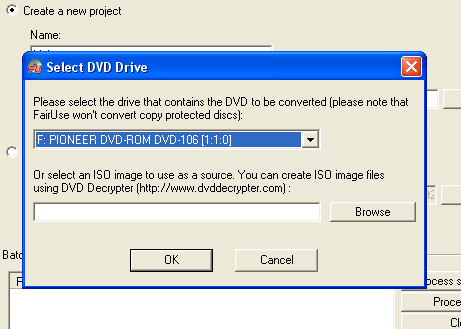
STEP 3: SELECT DVD DRIVE
Select the DVD drive that contains the DVD you wish to convert. This is also where you also can instead select an ISO file (created from DVD DeCrypter).
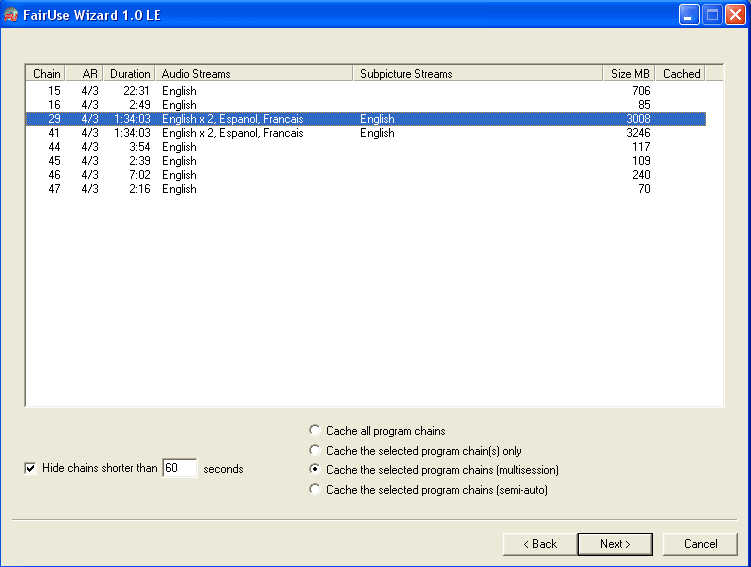
STEP 4: SELECT THE MAIN MOVIE
Select the main movie. This is the longest chain. Note on the example that two chains of the same length are shown. That’s because one is a widescreen, one isn’t. The AR (aspect ratio) column may tell you which is which (but it didn’t on this one) – 4/3 is normal "TV" ratio. 16/9 is usually widescreen ratio. I guessed at the first one here, as the DVD menu gives widescreen as the first choice. Whether you picked the right one will be confirmed a few steps later. Your minivan screen is widescreen format.
STEP 5: COPY TO HD
FairUse will now copy the selected portions of the movie to your PC’s hard drive. This will take a while (about 10 – 20 minutes). Make sure you have enough room on your hard drive, as this file can be up to 8 MB!
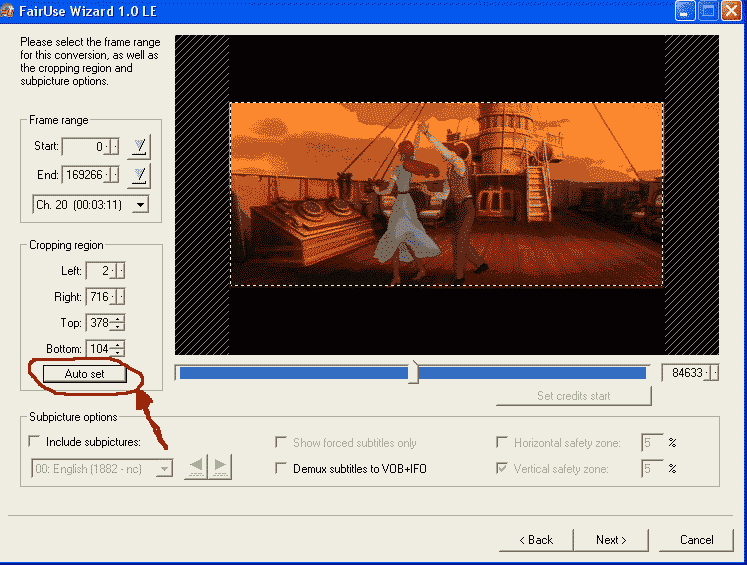
STEP 6: SELECT FRAME RANGE
This is where you select the portion of the frame you want to convert. The "Auto set" option does a good job here. Also note that the movie in this example is widescreen. My previous guess was correct! If it wasn't widescreen, I'd hit the "back" button until I got back to step #4.
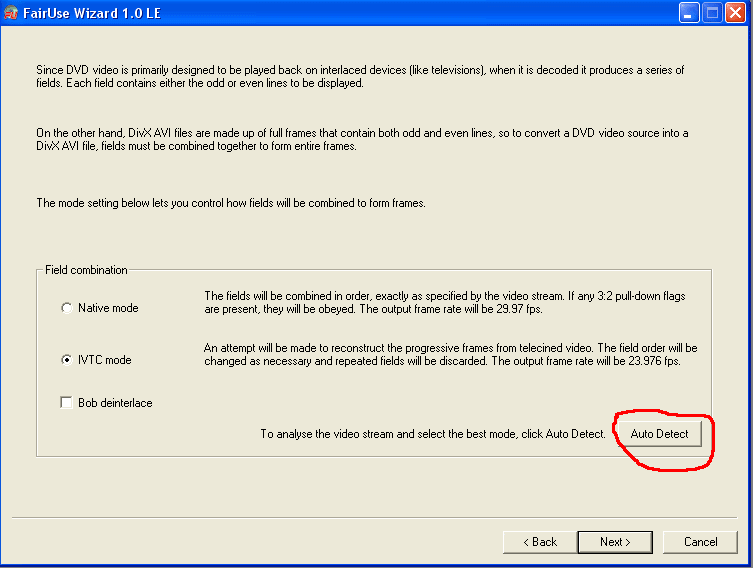
STEP 7: FIELD COMBINATION SELECTION
I don’t really know what this means, but press the "auto detect" button, select what it suggests, and move on!
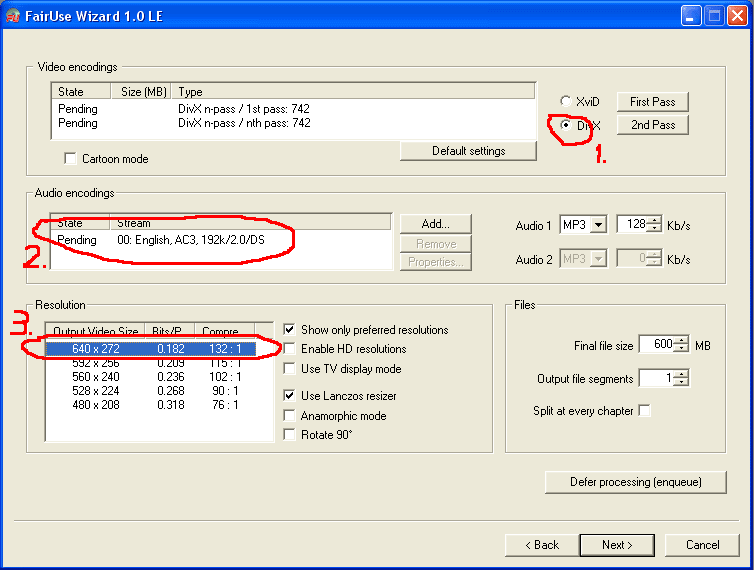
STEP 8: GETTING READY TO CONVERT
First, select the format you desire. PhatNoise handles both DivX and XviD. I couldn’t find any good reasons to pick one over the other, and have had no problem using DivX. Second, make sure the correct audio is being converted. It will probably default to what you want (assuming you want English!). AC3 2.0 worked great for me. 128kp/s in MP3 will probably be the default, and works fine. If you want to see the other audio steam options for other languages, press the "add" button. Third – select the largest resolution that approaches 740 x 420! This size will fill your screen the best. In my first attempt using FairUse, I just accepted the default, and I ended up with a movie that filled about a third of the minivan screen!
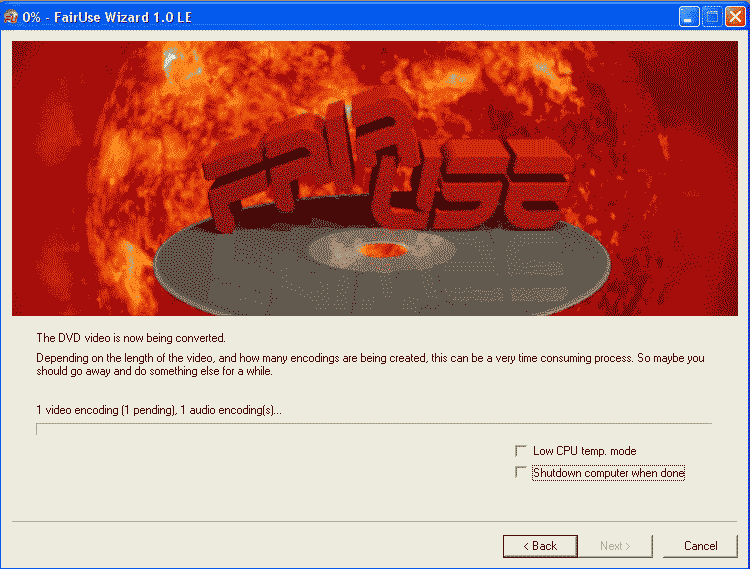
STEP 9: WAIT
FairUse will now create the MPEG 4 file (DivX or XviD) that will work on your PhatNoise system. This is going to take a while (i.e. a few hours, depending on how fast your PC is). This is a good time to go to bed (hey, I never promised this was fast!). The resulting file will have an “AVI” extension.
TIME TO SWITCH TO THE PHATNOISE MEDIA MANAGER
STEP 10: LOAD VIDEO MEDIA
Start up the PhatNoise Media Manager that came with your crossover sport van! Select "File:Load Media". Direct the software to where you saved the file created in FairUse Wizard in Step 2 above. Make sure you check to scan for video files.
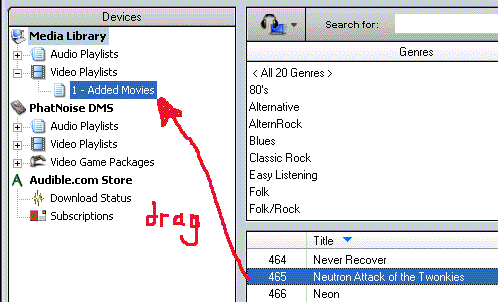
STEP 11: CREATE A MOVIE PLAYLIST AND ADD YOUR MOVIESUnder "Devices" on the left side of your screen, right click on "Video Playlist" under "Media Gallery". Select "New Playlist" – doesn’t matter where you place it if you only have one. I named mine "Added Movies".
STEP 12: ADD YOUR MOVIE(S) TO THE PLAYLIST
Click back on "Media Library" on the left side of your screen. This will now list all the music and video tracks on your hard drive that are also on your PhatNoise cartridge. Find your movies in the list. You may want to lick on "Title" to sort them by title and find them that way. Or click on "Genre" to sort them, and then scroll to "video". Click and Drag the movie(s) over to the previously created playlist in the Media Gallery"
STEP 13: SYNC AND YOU’RE GOOD TO GO!
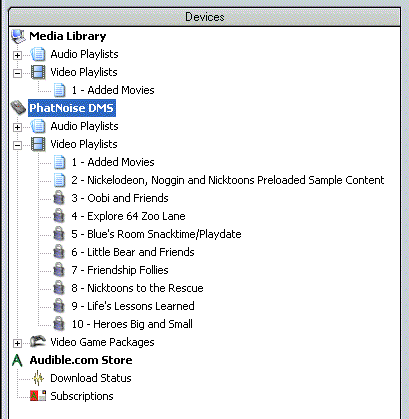
Click on "PhatNoise DMS" in the Media Manager pane (left side). Now sync the PhatNoise cartridge by clicking the "Sync" button on the right side of your screen. The PhatNoise cartridge will sync with the content in the "Media Library" (on your hard drive). Note that even when the sync appears to be complete, files will still be moving over to the cartridge (watch the bottom bar to see what’s really happening).
After it’s synced, expand the Video Playlist on your PhatNoise DMS, and you’ll see your added movie playlist. Click on the playlist, and the titles will appear in the right pane.
YOU'RE DONE! Put the cartride in your van and enjoy quiet kids in the rear!
+ Reply to Thread
Results 1 to 1 of 1


 Quote
QuoteSimilar Threads
-
Dvd Backup
By DIKYDO in forum Newbie / General discussionsReplies: 4Last Post: 22nd Jul 2009, 08:30 -
DVD Backup
By sixleaf in forum Newbie / General discussionsReplies: 3Last Post: 8th Jul 2009, 00:50 -
Backup of a dvd movie using Ripit4me, Dvd Decrypter, and Dvd Shrink 3.2
By Gerald Sr. in forum DVD RippingReplies: 18Last Post: 16th Oct 2008, 15:55 -
Help with DVD Backup
By zeroplace in forum DVD RippingReplies: 3Last Post: 23rd Jun 2008, 09:48 -
DVD Backup
By romanstopme in forum Newbie / General discussionsReplies: 1Last Post: 27th Mar 2008, 08:38