


This guide is here with the help of kisqqcs from Hungary.
Software used:
DVD Decrypter - (for demuxing video, audio, subtitles and chapters form the DVD)
DVD-lab PRO 1.53 - (for multiplexing video, audio and subtitles)
Ifo Update - (for updating the original IFO fles, let them know about the new info in the VOB files)
Please check first every VOB file from the DVD (from the longest VOB set - "i mean the VOB set that has many VOB files about 1 Gb each :)") with a media player (Media Player Classic is recomended), and see witch VOB files are the episodes you want to add subtitles to.
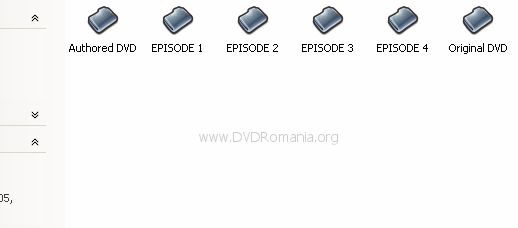
Create one folder for each episode on the disc, on a partition with more then 20 Gb of free space. Create also an "Authored DVD" folder for the result from DVD-lab PRO and an "Original DVD" folder where you will copy all the files from the original DVD with DVD Decrypter or DVD Shrink. NTFS partition is needed.
I have 4 episodes so i made 4 folders. One for each episode.
STEP 1 - DVD Decrypter
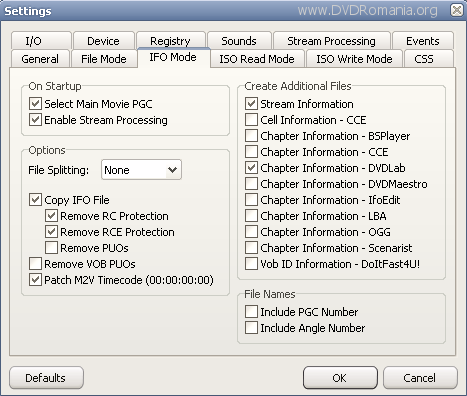
a). Insert in the DVD-ROM the disc on which you want to add subtitles. If you have an DVD Image on the HardDrive mount it first with Daemon Tools. Open DVD Decrypter, go to Tools menu and then press "Settings" and after that press "IFO Mode" tab and set the parameters like in the image below.
After you have set everything as in the image above, press OK and go to "Mode" menu and select "IFO I". In this moment the software will automatically choose the first episode from the VOB set in order to demux it.
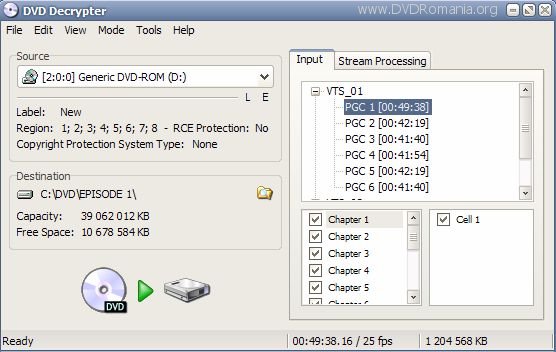
You will see that the rest of the episodes are next in the same set of VOB files.
WARNING ! - Not all the VOB files are episodes. As you see in the image above, there are 6 Episodes, but only the first 4 are the real episodes, number 5 and 6 are actualy the first 2 episodes (1 and 2). That's why you have to check them first!
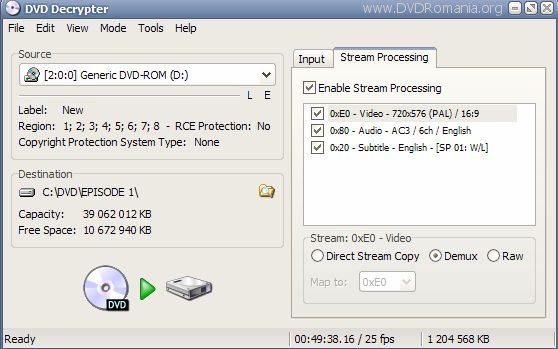
b). In the right side, press "Stream Processing " tab and check "Enable Stream Processing" option (now you will have access to the VIDEO and AUDIO streams in order to demux them in separate files). At the bottom of the window select "Demux" option for each stream in the window (VIDEO stream and AUDIO stream), like in the image below.
c). Select the files destination, in our case "Episode 1" folder.
And press the button
and the program will start its work.
ATENTION ! - After it finishes, DO THE SAME FOR THE OTHER EPISODES FROM THE DVD!
REMEMBER TO PUT THE OTHER EPISODES IN THEIR FORLDERS! (Episode 2, Episode 3, Episode 4, etc...)
AFTER YOU DEMUX ALL THE EPISODES, YOU WILL HAVE IN EACH FOLDER (Episode 1, Episode 2, Episode 3, Episode 4, etc...) ONE VIDEO FILE AND ONE AUDIO FILE, OF COURSE THE CHAPTER FILE ALSO :)
.
STEP 2 - Multiplexing video, audio and subtitles with DVD-lab PRO.
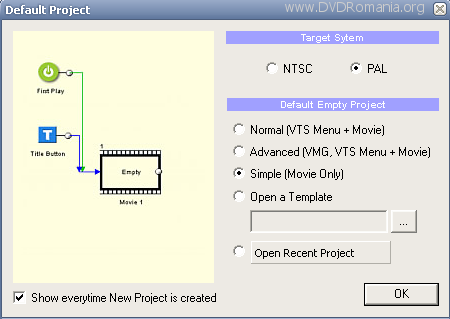
a). Open DVD-lab PRO and on the window that appears select like in the image below, the option "Simple (Movie Only)". Don't forget to chose the NTSC or PAL option as is your original DVD movie and hit OK.
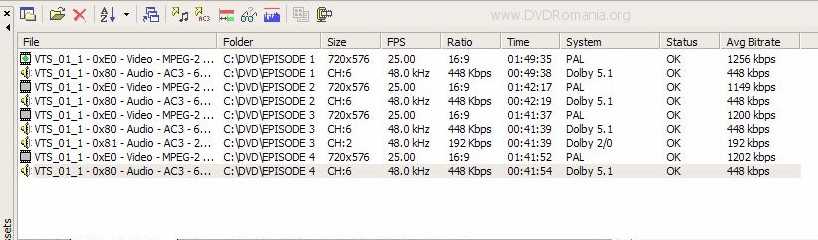
b). In the lower left part of the screen, in the big white section, right click and chose "Import..." and import one by one, your VIDEO file and AUDIO file FROM EACH FOLDER (Episode 1, Episode 2, Episode 3, Episode 4, etc...).
So you will have like me in the image below, (i have 4 VIDEO files and 4 AUDIO files, and on the episode 3 I have an audio commentary).
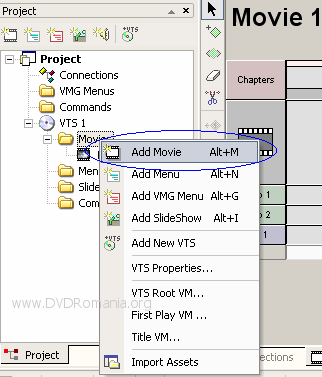
c.) Now comes the trick part :) You will have to go in the left part of DVD-lab PRO and right click on "Movie" and select "Add Movie".
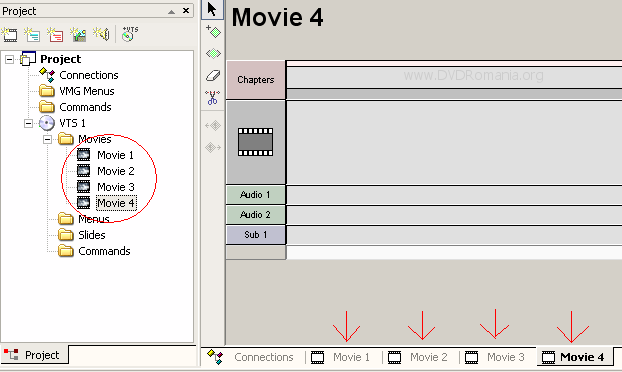
WARNING! - YOU MUST ADD AS MANY MOVIES AS EPISODES YOU HAVE ON THE DVD! I HAVE 4 EPISODES, SO I PUT 4 MOVIES!
See the result in the image below.
Now click on "Movie 1" and add your VIDEO and AUDIO files. Right click one by one the VIDEO file first and then on the AUDIO file in the big white section where you just imported the video and audio files, and chose "Insert to Project...".
ATENTION! - DO THE SAME TO THE OTHER EPISODES YOU HAVE.
EXEMPLE: - For Episode 2 you have to chose "Movie 2" and right click on the VIDEO and AUDIO files from the Episode 2 and Import them.I think you get the ideea ;)
The VIDEO and AUDIO will be automaticaly inserted on the MOVIE window (right upper part of the screen).
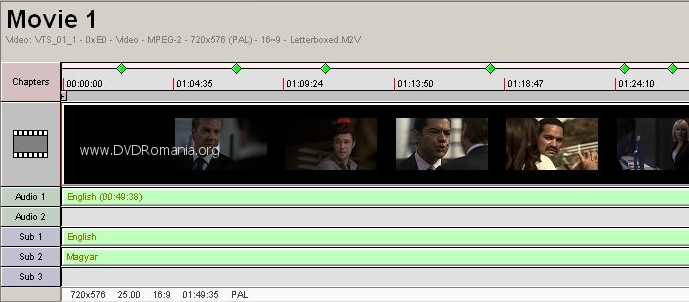
EPISODE 1
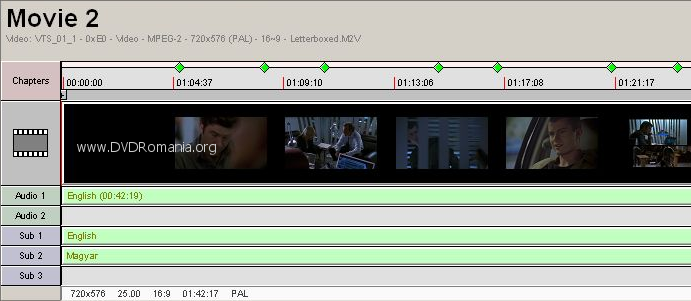
EPISODE 2
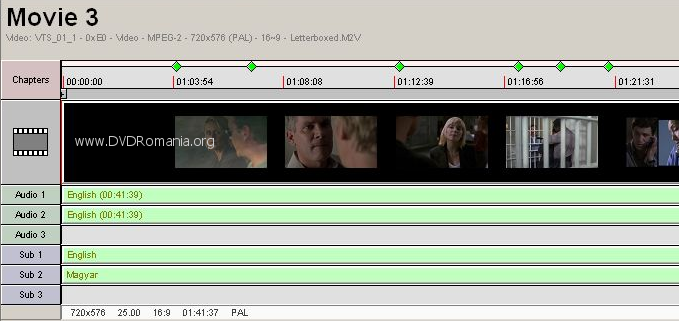
EPISODE 3
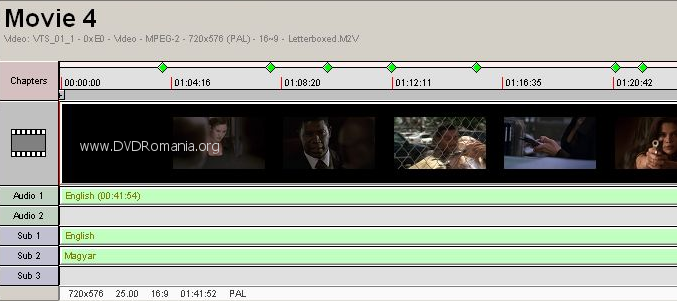
EPISODE 4
ATENTION! - Do the next instructions, point d). and point e). for all the MOVIE windows you have!
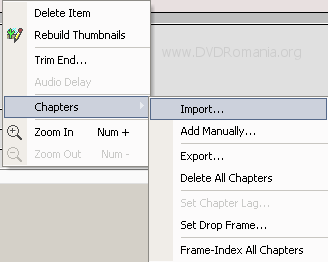
d). Right click on the Chapters section (right above the Video section) in the MOVIE zone and go to Chapters->Import Chapters...
A window will appear, just hit "Proceed" button and the chapters will be imported automaticaly to the movie. (Hit OK to all the windows that appear).
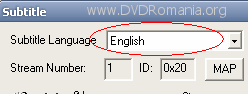
e). Double click the Sub 1 line and a new window will appear.
First you must chose the subtitle language...
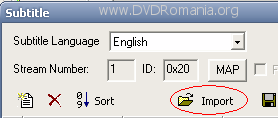
Second you must click on the Import button and open the subtitle file (you have 5 formats to chose from: SUB, SRT, SSA, SON, SST).
Optional:
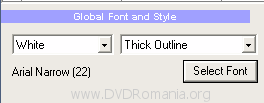
1. You can chose the font color (White or Yellow).
2. You can chose the font face. (I suggest using a Arial font face).
3. You can chose the font size. (I suggest using a 22 size font).
4. You can chose the font style. (I suggest using Thick Outline style).
You can view the changes in the Preview window !
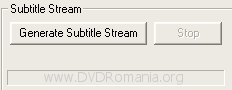
After your are done hit the "Generate Subtitle Stream" button and wait for the process to finish...it will automaticaly return to the main window after it's done. Hit OK to the windows that appear!
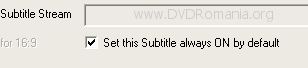
Now you can see your subtitle line added automaticaly.
If you want a subtitle to appear automaticaly on the movie when you start the movie, just select the "Set this Subtitle always ON by default" option.
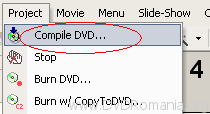
f). Go to "Project" -> Compile DVD...
In the window that will appear chose the path to the Final DVD folder and hit Start.
Wait untill the whole process finishes. About 15-20 minutes on a AMD 2.0 Ghz machine with 512 DDR.
STEP 3 - Update the original IFO files.
a). Copy from the DVD-ROM in "Original DVD" folder all the files of the disc with DVD Shrink.
--------------------------------------------
WARNING ! - Before moving the *.VOB files over the original ones rename them becouse DVD-lab PRO will give a set of VOB files with name VTS_01_xx ,
so if your ORIGINAL VOB files are not in set VTS_01_xx and are in the set VTS_02_xx or set VTS_03_xx ...
you have to rename the files from DVD-lab PRO in the "Authored DVD" folder to the set of files in the "Original DVD" folder
(e g: let's suppose that on the original disc the episodes are situated in the VTS_03_1.VOB, VTS_03_2.VOB, VTS_03_3.VOB, VTS_03_04 ...set of files .
You will have to rename the VOB files from the "Authored DVD" folder to the names like they are in the "Original DVD" folder.)
I hope you understand :)
--------------------------------------------
b). Select the main movie *.VOB files from the "Authored DVD" folder (ex " VTS_01_1.VOB, VTS_01_2.V OB, VTS_01_3.VOB, VTS_01_4.VOB etc) that contain the movie, !ONLY AFTER YOU HAVE CORRECTLY RENAMED THEM, SEE ABOVE WARNING!, and move them (Cut and Paste) in the "Original DVD" folder overwriting the old ones.
DO NOT COPY THE *.IFO or *.BUP files!
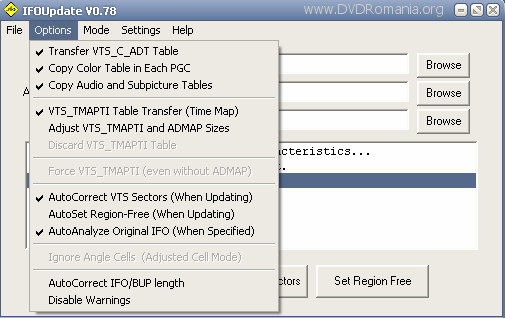
c). Open IfoUpdate and go to "Options" menu and select the options like in the image below. You will have to select them one by one, as IfoUpdate do not let you to select them all at ones.
d). Now you will have to insert the IFO files.
- On "Original IFO Path" choose the corresponding IFO file from "Original DVD" folder (eg:if the episodes are situated in the VTS_03_1.VOB, VTS_03_2.VOB, VTS_03_3.VOB, VTS_03_4.VOB... files, you will have to open VTS_03_0.IFO in IfoUpdate)
- On "Authored IFO Path" choose from "Authored DVD" folder VTS_01_0.IFO file.
- On "Backup IFO Path" choose where to save a backup of the original file just in case you make a mistake.
Press "Update IFO" and 2 windows will appear and click OK on both.
Now the new Episode DVD with your prefered subtitles is ready for burning on a DVD±R/DVD±RW.
Try StreamFab Downloader and download from Netflix, Amazon, Youtube! Or Try DVDFab and copy Blu-rays! or rip iTunes movies!
+ Reply to Thread
Results 1 to 5 of 5
Thread
-
Follow the white rabbit
-
Hello.
The guide is cool, when there is new VTS for each episode. But I can't figure out a way to add subtitles to DVD with one VTS (4 episodes and some extras). Everything is OK, unil you try to play episodes 2, 3 and 4. The beginnig of these episodes is cut out (10-20 sec). Could this be because of the cut subtitles (I extracted 2 or 3 sobtitle streams)?
If you have any solutions, I would be glad to hear them.
THX and HAPPY NEW YEAR!!! -
Great guide, TheMatrixx. I've used to old one quite a lot (DVDLab PRO seems to have a problem with subtitle synch, though, and I have to move the subs about 0.65-1.0 seconds backwards to make them synch correctly).
However, my DVD has VTS_01 and VTS_02.
So, how do I do it then? There are two titles on the DVD. Both start and 0 minutes. I have timed subtitles to the episodes using DVD subber.
If I had all episodes in one PCG there would be no problem. I can still follow your guide all the way until the IFO update. Since I don't have just the one IFO to update...
What do I do?
Thanks.
ericf -
Silly me.
Well, I figured out how to make the two VTS with added subtitles in DVDLab PRO. I just added another VTS and went on from there. Same procedure as the guide for each VTS.
However, the DVD player doesn't play episode unless I either go to the next chapter from the last chapter in episode one or press 2 when the DVD player has finished playing episode 1 and stopped.
Is there any way of making the .IFO recognize both titles and keeping original menus and so on? Menus isn't a priority, though. They're just nice to have.
Thanks.
ericf -
Hello to all.
I use this guide for all my dvds to add subs and is 100%.
But i buy The OC - Season 3 and in decrypter i get this:

A PGC "Play All" and 4 PGC with the 4 episodes.
I have created the 4 PGC with dvdlab, but i need the pgc play all to the dvd work.
I have used the pgcedit to create a pgc "play all" but will be title 5.
I want to know how can change position of a pgc to move the play all from title 5 to tile 1.
Tks

 Quote
QuoteSimilar Threads
-
Add DVD Subtitles to a BlueRay
By wulf109 in forum Blu-ray RippingReplies: 3Last Post: 16th Mar 2014, 17:53 -
Help needed adding Subtitles to Multiple Episode DVD with SubtitleCreator
By colditz in forum SubtitleReplies: 5Last Post: 20th Jan 2011, 19:41 -
Only subtitles for first episode
By hubfred in forum SubtitleReplies: 0Last Post: 2nd Apr 2010, 14:15 -
How to add Subtitles to original DVD whitout loosing original subtitles ?
By Chainsaw_1 in forum Newbie / General discussionsReplies: 2Last Post: 6th Jan 2010, 12:52 -
How can add subtitles to dvd with 2 angles
By siopilos in forum SubtitleReplies: 0Last Post: 21st Jul 2008, 16:17