


1394 built in on MB
Sony
NEC 1100A
Asus A7N8X Dlx
Sony DCR-PC100 DV")
This is a guide on making CD / DVD Label templates in Adobe Photoshop 7.0
Tools needed are: Adobe Photoshop, the labels you want to print on and a ruler.
Overview:
We will be using Photoshop's "Action" menu to create a macro to size our image and place it on a virtual page so that when printed it fits perfectly on the label.
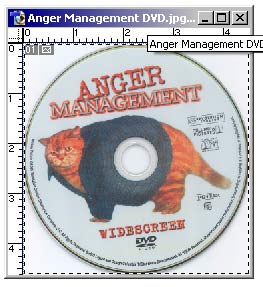
Step 1. Create your image
I usually scan in the DVD at 300 dpi and the crop it so that there is not much white background to either side or top and bottom.
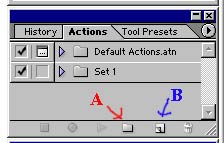
Step 2. Create a new Action Set
In the Action window click on the folder icon (Create New Set - Item A in the picture). This will bring up a window that you can give a name to (maybe print actions).
Step 3. Create a new Action
In the action window click on the "square on Square" icon (Create New Action - Item B in the picture). This will bring up a window that allows you to name your action and setup Function Keys to make it easier to run your action when you are done. (IE Print Labels when you press F12). After naming and setting up your function key click on the "Record" button.
Step 4. Size your image to fit the disk label
Use your ruler to measure the diameter of disk portion of your label. The Label I use has a diameter of 4.6 inches (117 mm). Then in Photoshop (with the image you want to use being the "active" window select "IMAGE" -> "IMAGE SIZE...". This will bring up the "Image Size" window. In the Document Size area type in the height, width and Resolution you want. I recommend using a slightly larger image than what the label actually is. In my case I used 4.7 inches for the height and width and 300 for the resolution. You might need to click off the "constrain proportions" check box. When you are ready click "OK".
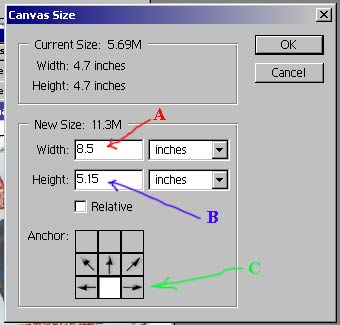
Step 5. Start positioning your image on the virtual page (Horizontal & Top Margin)
Click on "IMAGE" -> "CANVAS SIZE...". This will Bring up the window bellow. You'll need to fill in 3 things during this step. First (Item A) you need to enter in the width of the label page (US Letter paper is 8.5 inches and Europe A4 is 210 mm. Next (Item B) we need to figure out the top margin (how far down from the top of the page in the edge of the cd label. My label sheet has a 0.5 inch margin. (However, I made my image diameter slightly bigger than the cd label, so I am taking the difference between my resized image (Step 4 = 4.7 inch) and the actual cd label (4.6 inch) and dividing it in half (0.05). I then minus this from the margin (0.5 - 0.05 = 0.45) I just measured and add it to the height in the canvas window (4.7 + 0.45 = 5.15). Lastly (Item C), I click the bottom middle anchor point so that it centers horizontally, but adds the blank area at the top of the image. Then click "ok".
Step 6. Finish positioning your image on the virtual page (Page Height)
Again click on "IMAGE" -> "CANVAS SIZE...". This time leave the width as is, and change the height to the height of the label page (US = 11 inch and A4 is 297 mm). Also click on the top middle anchor point. Then click "ok".
Step 7. Remove printer margins
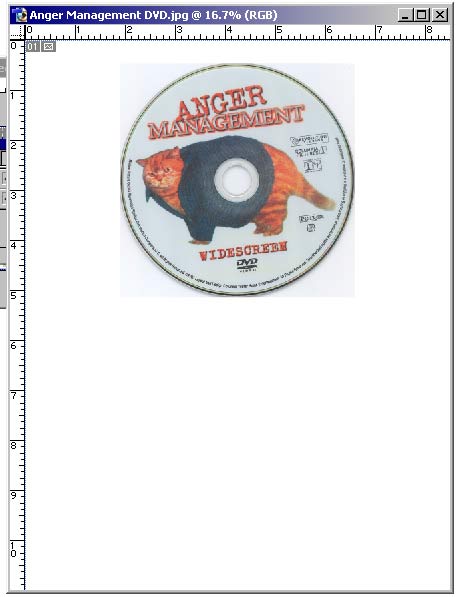
Most printers can not print to the edge of the page, so if you leave the canvas now, your printer will either clip the image off or rescale it to fit within its printable area. To insure that it clips of the blank areas and does not resize, will clip it so your printer doesn't need to choose. Most printers have a 0.25 inch minimum margin (check your printers manual or look online). So we will reduce our canvas size by that all the way around. Again click on "IMAGE" -> "CANVAS SIZE...". Then minus off 2 * the printers margin (2 * 0.25 inch = 0.5 inch) from the height and the width. Leave the anchor point in the middle. Then click "ok".
You should now have an image that looks like this:
Step 8. Stop the Recording
In the Action Window you should see the "stop square" icon. Hit this to finish off your action tool. From now on all you need to do is get you image and then hit the function key you selected in Step 3. (Or you can select your action in the action window and hit the "play triangle".
You should be able to print this no problem. I hope...
NOTE: If you want to print 2 images on the same label sheet, you can repeat the bove process and instead of printing you rotate the image 180° and paste it over the top of your first image. (You might need to "cut" out the white area on the top image to see the first one...) But when your done it should look like this...

Enjoy!
Try StreamFab Downloader and download from Netflix, Amazon, Youtube! Or Try DVDFab and copy Blu-rays! or rip iTunes movies!
+ Reply to Thread
Results 1 to 4 of 4
Thread
-
-
Thank you for the time you spent creating the tutorial. I will try it out later today..Thought I would let the users know there is a layered template for Photoshop V 4 and above in the "third party" template directory of Neato V 4 label program. There are also templates for Word, Corel ect. Neato 4 is included in some of the label packages from Media Face (30 day trial) or if need be, $20.00 online. I don't use Neato label program, I just copied the Photoshop label template into another directory and use that. I'll be anxious to give this new method a try later today.
-
Hi All,
Pls what CD/DVD labelling application or software can I use that has such feature that can allow me place picture in picture, making some part of the image transparent or the edge fade?
I will appreciate your response.
Thanks- JohnA22 -
The final step should be "practice your forum typing skills"
After a couple of weeks you will be back here posting about how your discs have started skipping and how it must be some new form of copy protection. Eventually, after the thread has grown to 20 or so posts, you tell us that you started using labels a few weeks back, and will then be told to soak them off and stop using them.Read my blog here.
 Quote
QuoteSimilar Threads
-
CD/DVD has ripped label, how do I fix it?
By videohalp in forum Newbie / General discussionsReplies: 6Last Post: 12th Apr 2009, 06:20 -
need psd template for cd/dvd label
By wingfan in forum MediaReplies: 3Last Post: 22nd Dec 2008, 13:25 -
DVD Label Printing Advice Needed
By jday in forum Authoring (VCD/SVCD)Replies: 3Last Post: 14th May 2008, 19:35 -
creating nice backdrops for greenscreen - photoshop?
By Bansaw in forum Newbie / General discussionsReplies: 1Last Post: 7th Apr 2008, 12:49 -
Printed DVD label color washin out
By anubis13 in forum MediaReplies: 19Last Post: 15th Oct 2007, 10:55