


Trimming is the most basic and frequently used editing operation. The simplest form of trimming is selecting a clip segment and removing all parts outside of the segment, without changing any of the original content and compression parameters. This form of trimming can be done quite easily in the Input Monitor in MPEG Video Wizard.
Step 1 : Download the latest version and install.
Download the latest version 'MPEG Video Wizard' from http://www.womble.com/download
. Install and run it. The latest version is June 2006 Update.
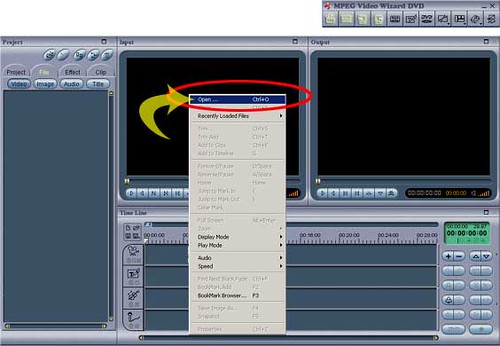
Step 2 : Open a video clip in the Input Monitor.
You can do any one of the following:
1) Click the 'Open...' in ruler menu to open a file.
With a right mouse click on the Input Monitor, click the 'open...'. Then you can select the file in the Open Dialog.
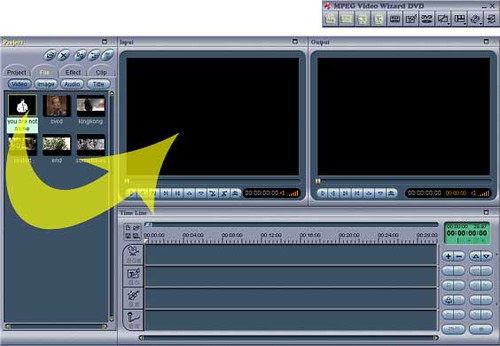
2) Drag a clip from the Project Manager to the Input monitor. You can open the file with double click the clip in Project Manager.
3) You can also drag the selected file icons from a Windows Explorer file folder directly to the Input monitor.
Step 3 : Use Mark In and Mark Out to select your segment.
1) Click the 'Mark In' button on Input Monitor to select the begin position of the your segment.
2) Click the 'Mark Out' button to select the end position.
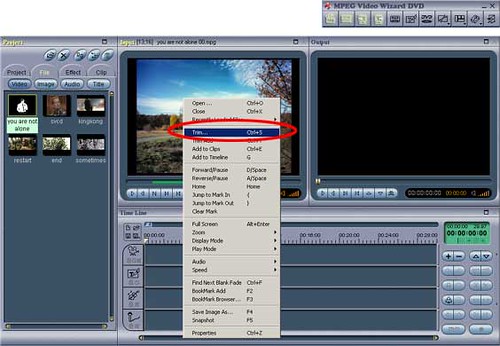
Step 4 : To save it as a new MPEG file using Trim.
With a right mouse click on the Input Monitor, click the 'Trim...' as follow.
Then set the file name that you want to trim as. There is a trim progress to display the trimming information.
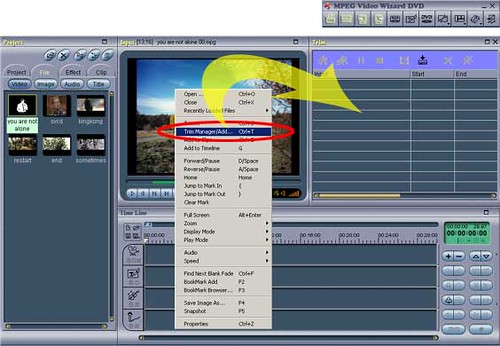
Step 5 : Advanced way how to using Trim Manager to add trim clips into the batch list.
1) Open the Trim Manager.
Click the 'Trim Manager/Add...' in the ruler menu. Then the Trim Manager will be opened beside.
2) Add clips into the batch list.
Using the Mark In and Mark Out to set segment with different movie files. Then click the 'Trim Add' in the ruler menu to add current duration to the Trim Manager.
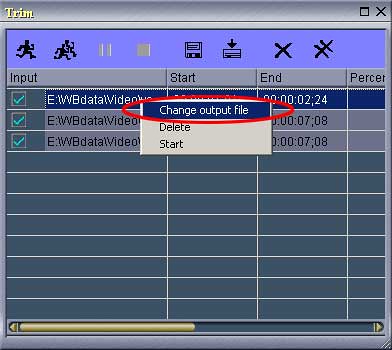
3) Change the output file name.
Select one of the Trim batch list item, click the right mouse button and select the 'Change output file', you can change the trim output directory and file name.
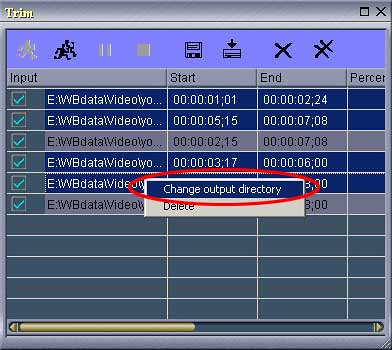
4) Change the output directory of all selected files.
Select some trim lists that you want to change their output directory, click the right mouse button and select 'Change output directory'.
5) Start trimming.
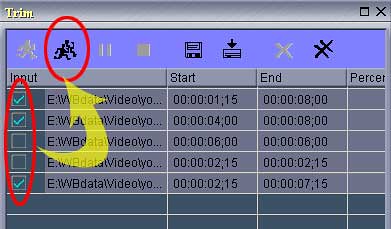
a) Start one.
Select one of the trim list, click 'Start' button. It will trim this segment.
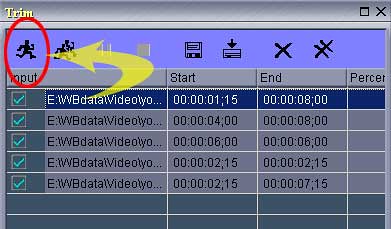
b) Start all the selected files.
Select some trim lists, click the 'Start All' button. Then it will trim these one by one.
Note : For fast selection of multiple trims, use the combination of (a) the "Full Screen" display mode; (b) the keyboard shortcut keys 'A', 'S' and 'D'; (c) the mouse scroll wheel; and (d) the "Add to Clips" menu selection.
Wish to help you!
Try StreamFab Downloader and download from Netflix, Amazon, Youtube! Or Try DVDFab and copy Blu-rays! or rip iTunes movies!
+ Reply to Thread
Results 1 to 1 of 1
Thread


 Quote
QuoteSimilar Threads
-
Cut Out Segments Of Video Using Womble MPEG Video Wizard DVD
By luckyace in forum Newbie / General discussionsReplies: 2Last Post: 4th May 2017, 03:46 -
Womble MPEG Video Wizard DVD is re-encoding video, claiming not to (FIXED)
By Brad in forum Authoring (DVD)Replies: 11Last Post: 2nd Mar 2012, 20:28 -
MPEG Video Wizard DVD
By newshoes in forum Software PlayingReplies: 10Last Post: 20th Mar 2008, 10:22 -
Womble MPEG Video Wizard - adding video files to dvd maker help?
By nightrider in forum Authoring (DVD)Replies: 3Last Post: 5th Mar 2008, 08:52 -
How to use Mpeg Video Wizard
By windranger in forum Newbie / General discussionsReplies: 3Last Post: 3rd Nov 2007, 08:24